Creating a WebSocket chat client
This is the second part of the Creating a WebSocket chat tutorial.
In this section, you will learn how to create a Ktor client chat application that uses WebSockets. The application will allow users to join a common chat server, send messages to users, and read messages from users in the terminal.
Prerequisites
Before starting this tutorial:
Make sure the Kotlin plugin is installed and enabled. Learn how to do this from the Install plugins topic.
To test the client, you will need a running server application. Follow the preceding tutorial for Creating a WebSocket chat or download the code example tutorial-websockets-server.
Create a new project
To create a new project for the WebSocket chat client, open IntelliJ IDEA and follow the steps below:
On the Welcome screen, click New Project.
Otherwise, from the main menu, select .
In the New Project wizard, choose Kotlin Multiplatform from the list on the left. On the right pane, specify the following settings:

Name: Specify a project name.
Location: Specify a directory for your project.
Project Template: Choose Console Application in the JVM group.
Build System: Make sure that Gradle Kotlin is selected.
Click Next.
On the next page, change Test framework to None.

Click Finish and wait until IntelliJ IDEA generates a project and installs the dependencies.
Configure the build script
Next, you will configure the build script by adding the required project dependencies and tasks.
Add client dependencies
Open the
gradle.propertiesfile and add the following line to specify the Ktor version:ktor_version=3.0.0-eap-815Open the
build.gradle.ktsfile and add the following artifacts to thedependenciesblock:val ktor_version: String by project dependencies { implementation("io.ktor:ktor-client-core:$ktor_version") implementation("io.ktor:ktor-client-cio:$ktor_version") implementation("io.ktor:ktor-client-websockets:$ktor_version") }
Add the JavaExec task
In order to correctly handle the user's input when the application is running with Gradle, the JavaExec task is required.
In the build.gradle.kts file, add the JavaExec task and specify standardInput:
Click the Load Gradle Changes icon in the top right corner of the build.gradle.kts file to install the dependencies.

Create the chat client
Now that all dependencies are in place, you can implement the logic for the client in the src/main/kotlin/Main.kt file.
First implementation
Open the src/main/kotlin/Main.kt file and add the following code for sending and receiving messages:
Here, you create an HttpClient and install Ktor's WebSockets plugin to enable connections to endpoints responding to the WebSocket protocol.
Functions in Ktor responsible for making network calls use the suspension mechanism from Kotlin's coroutines. Therefore, all network-related code is wrapped in a runBlocking block.
Inside the WebSocket session handler, the client prints the received Frame only if it is of text type. Then, it reads the user's input and sends it to the server.
Although this solution works, it has one big flaw: when invoking readLine(), the program waits until the user enters a message. During this time, incoming messages from other users won't be read. Similarly, invoking readLine() after every received message means the user would only ever see one new message at a time.
In the next section, you will improve the solution by separating the message output and input mechanisms.
Improved solution
A better solution for the chat client would be to separate the message output and input mechanisms, allowing them to run concurrently. This means that when new messages arrive they can be displayed immediately, and users can start composing a new chat message at the same time without interruption.
To receive messages from the WebSocket's incoming channel, and print them to the console, add a function called outputMessages() to the Main.kt file with the following implementation:
Because the function operates in the context of a DefaultClientWebSocketSession, outputMessages() is an extension function on the type. By using the suspend modifier, iterating over the incoming channel suspends the coroutine while no new message is available.
To allow the user to input text, create a new function called inputMessages() in Main.kt with the following implementation:
Once again defined as a suspending extension function on DefaultClientWebSocketSession, this function reads text from the command line and either sends it to the server or returns if the user types exit.
Now, instead of reading and printing output within the same loop, the client can utilise the two functions by allowing them to operate independently of each other.
Wire it together
Navigate to the main() method in Main.kt and update the code to the following:
This new implementation improves the behavior of the application: Once the connection to the chat server is established, the launch function from Kotlin's Coroutines library is used to launch the two long-running functions outputMessages() and inputMessages() on a new coroutine (without blocking the current thread). The launch function also returns a Job object for both of them, which keeps the program running until the user types exit or encounters a network error when trying to send a message. After inputMessages() has returned, the client cancels the execution of outputMessages(), and closes the connection.
While the connection is still present, both input and output can execute concurrently, with new messages being received while the client sits idle. In this way the user has the option to start composing a new message at any point.
Test the application
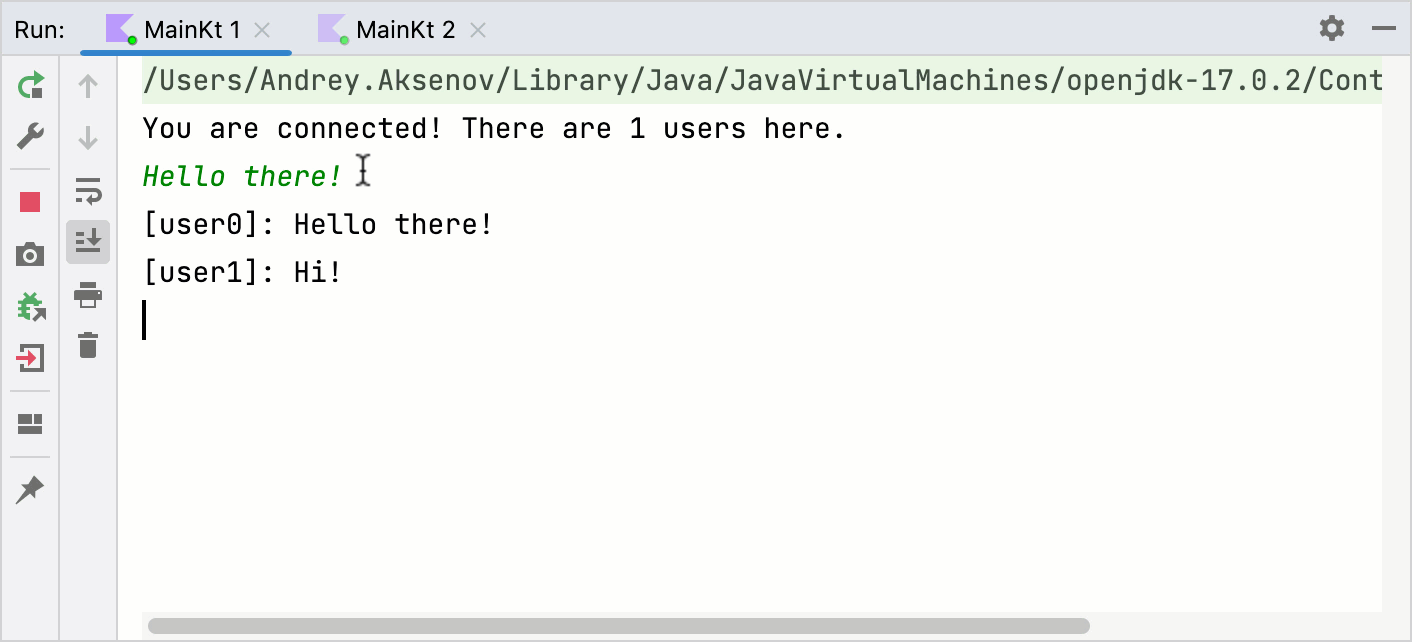
Now that you have finished implementing your WebSocket-based chat client with Kotlin and Ktor, it is time to validate your solution by running the application.
With the chat server running, start two instances of the chat client. You can do this by creating two identical **MainKt ** run configurations, which can be run separately. Even if you send multiple messages right after each other, they should be correctly displayed on all connected clients.
For the full example of the chat application, see tutorial-websockets-client.
What's next
Congratulations on creating a chat service using WebSockets with Ktor. At this point, you have implemented a functional chat service, both on the client and server side. You can keep expanding on this project. To get you started, here are a few ideas of how to improve the application:
Integrate what you have learned in this tutorial in the context of a multi-platform application. Learn about Creating a cross-platform mobile application.
Improve the User Interface for the chat using TornadoFX, Compose for Desktop or another framework of your choice.