Create a WebSocket application in Kotlin with Ktor
This article walks you through the process of creating a WebSocket application in Kotlin with Ktor. It builds on the material covered in the Create RESTful APIs tutorial.
This article will teach you how to do the following:
Create services that use JSON serialization.
Send and receive content through a WebSocket connection.
Broadcast content to multiple clients simultaneously.
Prerequisites
You can do this tutorial independently, however, we recommend that you complete the Create RESTful APIs tutorial to get familiar with Content Negotiation and REST.
We recommend that you install IntelliJ IDEA, but you could use another IDE of your choice.
Hello WebSockets
In this tutorial, you will build on the Task Manager service developed in the Create RESTful APIs tutorial by adding the ability to exchange Task objects with a client, through a WebSocket connection. To achieve this, you will need to add the WebSockets Plugin. While you could manually add it to your existing project, for the sake of this tutorial, we'll start from scratch by creating a new project.
Create the initial project with plugins
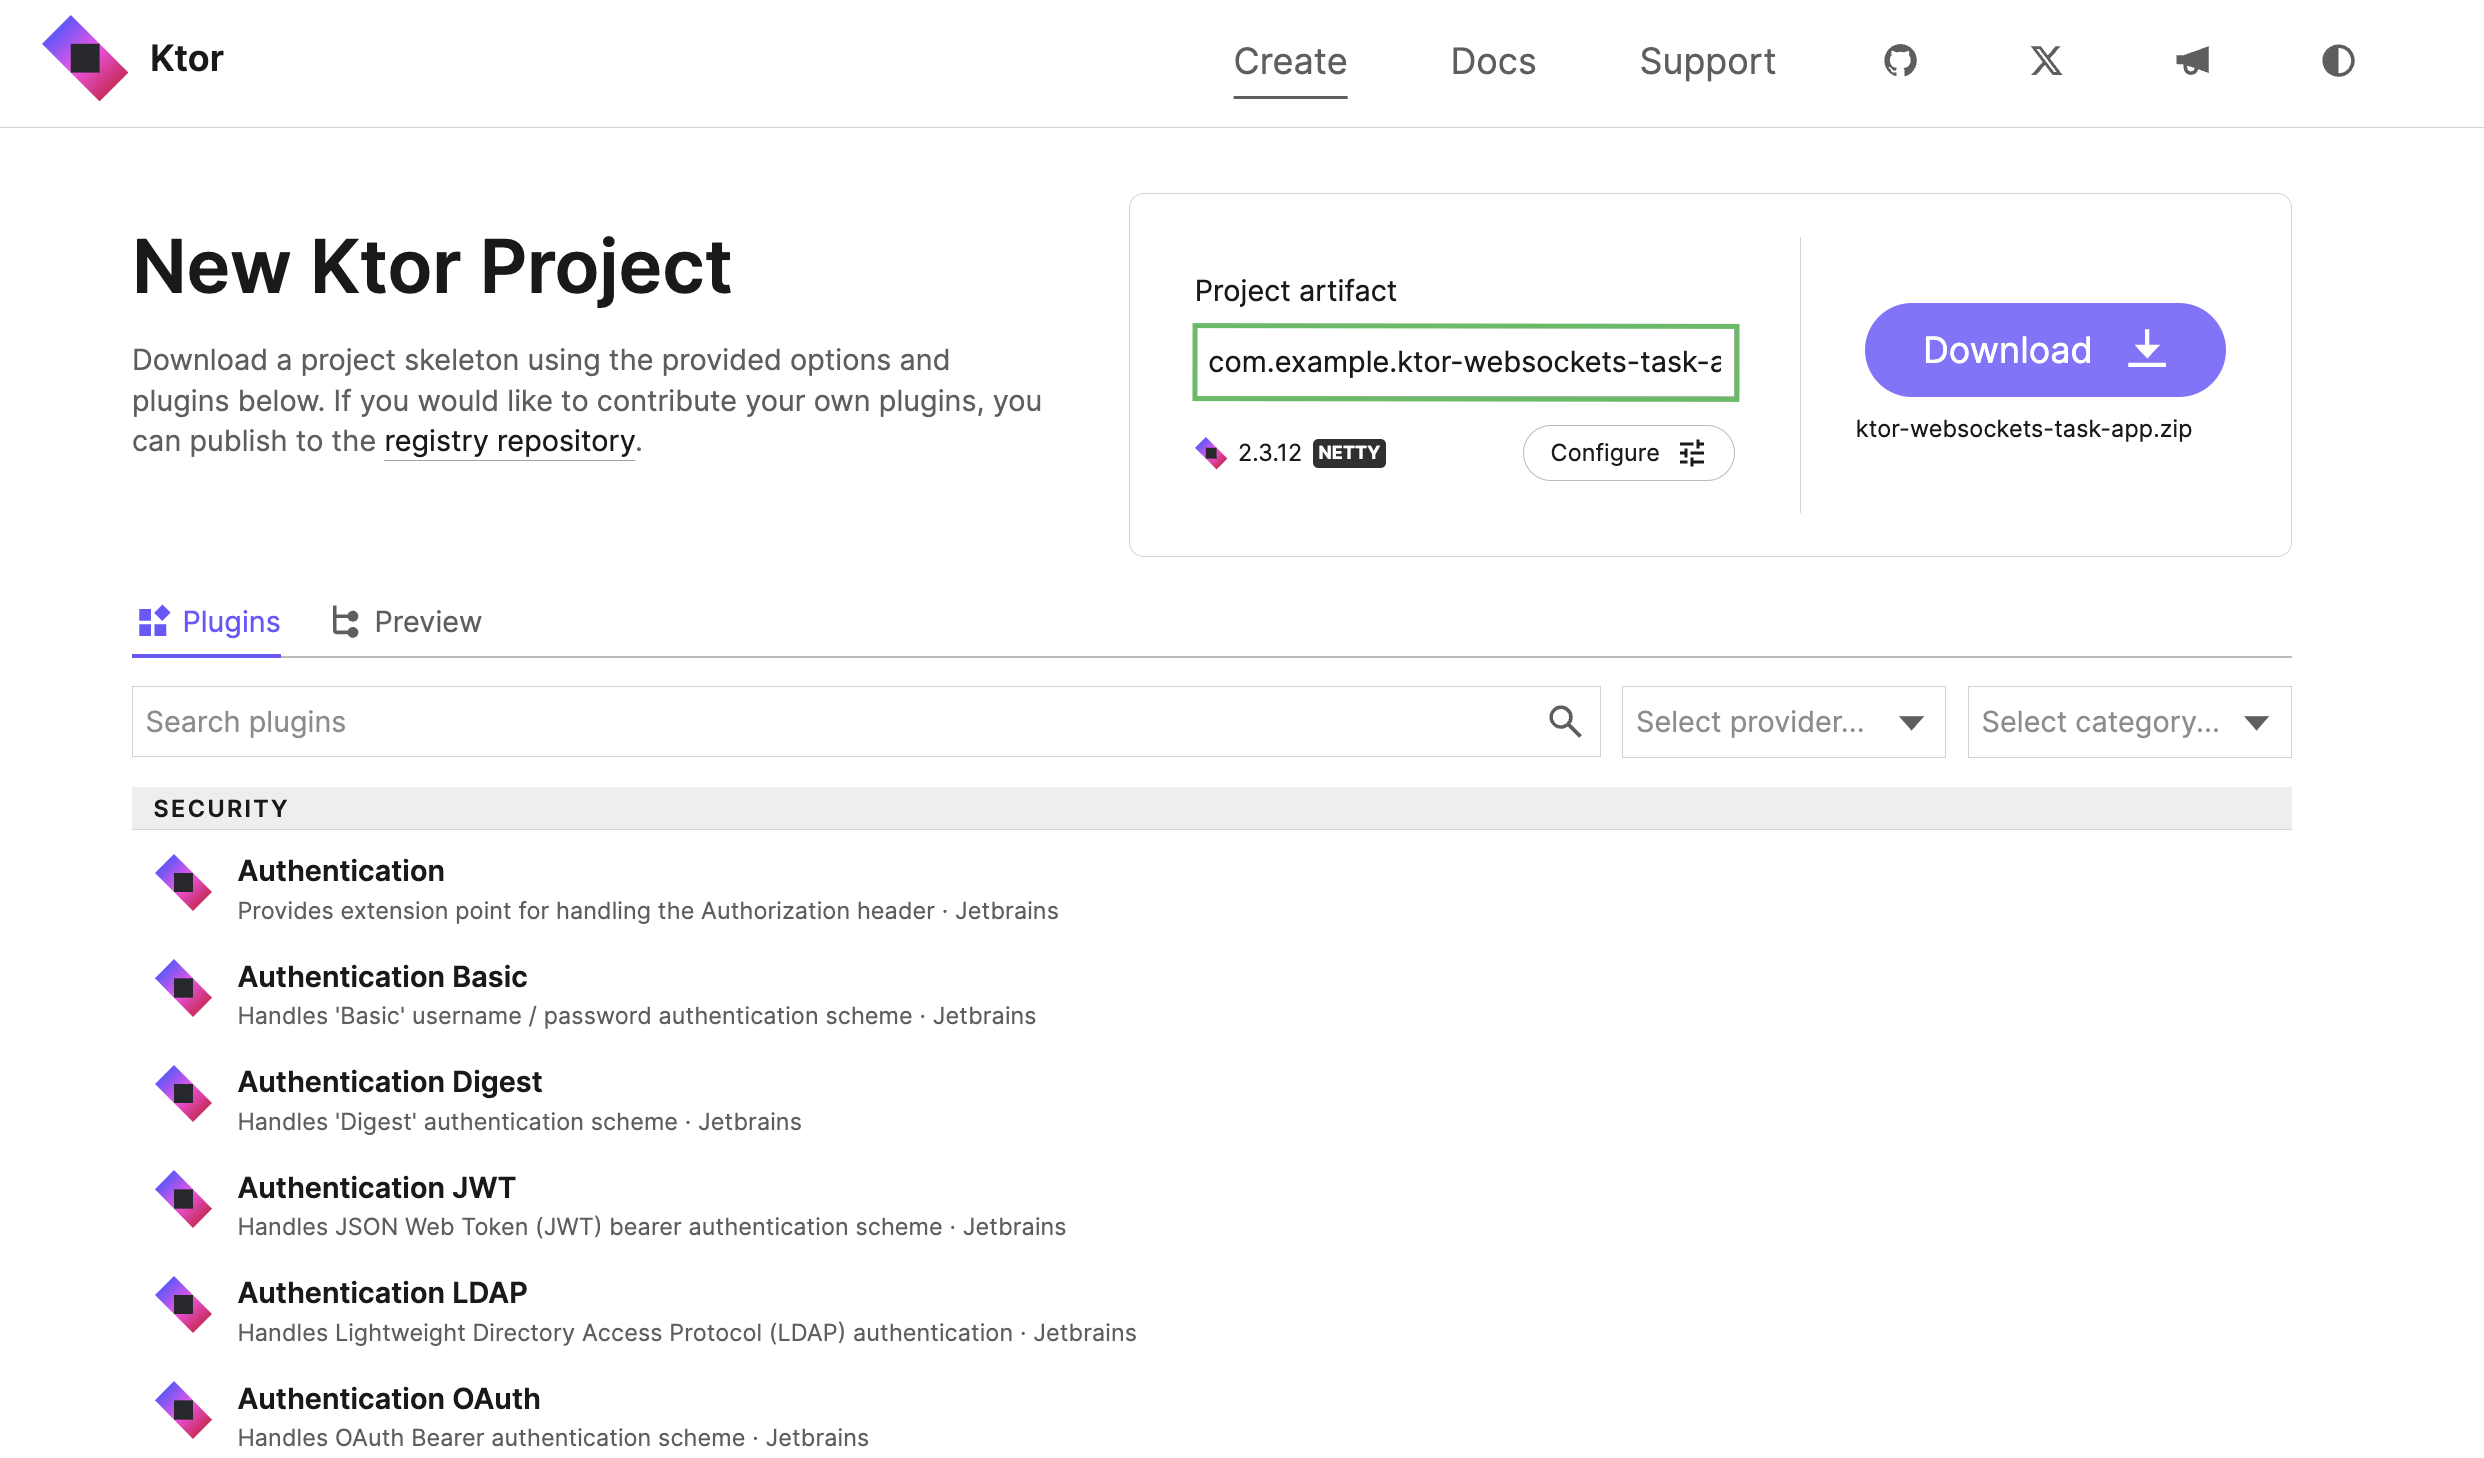
Navigate to the Ktor Project Generator.
In the Project artifact field, enter com.example.ktor-websockets-task-app as the name of your project artifact.

In the plugins section search for and add the following plugins by clicking on the Add button:
Routing
Content Negotiation
Kotlinx.serialization
WebSockets
Static Content
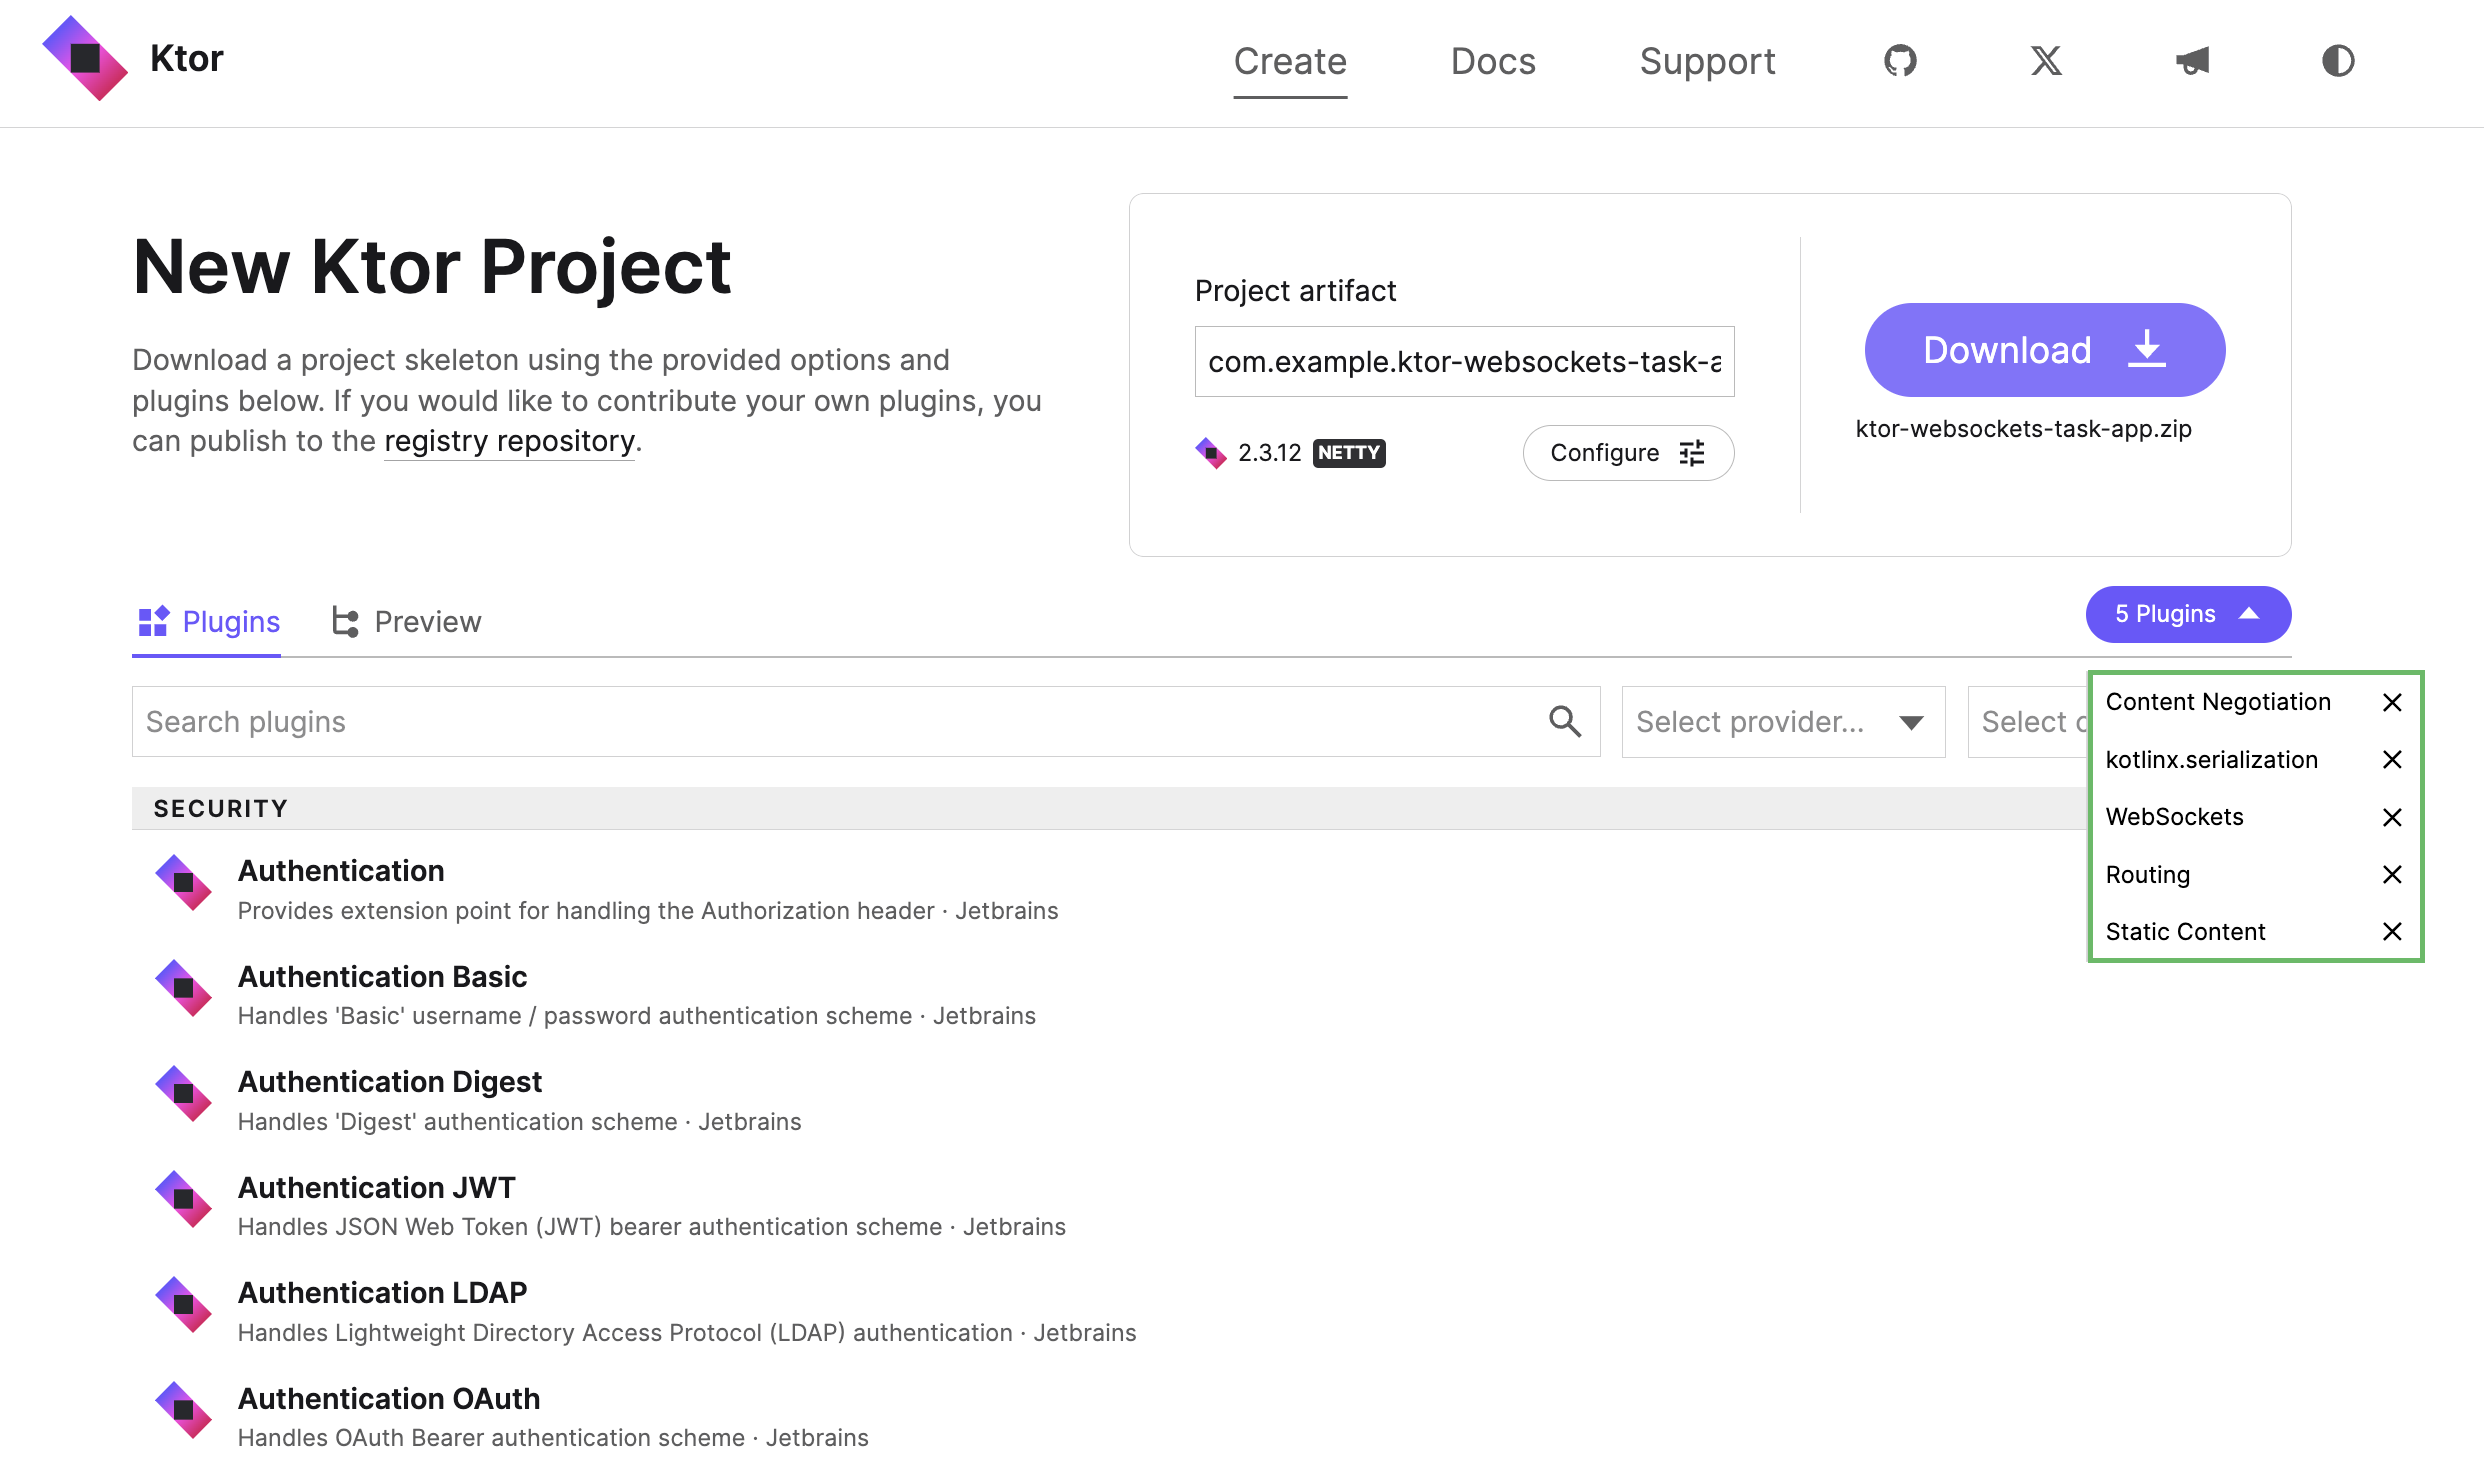
Once you have added the plugins, click on the 5 plugins button at the top right of the plugin section, to display the added plugins.
You will then see a list of all the plugins that will be added to your project:

Click the Download button to generate and download your Ktor project.
Add starter code
Once it has finished downloading, open your project in IntelliJ IDEA and follow the steps below:
Navigate to src/main/kotlin and create a new subpackage called model.
Inside the model package create a new Task.kt file.
Open the Task.kt file and add an
enumto represent priorities and adata classto represent tasks:package model import kotlinx.serialization.Serializable enum class Priority { Low, Medium, High, Vital } @Serializable data class Task( val name: String, val description: String, val priority: Priority )Note that the
Taskclass is annotated with theSerializabletype from thekotlinx.serializationlibrary. This means that instances can be converted to and from JSON, allowing their contents to be transferred over the network.Because you included the WebSockets plugin, a Sockets.kt file has been generated within src/main/kotlin/com/example/plugins.
Open the Sockets.kt file and replace the existing
Application.configureSockets()function with the implementation below:fun Application.configureSockets() { install(WebSockets) { contentConverter = KotlinxWebsocketSerializationConverter(Json) pingPeriod = Duration.ofSeconds(15) timeout = Duration.ofSeconds(15) maxFrameSize = Long.MAX_VALUE masking = false } routing { webSocket("/tasks") { val tasks = listOf( Task("cleaning", "Clean the house", Priority.Low), Task("gardening", "Mow the lawn", Priority.Medium), Task("shopping", "Buy the groceries", Priority.High), Task("painting", "Paint the fence", Priority.Medium) ) for (task in tasks) { sendSerialized(task) delay(1000) } close(CloseReason(CloseReason.Codes.NORMAL, "All done")) } } }In this code the following steps occur:
The WebSockets plugin is installed and configured with standard settings.
The
contentConverterproperty is set, enabling the plugin to serialize objects sent and received through the kotlinx.serialization library.Routing is configured with a single endpoint, where the relative URL is
/tasks.Upon receiving a request, a list of tasks is serialized down the WebSocket connection.
Once all items are sent, the server closes the connection.
For demonstration purposes, a one-second delay is introduced between sending tasks. This allows us to observe the tasks appearing incrementally in our client. Without this delay, the example would appear identical to the RESTful service and Web Application developed in previous articles.
The final step in this iteration is to create a client for this endpoint. Because you included the Static Content plugin, an index.html file has been generated within src/main/resources/static.
Open the index.html file and replace the existing content with the following:
<html> <head> <title>Using Ktor WebSockets</title> <script> function readAndDisplayAllTasks() { clearTable(); const serverURL = 'ws://0.0.0.0:8080/tasks'; const socket = new WebSocket(serverURL); socket.onopen = logOpenToConsole; socket.onclose = logCloseToConsole; socket.onmessage = readAndDisplayTask; } function readAndDisplayTask(event) { let task = JSON.parse(event.data); logTaskToConsole(task); addTaskToTable(task); } function logTaskToConsole(task) { console.log(`Received ${task.name}`); } function logCloseToConsole() { console.log("Web socket connection closed"); } function logOpenToConsole() { console.log("Web socket connection opened"); } function tableBody() { return document.getElementById("tasksTableBody"); } function clearTable() { tableBody().innerHTML = ""; } function addTaskToTable(task) { tableBody().appendChild(taskRow(task)); } function taskRow(task) { return tr([ td(task.name), td(task.description), td(task.priority) ]); } function tr(children) { const node = document.createElement("tr"); children.forEach(child => node.appendChild(child)); return node; } function td(text) { const node = document.createElement("td"); node.appendChild(document.createTextNode(text)); return node; } </script> </head> <body> <h1>Viewing Tasks Via WebSockets</h1> <form action="javascript:readAndDisplayAllTasks()"> <input type="submit" value="View The Tasks"> </form> <table rules="all"> <thead> <tr> <th>Name</th><th>Description</th><th>Priority</th> </tr> </thead> <tbody id="tasksTableBody"> </tbody> </table> </body> </html>This page uses the WebSocket type, available in all modern browsers. We create this object in JavaScript, passing the URL of our endpoint into the constructor. Subsequently, we attach event handlers for the
onopen,onclose, andonmessageevents. Upon triggering theonmessageevent, we append a row to a table using the document object's methods.In IntelliJ IDEA, click on the run button (
) to start the application.
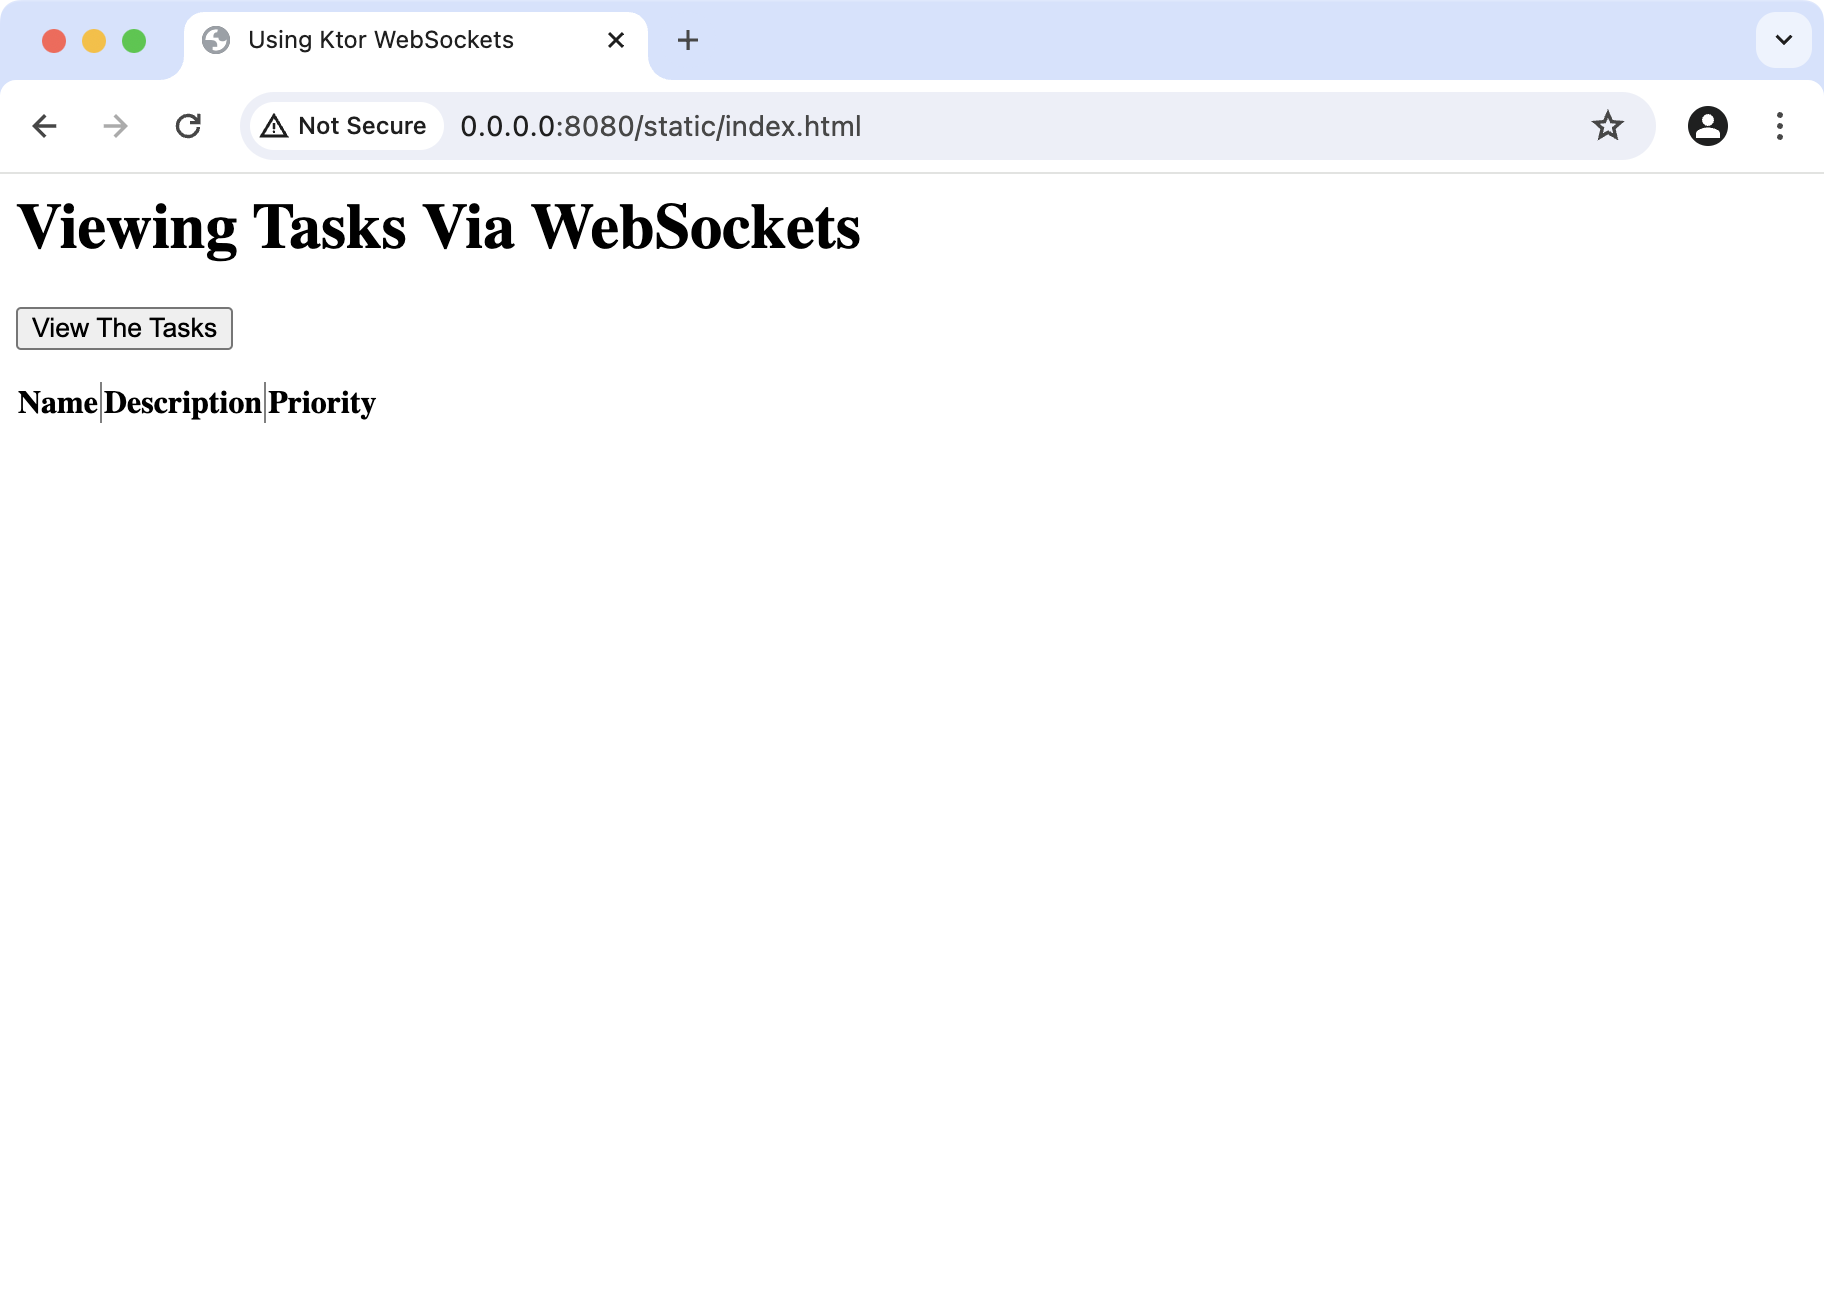
Navigate to http://0.0.0.0:8080/static/index.html. You should see a form with a button and an empty table:

When you click on the form, tasks should be loaded from the server, appearing at a rate of one per second. As a result, the table should be populated incrementally. You can also view the logged messages by opening the JavaScript Console in your browser's developer tools.
With this, you can see that the service is performing as expected. A WebSocket connection is opened, the items are sent to the client, and then the connection is closed. There is a lot of complexity in the underlying networking, but Ktor handles all of this by default.
Understanding WebSockets
Before moving to the next iteration, it may be helpful to review some of the fundamentals of WebSockets. If you are already familiar with WebSockets, you can continue to improve the design of your service.
In previous tutorials, your clients were sending HTTP Requests and receiving HTTP Responses. This works well and enables the Internet to be scalable and resilient.
However, it's not suitable for scenarios where:
Content is generated incrementally over time.
Content changes frequently in response to events.
Clients need to interact with the server as content is produced.
Data sent by one client needs to be quickly propagated to others.
Examples of these scenarios include share trading, purchasing cinema and concert tickets, bidding in online auctions, and chat functionality in social media. WebSockets were developed to handle these situations.
A WebSocket connection is established over TCP and can last for an extended period. The connection provides ‘full duplex communication’, meaning clients can send messages to the server and receive messages from it simultaneously.
The WebSocket API defines four events (open, message, close, and error) and two actions (send and close). How this functionality is accessed can vary across different languages and libraries. For example, in Kotlin, you can consume the sequence of incoming messages as a Flow.
Improve the design
Next, you will refactor your existing code, to make room for more advanced examples.
In the model package, create a new TaskRepository.kt file.
Open TaskRepository.kt and add a
TaskRepositorytype:package model object TaskRepository { private val tasks = mutableListOf( Task("cleaning", "Clean the house", Priority.Low), Task("gardening", "Mow the lawn", Priority.Medium), Task("shopping", "Buy the groceries", Priority.High), Task("painting", "Paint the fence", Priority.Medium) ) fun allTasks(): List<Task> = tasks fun tasksByPriority(priority: Priority) = tasks.filter { it.priority == priority } fun taskByName(name: String) = tasks.find { it.name.equals(name, ignoreCase = true) } fun addTask(task: Task) { if (taskByName(task.name) != null) { throw IllegalStateException("Cannot duplicate task names!") } tasks.add(task) } fun removeTask(name: String): Boolean { return tasks.removeIf { it.name == name } } }You might recall this code from the previous tutorials.
Navigate to the plugins package and open the Sockets.kt file.
You can now simplify the routing in
Application.configureSockets()by utilizing theTaskRepository:routing { webSocket("/tasks") { for (task in TaskRepository.allTasks()) { sendSerialized(task) delay(1000) } close(CloseReason(CloseReason.Codes.NORMAL, "All done")) } }
Send messages through WebSockets
To illustrate the power of WebSockets, you'll create a new endpoint where:
When a client starts up, it receives all existing tasks.
Clients can create and send tasks.
When one client sends a task, other clients are notified.
In the Sockets.kt file, replace the current
configureSockets()method with the implementation below:fun Application.configureSockets() { install(WebSockets) { contentConverter = KotlinxWebsocketSerializationConverter(Json) pingPeriod = Duration.ofSeconds(15) timeout = Duration.ofSeconds(15) maxFrameSize = Long.MAX_VALUE masking = false } routing { val sessions = Collections.synchronizedList<WebSocketServerSession>(ArrayList()) webSocket("/tasks") { sendAllTasks() close(CloseReason(CloseReason.Codes.NORMAL, "All done")) } webSocket("/tasks2") { sessions.add(this) sendAllTasks() while(true) { val newTask = receiveDeserialized<Task>() TaskRepository.addTask(newTask) for(session in sessions) { session.sendSerialized(newTask) } } } } } private suspend fun DefaultWebSocketServerSession.sendAllTasks() { for (task in TaskRepository.allTasks()) { sendSerialized(task) delay(1000) } }With this code you have done the following:
Refactored the functionality to send all existing tasks into a helper method.
In the
routingsection, you've created a thread-safe list ofsessionobjects to keep track of all clients.Added a new endpoint with a relative URL of
/task2. When a client connects to this endpoint, the correspondingsessionobject is added to the list. The server then enters an infinite loop in waiting to receive a new task. Upon receiving a new task, the server stores it in the repository and sends a copy to all clients, including the current one.
To test this functionality, you'll create a new page that extends the functionality in index.html.
Within src/main/resources/static create a new HTML file called wsClient.html.
Open wsClient.html and add the following content:
<html> <head> <title>WebSocket Client</title> <script> let serverURL; let socket; function setupSocket() { serverURL = 'ws://0.0.0.0:8080/tasks2'; socket = new WebSocket(serverURL); socket.onopen = logOpenToConsole; socket.onclose = logCloseToConsole; socket.onmessage = readAndDisplayTask; } function readAndDisplayTask(event) { let task = JSON.parse(event.data); logTaskToConsole(task); addTaskToTable(task); } function logTaskToConsole(task) { console.log(`Received ${task.name}`); } function logCloseToConsole() { console.log("Web socket connection closed"); } function logOpenToConsole() { console.log("Web socket connection opened"); } function tableBody() { return document.getElementById("tasksTableBody"); } function addTaskToTable(task) { tableBody().appendChild(taskRow(task)); } function taskRow(task) { return tr([ td(task.name), td(task.description), td(task.priority) ]); } function tr(children) { const node = document.createElement("tr"); children.forEach(child => node.appendChild(child)); return node; } function td(text) { const node = document.createElement("td"); node.appendChild(document.createTextNode(text)); return node; } function getFormValue(name) { return document.forms[0][name].value } function buildTaskFromForm() { return { name: getFormValue("newTaskName"), description: getFormValue("newTaskDescription"), priority: getFormValue("newTaskPriority") } } function logSendingToConsole(data) { console.log("About to send",data); } function sendTaskViaSocket(data) { socket.send(JSON.stringify(data)); } function sendTaskToServer() { let data = buildTaskFromForm(); logSendingToConsole(data); sendTaskViaSocket(data); //prevent form submission return false; } </script> </head> <body onload="setupSocket()"> <h1>Viewing Tasks Via WebSockets</h1> <table rules="all"> <thead> <tr> <th>Name</th><th>Description</th><th>Priority</th> </tr> </thead> <tbody id="tasksTableBody"> </tbody> </table> <div> <h3>Create a new task</h3> <form onsubmit="return sendTaskToServer()"> <div> <label for="newTaskName">Name: </label> <input type="text" id="newTaskName" name="newTaskName" size="10"> </div> <div> <label for="newTaskDescription">Description: </label> <input type="text" id="newTaskDescription" name="newTaskDescription" size="20"> </div> <div> <label for="newTaskPriority">Priority: </label> <select id="newTaskPriority" name="newTaskPriority"> <option name="Low">Low</option> <option name="Medium">Medium</option> <option name="High">High</option> <option name="Vital">Vital</option> </select> </div> <input type="submit"> </form> </div> </body> </html>This new page introduces an HTML form, into which the user can enter the information for a new task. Upon submitting the form, the
sendTaskToServerevent handler is called. This builds a JavaScript object with the form data and sends it to the server using thesendmethod of the WebSocket object.In IntelliJ IDEA, click the rerun button (
) to restart the application.
To test this functionality, open two browsers side-by-side and follow the steps below.
In Browser A, navigate to http://0.0.0.0:8080/static/wsClient.html. You should see the default tasks displayed.
Add a new task in Browser A. The new task should appear in the table on that page.
In Browser B, navigate to http://0.0.0.0:8080/static/wsClient.html. You should see the default tasks, plus any new tasks that you added in Browser A.
Add a task in either browser. You should see the new item appearing on both pages.
Add automated tests
To streamline your QA process and make it fast, reproducible, and hands-free, you can use Ktor's built-in support for automated testing. Follow these steps:
Add the following dependency to build.gradle.kts to allow you to configure support for Content Negotiation within the Ktor Client :
implementation("io.ktor:ktor-serialization-kotlinx-json-jvm")In intelliJ IDEA, click on the notification Gradle icon (
) on the right side of the editor to load Gradle changes.
Navigate to src/test/kotlin/com/example and open the ApplicationTest.kt file.
Replace the generated test class with the implementation below:
package com.example import com.example.plugins.* import io.ktor.client.plugins.contentnegotiation.* import io.ktor.client.plugins.websocket.* import io.ktor.serialization.* import io.ktor.serialization.kotlinx.* import io.ktor.serialization.kotlinx.json.* import io.ktor.server.testing.* import kotlinx.coroutines.flow.* import kotlinx.serialization.json.Json import model.Priority import model.Task import kotlin.test.* class ApplicationTest { @Test fun testRoot() = testApplication { application { configureRouting() configureSerialization() configureSockets() } val client = createClient { install(ContentNegotiation) { json() } install(WebSockets) { contentConverter = KotlinxWebsocketSerializationConverter(Json) } } val expectedTasks = listOf( Task("cleaning", "Clean the house", Priority.Low), Task("gardening", "Mow the lawn", Priority.Medium), Task("shopping", "Buy the groceries", Priority.High), Task("painting", "Paint the fence", Priority.Medium) ) var actualTasks = emptyList<Task>() client.webSocket("/tasks") { consumeTasksAsFlow().collect { allTasks -> actualTasks = allTasks } } assertEquals(expectedTasks.size, actualTasks.size) expectedTasks.forEachIndexed { index, task -> assertEquals(task, actualTasks[index]) } } private fun DefaultClientWebSocketSession.consumeTasksAsFlow() = incoming .consumeAsFlow() .map { converter!!.deserialize<Task>(it) } .scan(emptyList<Task>()) { list, task -> list + task } }With this setup, you:
Configure your service to run within the test environment and enable the same functionality that you would have in production, including Routing, JSON Serialization, and WebSockets.
Configure Content Negotiation and WebSocket support within the Ktor Client. Without this, the client wouldn’t know how to (de)serialize objects as JSON when using WebSocket connections.
Declare the list of
Tasksyou expect the service to send back.Use the
websocketmethod of the client object to send a request to/tasks.Consume the incoming tasks as a
flow, incrementally adding them to a list.Once all tasks have been received, compare the
expectedTasksto theactualTasksin the usual way.
Next steps
Great work! By incorporating WebSocket communication and automated tests with the Ktor Client, you've enhanced your Task Manager service significantly.
Continue to the next tutorial to explore how your service can seamlessly interact with relational databases using the Exposed library.


