Creating a cross-platform mobile application
The Ktor HTTP client can be used in multiplatform projects. In this tutorial, we'll create a simple Kotlin Multiplatform Mobile application, which sends a request and receives a response body as plain HTML text.
Prerequisites
First, you need to set up an environment for cross-platform mobile development by installing the necessary tools on a suitable operating system. Learn how to do this from the Set up an environment section.
Create a new project
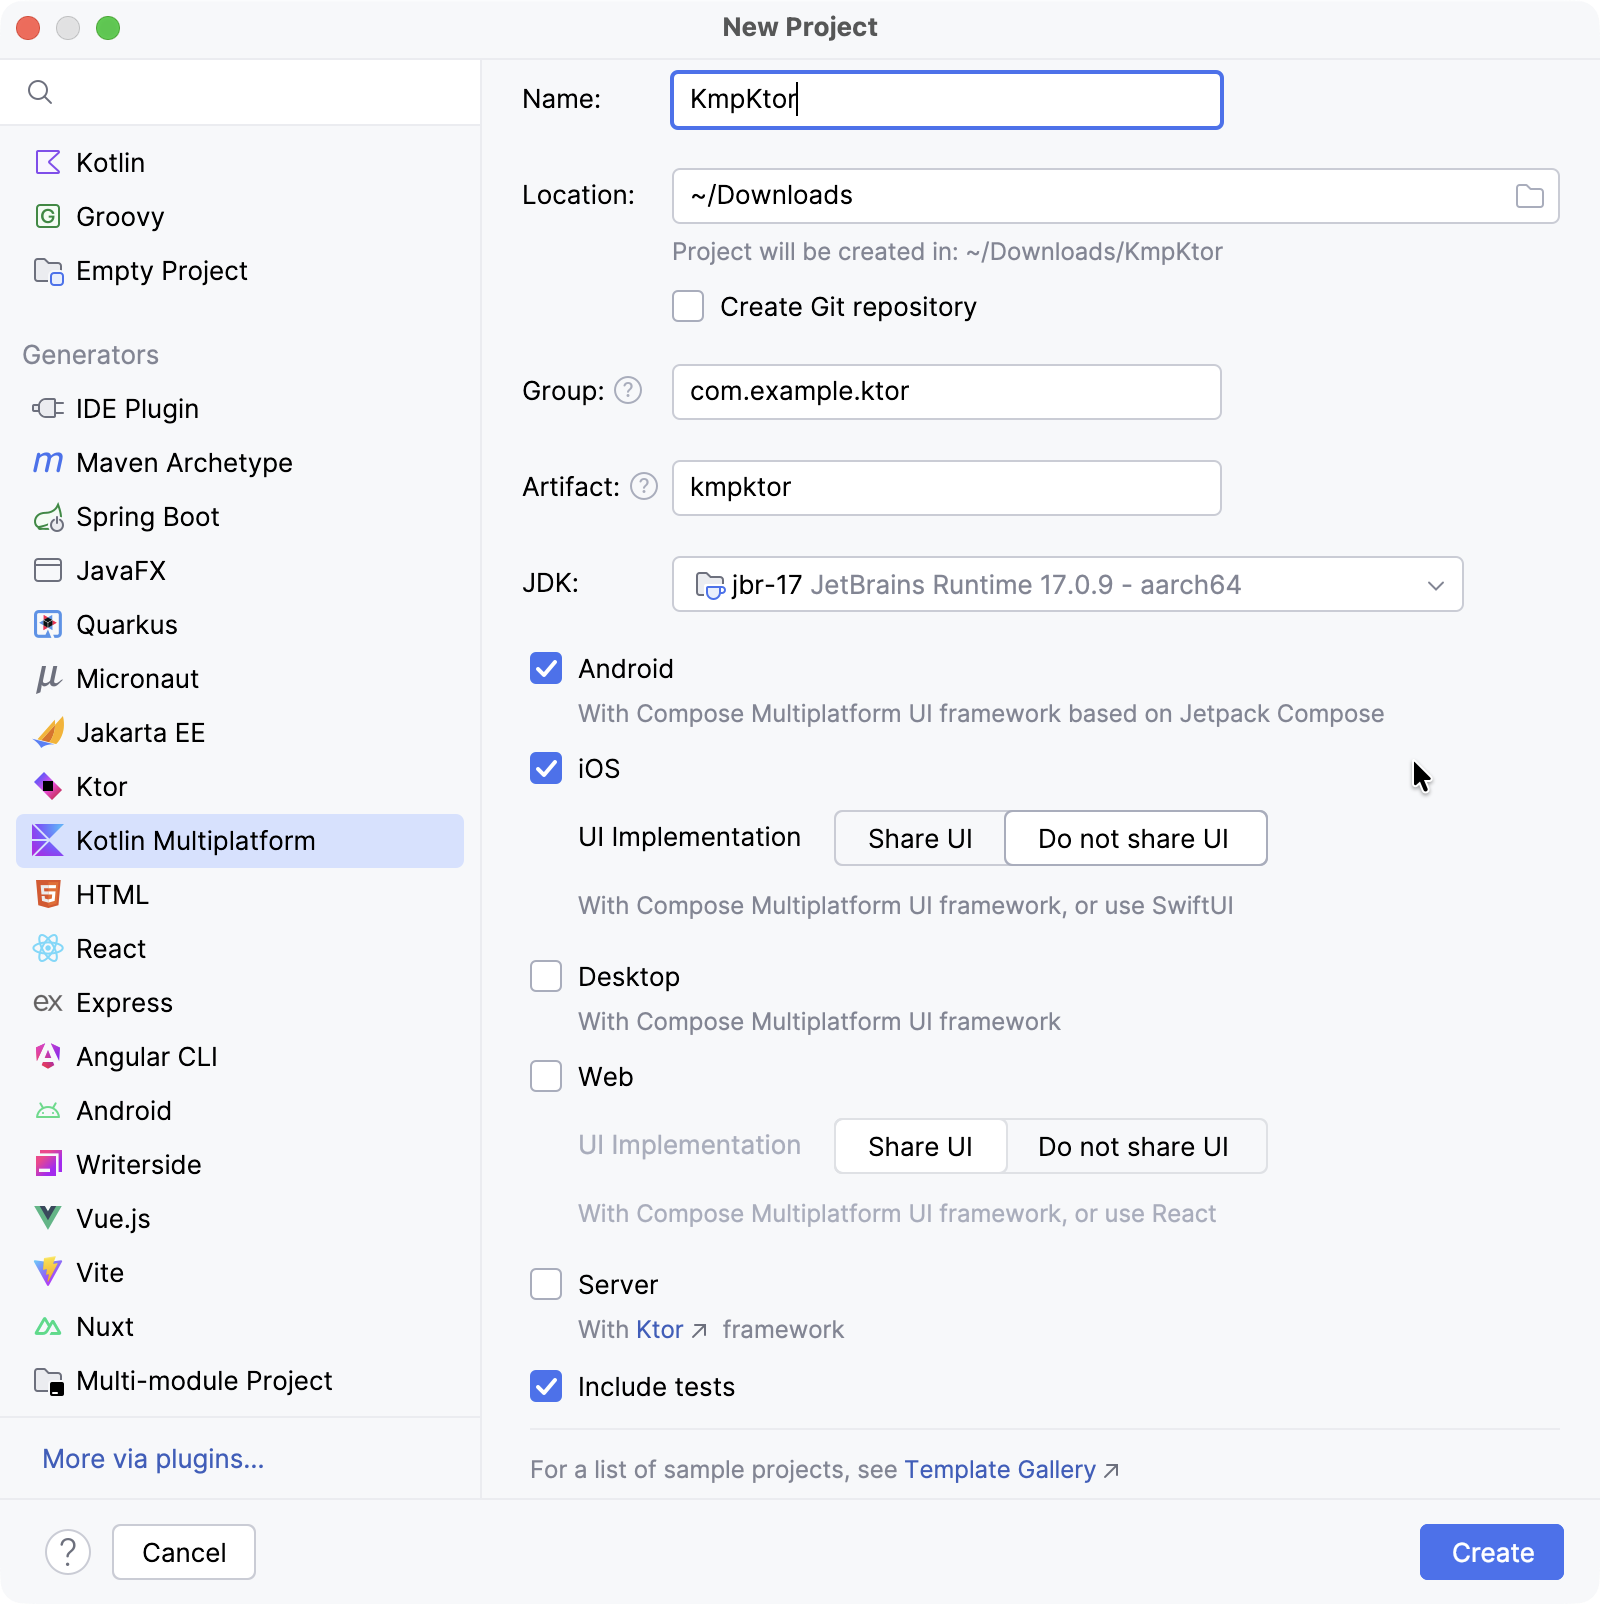
To create a new project, you can use the Kotlin Multiplatform project wizard in IntelliJ IDEA. It will create a basic multiplatform project which you can expand with clients and services.
Launch IntelliJ IDEA.
In IntelliJ IDEA, select File | New | Project.
In the panel on the left, select Kotlin Multiplatform.
Specify the following fields in the New Project window:
Name: KmpKtor
Group: com.example.ktor

Select Android and iOS targets.
For iOS, select the Do not share UI option to keep the UI native.
Click the Create button and wait for the IDE to generate and import the project.
Configure build scripts
Add Ktor dependencies
To use the Ktor HTTP client in your project, you need to add at least two dependencies: a client dependency and an engine dependency.
Open the gradle/libs.versions.toml file add the Ktor version:
[versions] ktor = "3.4.0"In the same gradle/libs.versions.toml define the Ktor client and engine libraries:
[libraries] ktor-client-core = { module = "io.ktor:ktor-client-core", version.ref = "ktor" } ktor-client-okhttp = { module = "io.ktor:ktor-client-okhttp", version.ref = "ktor" } ktor-client-darwin = { module = "io.ktor:ktor-client-darwin", version.ref = "ktor" }Open the shared/build.gradle.kts file and add the following dependencies:
sourceSets { commonMain.dependencies { implementation(libs.ktor.client.core) } androidMain.dependencies { implementation(libs.ktor.client.okhttp) } iosMain.dependencies { implementation(libs.ktor.client.darwin) } }Add the
ktor-client-coreto thecommonMainsource set to enable Ktor client functionality in shared code.In the
androidMainsource set, include thektor-client-okhttpdependency to use theOkHttpengine on Android. Alternatively, you can choose from other available Android/JVM engines.In the
iosMainsource set, add thektor-client-darwindependency to use the Darwin engine on iOS.
Add coroutines
To use coroutines in Android code, you need to add kotlinx.coroutines to your project:
Open the gradle/libs.versions.toml file and specify the coroutines version and libraries:
[versions] kotlinx-coroutines = "1.10.2" [libraries] kotlinx-coroutines-core = { module = "org.jetbrains.kotlinx:kotlinx-coroutines-core", version.ref = "kotlinx-coroutines" } kotlinx-coroutines-android = { module = "org.jetbrains.kotlinx:kotlinx-coroutines-android", version.ref = "kotlinx-coroutines" }Open the shared/build.gradle.kts file and add the
kotlinx-coroutines-coredependency to thecommonMainsource set:sourceSets { commonMain.dependencies { implementation(libs.ktor.client.core) implementation(libs.kotlinx.coroutines.core) } }Then, open the composeApp/build.gradle.kts file and add the
kotlinx-coroutines-androiddependency to theandroidMainsource set:sourceSets { androidMain.dependencies { // ... implementation(libs.kotlinx.coroutines.android) } }Select Build | Sync Project with Gradle Files to install the added dependencies.
Update your application
Shared code
To update the code shared between Android and iOS, open the shared/src/commonMain/kotlin/com/example/ktor/kmpktor/Greeting.kt file and add the following code to the Greeting class:
Android code
Open the composeApp/src/androidMain/kotlin/com/example/ktor/kmpktor/App.kt file and update the code as follows:
LaunchedEffect() launches a coroutine tied to the composable’s lifecycle. Within this coroutine, the shared greet() function is called, its result is assigned to text, and any exceptions are caught and handled.
iOS code
Open the iosApp/iosApp/ContentView.swift file and update the code in the following way:
On iOS, the greet() suspending function is available as a function with a callback.
Enable internet access on Android
The final step is to enable internet access for the Android application. Open the composeApp/src/androidMain/AndroidManifest.xml file and enable the required permission using the <uses-permission> element:
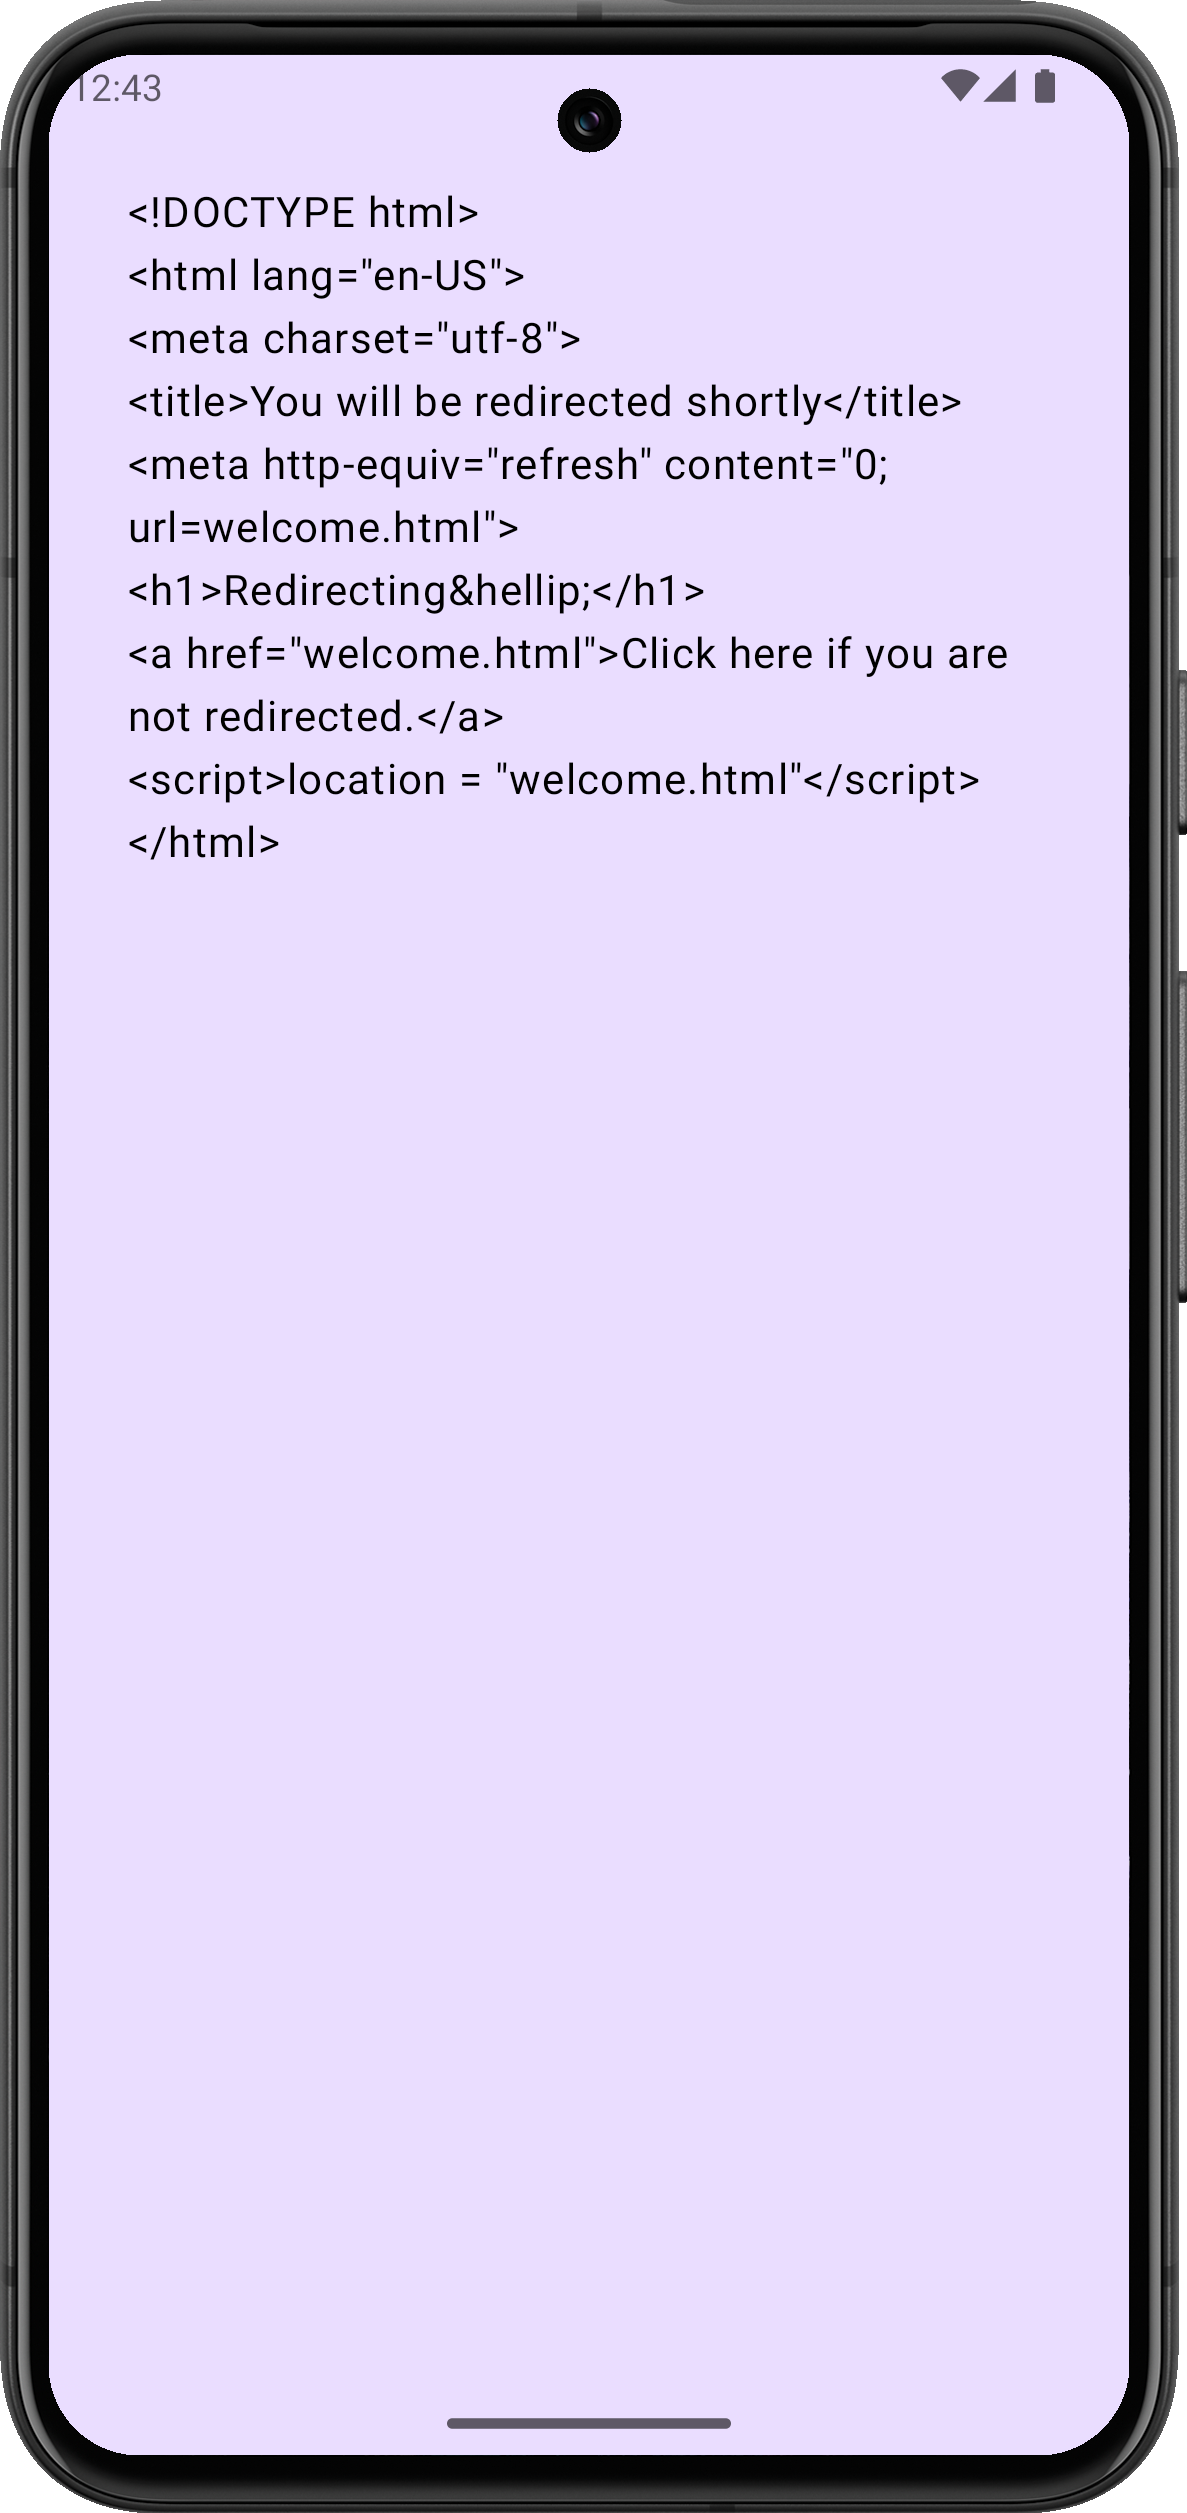
Run your application on Android
In IntelliJ IDEA, select composeApp in the list of run configurations.
Choose an Android virtual device next to the list of configurations and click Run.

If you don't have a device in the list, create a new Android virtual device.
Once loaded, the simulator should display the received HTML document as plain text.

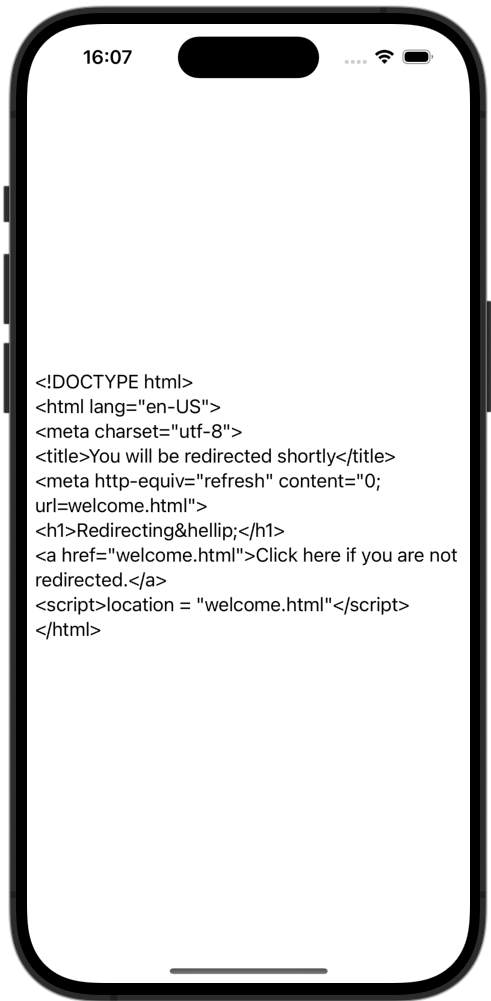
Run your application on iOS
In IntelliJ IDEA, select iosApp in the list of run configurations.
Choose an iOS simulated device next to the list of configurations and click Run.

If you don't have an available iOS configuration in the list, add a new run configuration.
Once loaded, the simulator should display the received HTML document as plain text.
