Adding Ktor to an existing Gradle project
In this tutorial, we'll show you how to integrate Ktor into the existing Gradle project.
Prerequisites
Before starting this tutorial, do the following:
Make sure the Gradle and Gradle Extension plugins are installed and enabled.
Create a new Gradle project
To create a new Gradle project, open IntelliJ IDEA, and follow the steps below:
On the Welcome screen, click New Project.
Otherwise, from the main menu, select .
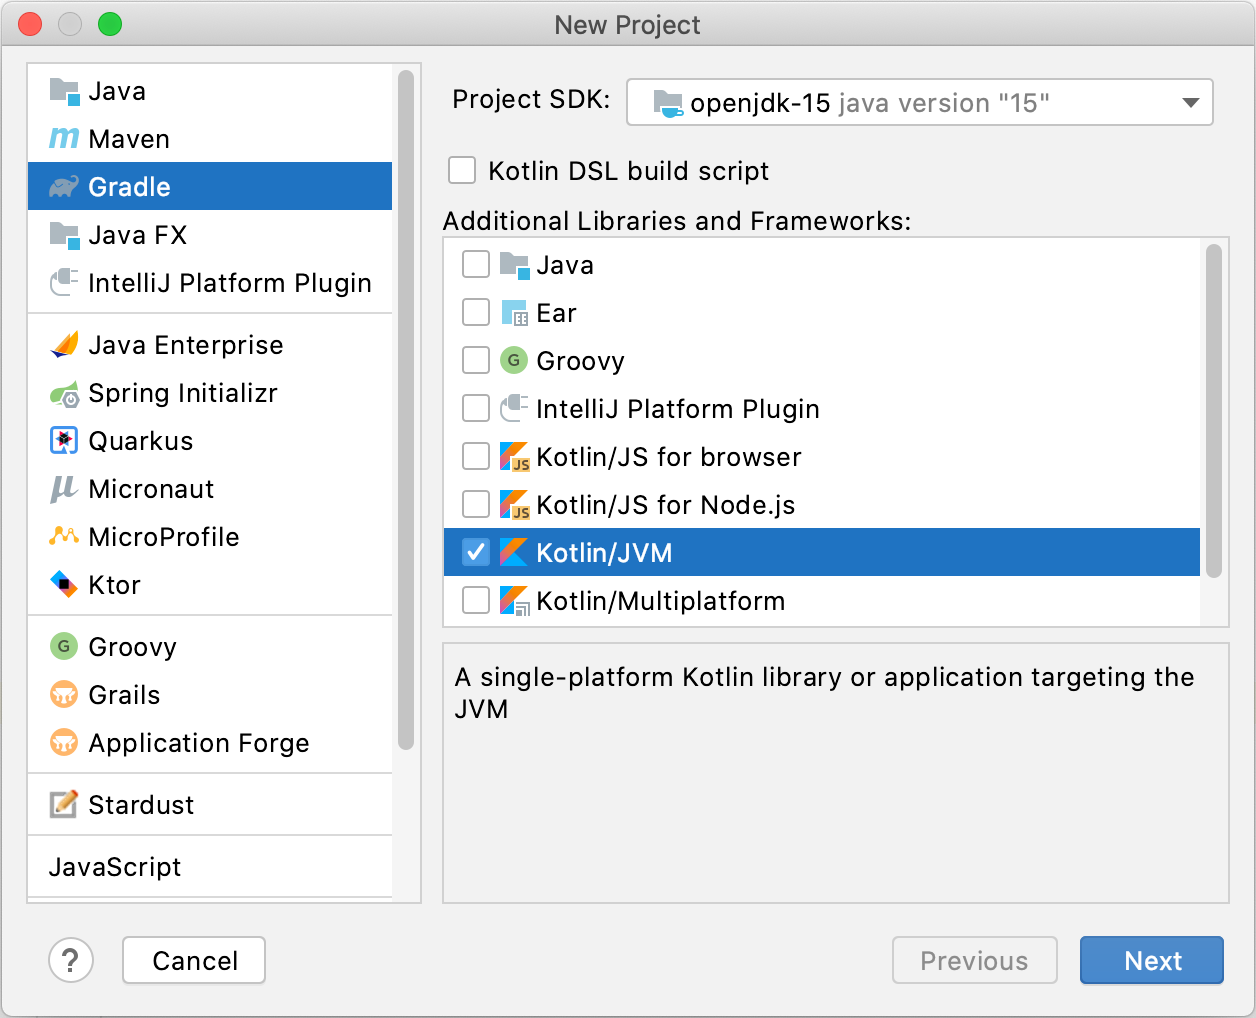
In the New Project wizard, choose Gradle from the list on the left and specify the following settings:

Choose the Project SDK from the list.
(Optional) Enable the Kotlin DSL build script option to use Kotlin instead of Groovy DSL.
Select Kotlin/JVM in the Additional Libraries and Frameworks area.
Click Next.
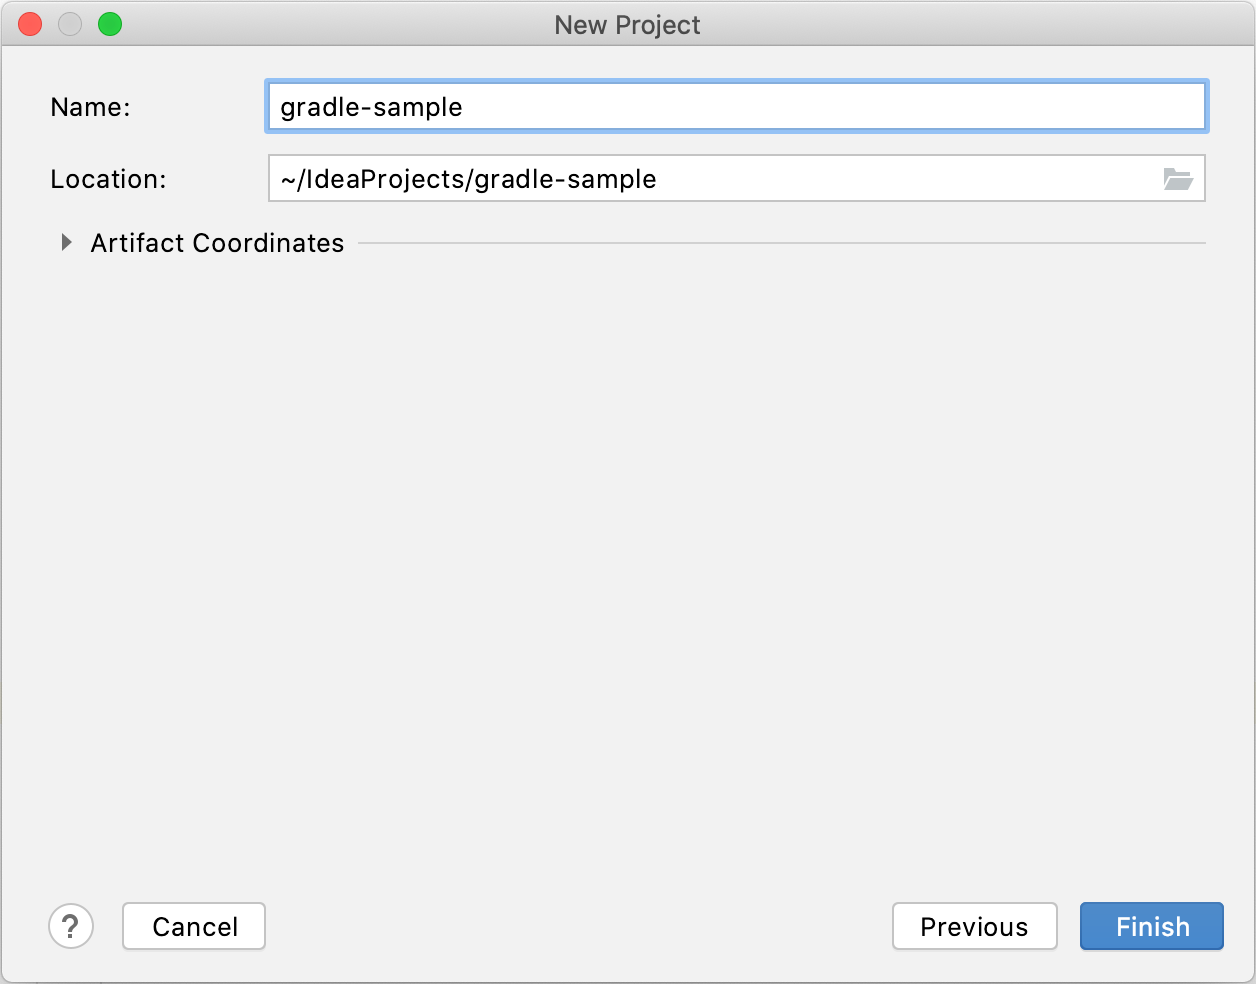
On the next wizard page, specify a project's name and location.

Click Finish and wait until IntelliJ IDEA creates and builds a project.
Add Ktor dependencies
After creating an empty project, we are ready to examine a Gradle build script and add Ktor dependencies to it:
Open the build.gradle or build.gradle.kts file. It should look as follows:
plugins { id 'org.jetbrains.kotlin.jvm' version '1.5.31' } group 'org.example' version '1.0-SNAPSHOT' repositories { mavenCentral() } dependencies { implementation "org.jetbrains.kotlin:kotlin-stdlib" }plugins { kotlin("jvm") version "1.5.31" } group = "org.example" version = "1.0-SNAPSHOT" repositories { mavenCentral() } dependencies { implementation(kotlin("stdlib")) }Besides other settings, this build script declares the Maven Central repository. Since Ktor dependencies are stored in Maven Central, we don't need to change anything here.
To create a simple Ktor application, we need to add at least the following dependencies:
ktor-server-core: contains core Ktor functionality.A dependency for an engine (for example,
ktor-server-netty).Logback artifacts for logging.
The
dependenciesblock might look as follows:dependencies { implementation "io.ktor:ktor-server-core:1.6.8" implementation "io.ktor:ktor-server-netty:1.6.8" implementation "ch.qos.logback:logback-classic:1.2.5" }dependencies { implementation("io.ktor:ktor-server-core:1.6.8") implementation("io.ktor:ktor-server-netty:1.6.8") implementation("ch.qos.logback:logback-classic:1.2.5") }Note that other engines and plugins that extend Ktor functionality might required additional dependencies. You can learn more from corresponding topics.
Create a server
Now we a ready to add some code for creating a Ktor server and running our application:
Create a com.example package within the src/main/kotlin folder.
In the com.example package, add an empty Application.kt file.
Since Ktor supports two approaches for creating a server, you can choose one of the following:
Create a server using embeddedServer
Add the following code to Application.kt to use the
embeddedServerfunction for starting a Ktor server:package com.example import io.ktor.application.* import io.ktor.response.* import io.ktor.routing.* import io.ktor.server.engine.* import io.ktor.server.netty.* fun main() { embeddedServer(Netty, port = 8080) { routing { get("/") { call.respondText("Hello, world!") } } }.start(wait = true) }
Create a server using EngineMain
Add the following code to Application.kt to use
EngineMainfor starting a Ktor server:package com.example import io.ktor.application.* import io.ktor.response.* import io.ktor.routing.* fun main(args: Array<String>): Unit = io.ktor.server.netty.EngineMain.main(args) fun Application.module(testing: Boolean = false) { routing { get("/") { call.respondText("Hello, world!") } } }The
Application.modulefunction is a module loaded by the server. Modules to load should be specified in the application.conf file, which will be created in the next step.Create the application.conf file in the src/main/resources folder and copy the following configuration:
ktor { deployment { port = 8080 } application { modules = [ com.example.ApplicationKt.module ] } }This file specifies a fully qualified name of the
Application.modulemodule to load and sets a listening port to8080.
Create an entry point for running an application
In this section, we'll prepare our Ktor application for running it using the Gradle's Application plugin. Go back to the build.gradle or build.gradle.kts file and perform the steps below:
Add the following code in the
pluginsblock to use the Application plugin:plugins { id 'application' }plugins { application }Depending on the way you used to create a server, specify the application main class in one of the following ways:
If you use embeddedServer, specify the main class as follows:
application { mainClass = 'com.example.ApplicationKt' }application { mainClass.set("com.example.ApplicationKt") }If you use EngineMain, you need to configure it as the main class. For Netty, it will look as follows:
application { mainClass = 'io.ktor.server.netty.EngineMain' }application { mainClass.set("io.ktor.server.netty.EngineMain") }
The resulting build.gradle/build.gradle.kts file should look something like this:
plugins { id 'application' id 'org.jetbrains.kotlin.jvm' version '1.5.31' } group 'org.example' version '1.0-SNAPSHOT' application { mainClass = 'io.ktor.server.netty.EngineMain' } repositories { mavenCentral() } dependencies { implementation "org.jetbrains.kotlin:kotlin-stdlib" implementation "io.ktor:ktor-server-core:1.6.8" implementation "io.ktor:ktor-server-netty:1.6.8" implementation "ch.qos.logback:logback-classic:1.2.5" }plugins { application kotlin("jvm") version "1.5.31" } group = "org.example" version = "1.0-SNAPSHOT" application { mainClass.set("io.ktor.server.netty.EngineMain") } repositories { mavenCentral() } dependencies { implementation(kotlin("stdlib")) implementation("io.ktor:ktor-server-core:1.6.8") implementation("io.ktor:ktor-server-netty:1.6.8") implementation("ch.qos.logback:logback-classic:1.2.5") }
Run an application
Now we can run our Ktor application using the run Gradle task:
Open the terminal.
Execute the
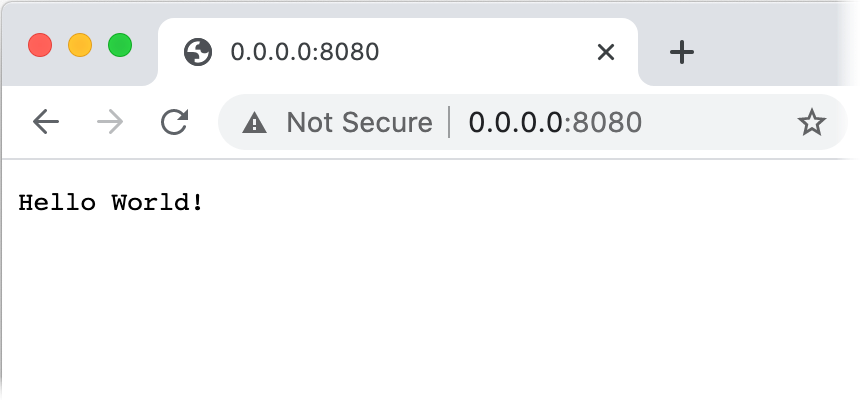
./gradlew runcommand. The following message should be shown:[main] INFO Application - Responding at http://0.0.0.0:8080This means that the server is ready to accept requests at the http://0.0.0.0:8080 address. You can click this link to open the application in a default browser:
