Integrate a database with Kotlin, Ktor, and Exposed
In this article, you will learn how to integrate your Ktor services with relational databases using Exposed, the SQL library for Kotlin.
By the end of this tutorial, you’ll learn how to do the following:
Create RESTful services that use JSON serialization.
Inject different repositories into these services.
Create unit tests for your services using fake repositories.
Build working repositories using Exposed and Dependency Injection (DI).
Deploy services that access external databases.
In previous tutorials, we used the Task Manager example to cover basics, such as handling requests, creating RESTful APIs or building Web Apps with Thymeleaf templates. While those tutorials focused on front-end functionality using a simple in-memory TaskRepository, this guide shifts focus to show how your Ktor services can interact with relational databases through the Exposed SQL Library.
Even though this guide is longer and more complex, you’ll still produce working code quickly and gradually introduce new features.
This guide will be broken down into two parts:
Prerequisites
You can do this tutorial independently, however, we recommend that you complete the Create RESTful APIs tutorial to get familiar with Content Negotiation and REST.
We recommend that you install IntelliJ IDEA, but you could use another IDE of your choice.
Create a RESTful service and an in-memory repository
First, you will recreate your Task Manager RESTful service. Initially, this will use an in-memory repository, but you will structure a design that allows it to be substituted with minimal effort.
You will do this in six stages:
Create a new project with plugins
To create a new project with the Ktor Project Generator, follow the steps below:
Navigate to the Ktor Project Generator.
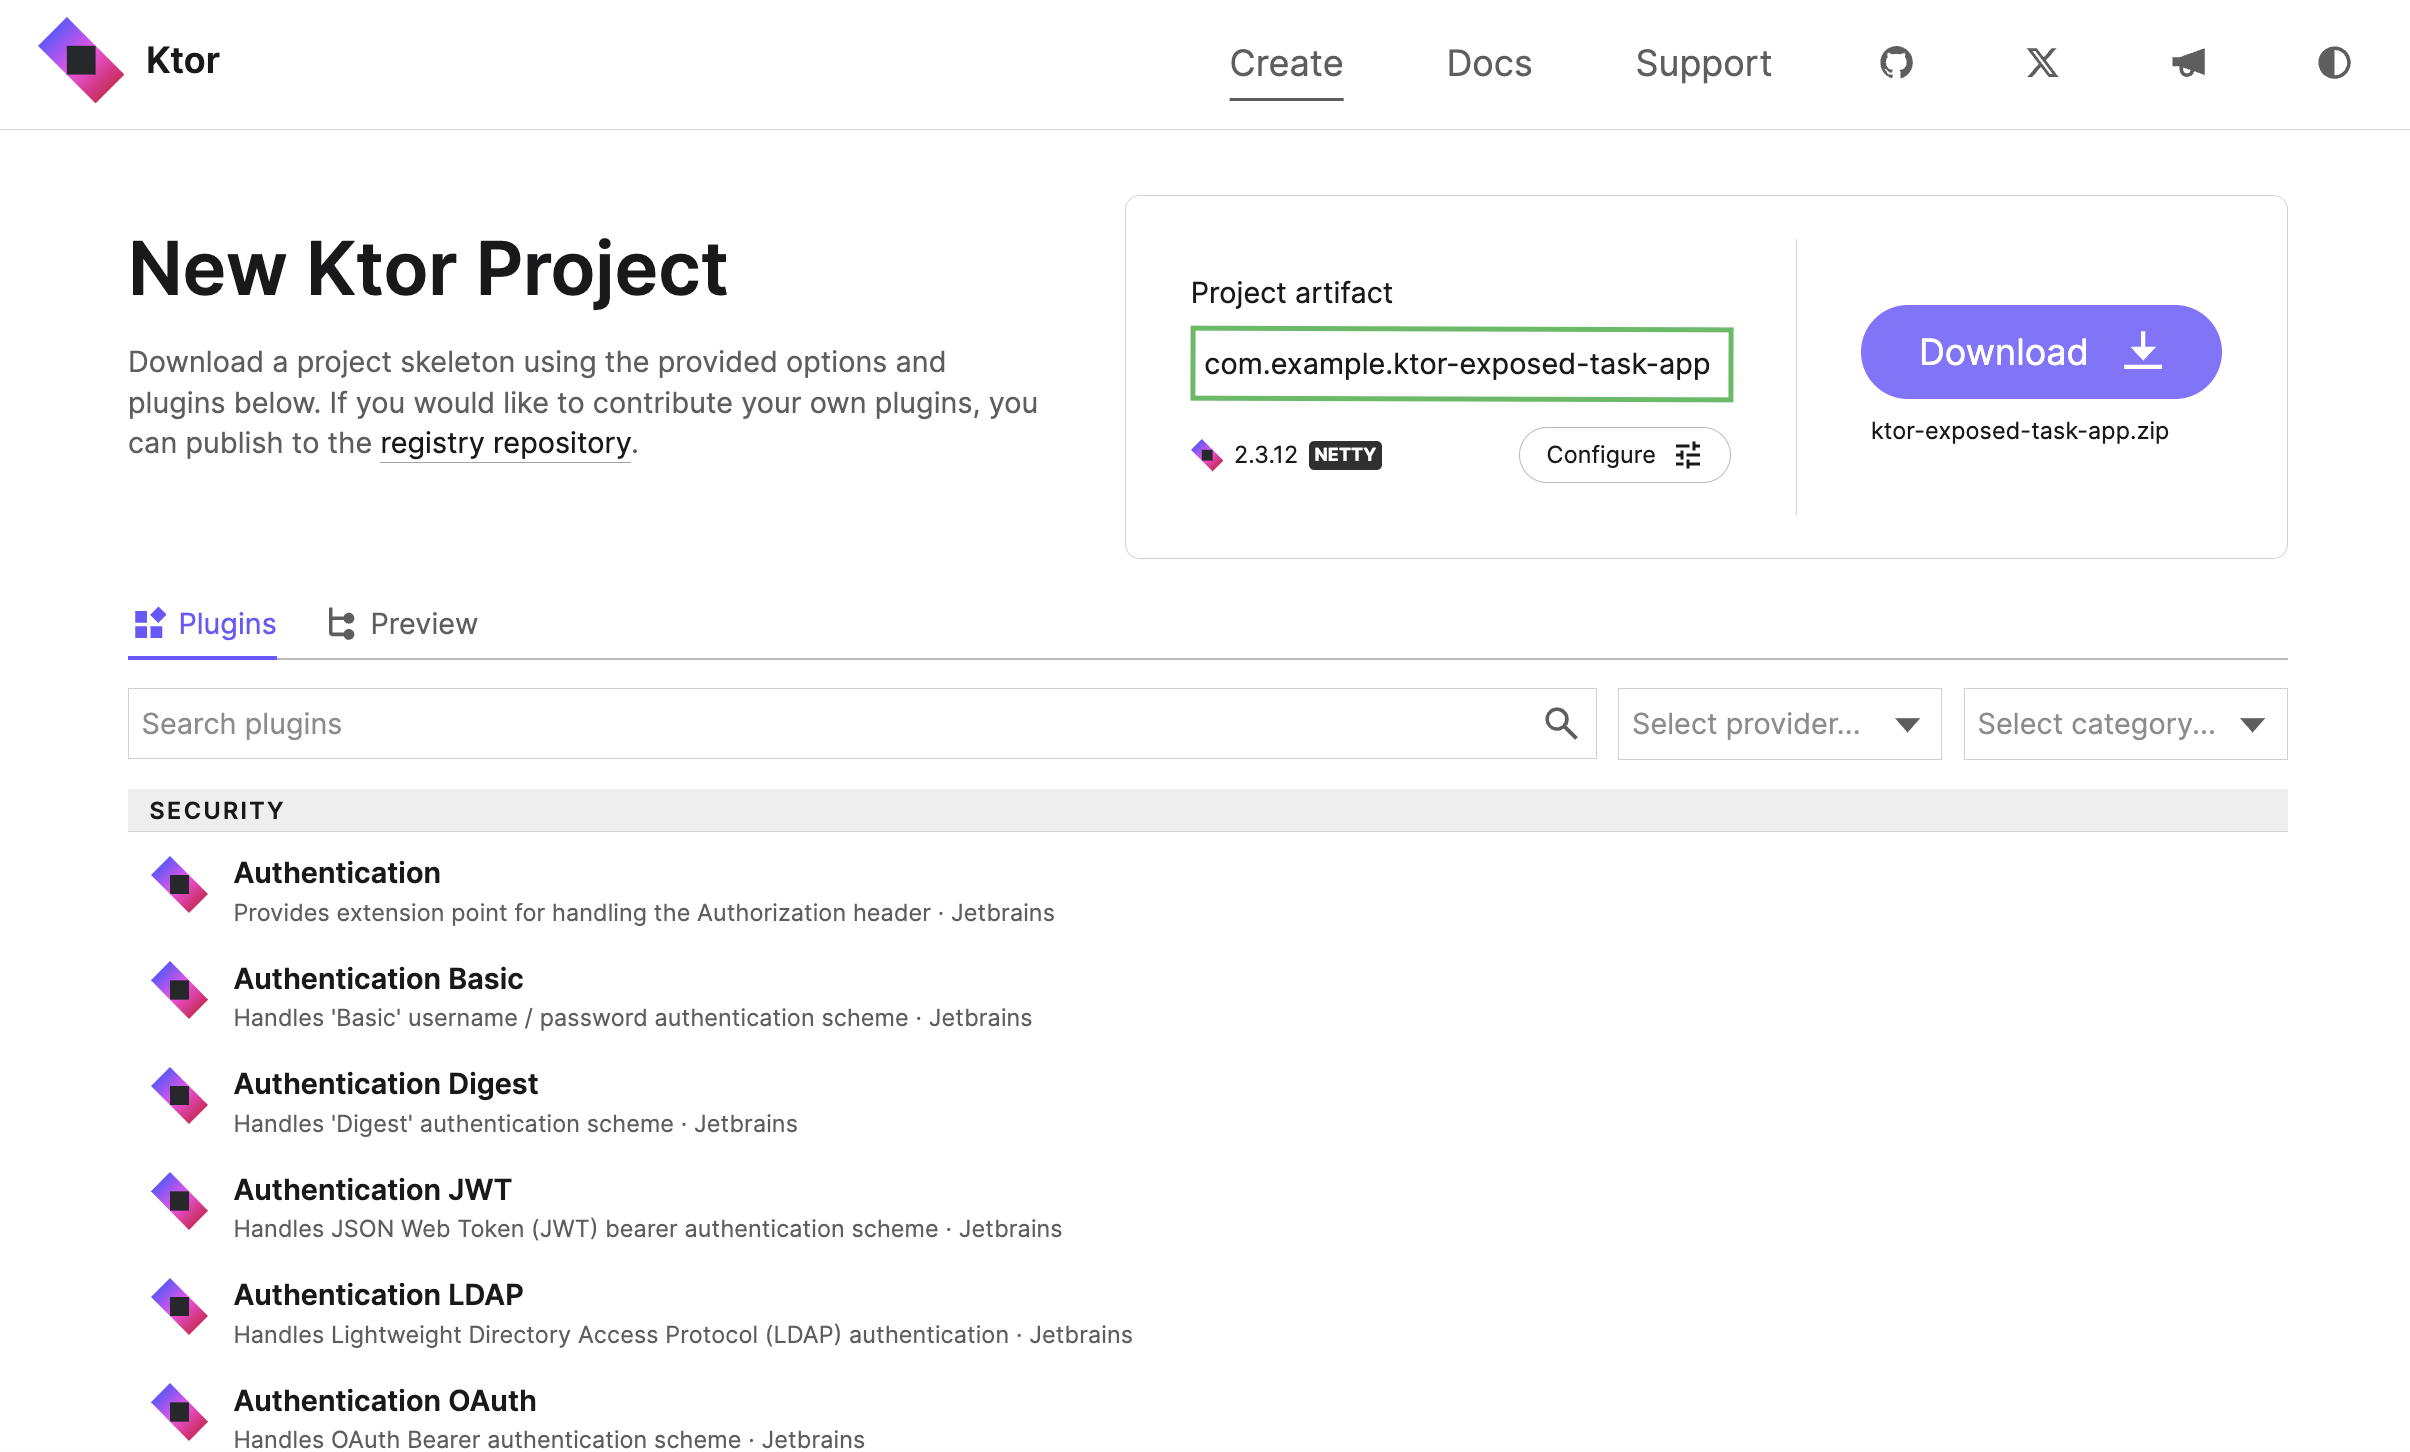
In the Project artifact field, enter com.example.ktor-exposed-task-app as the name of your project artifact.
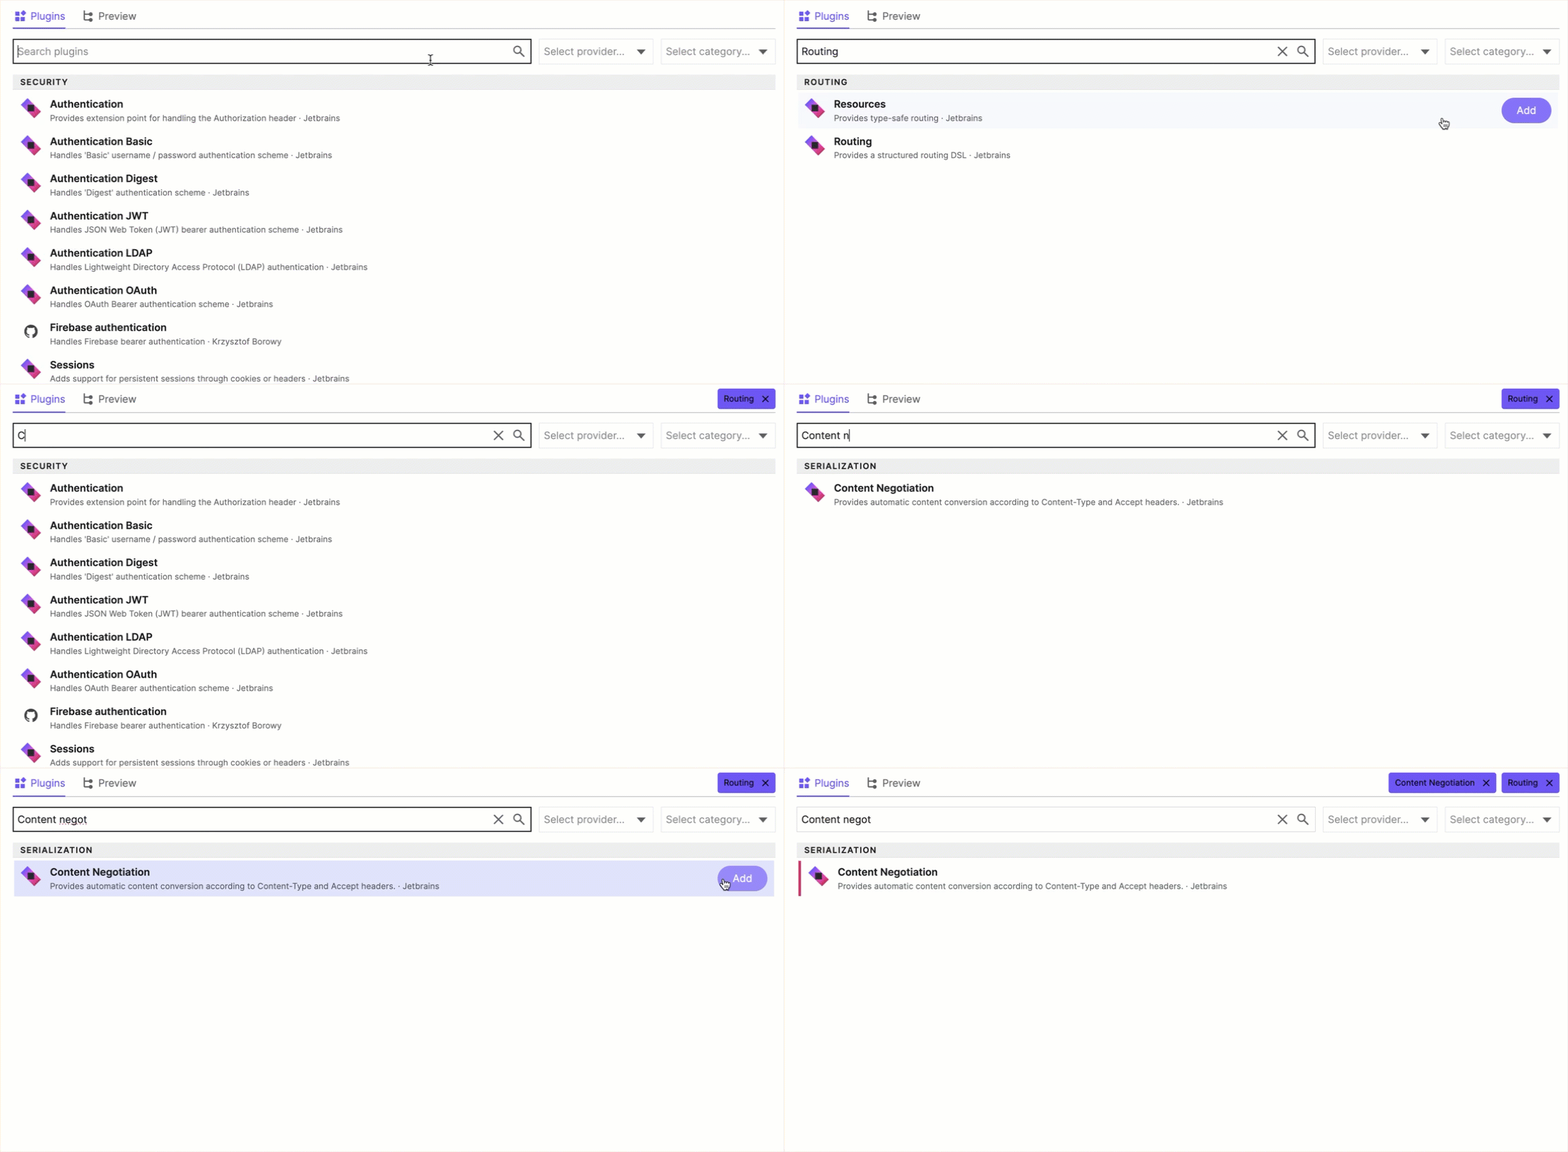
In the plugins section search for and add the following plugins by clicking on the Add button:
Routing
Content Negotiation
Kotlinx.serialization
Static Content
Status Pages
Exposed
Postgres
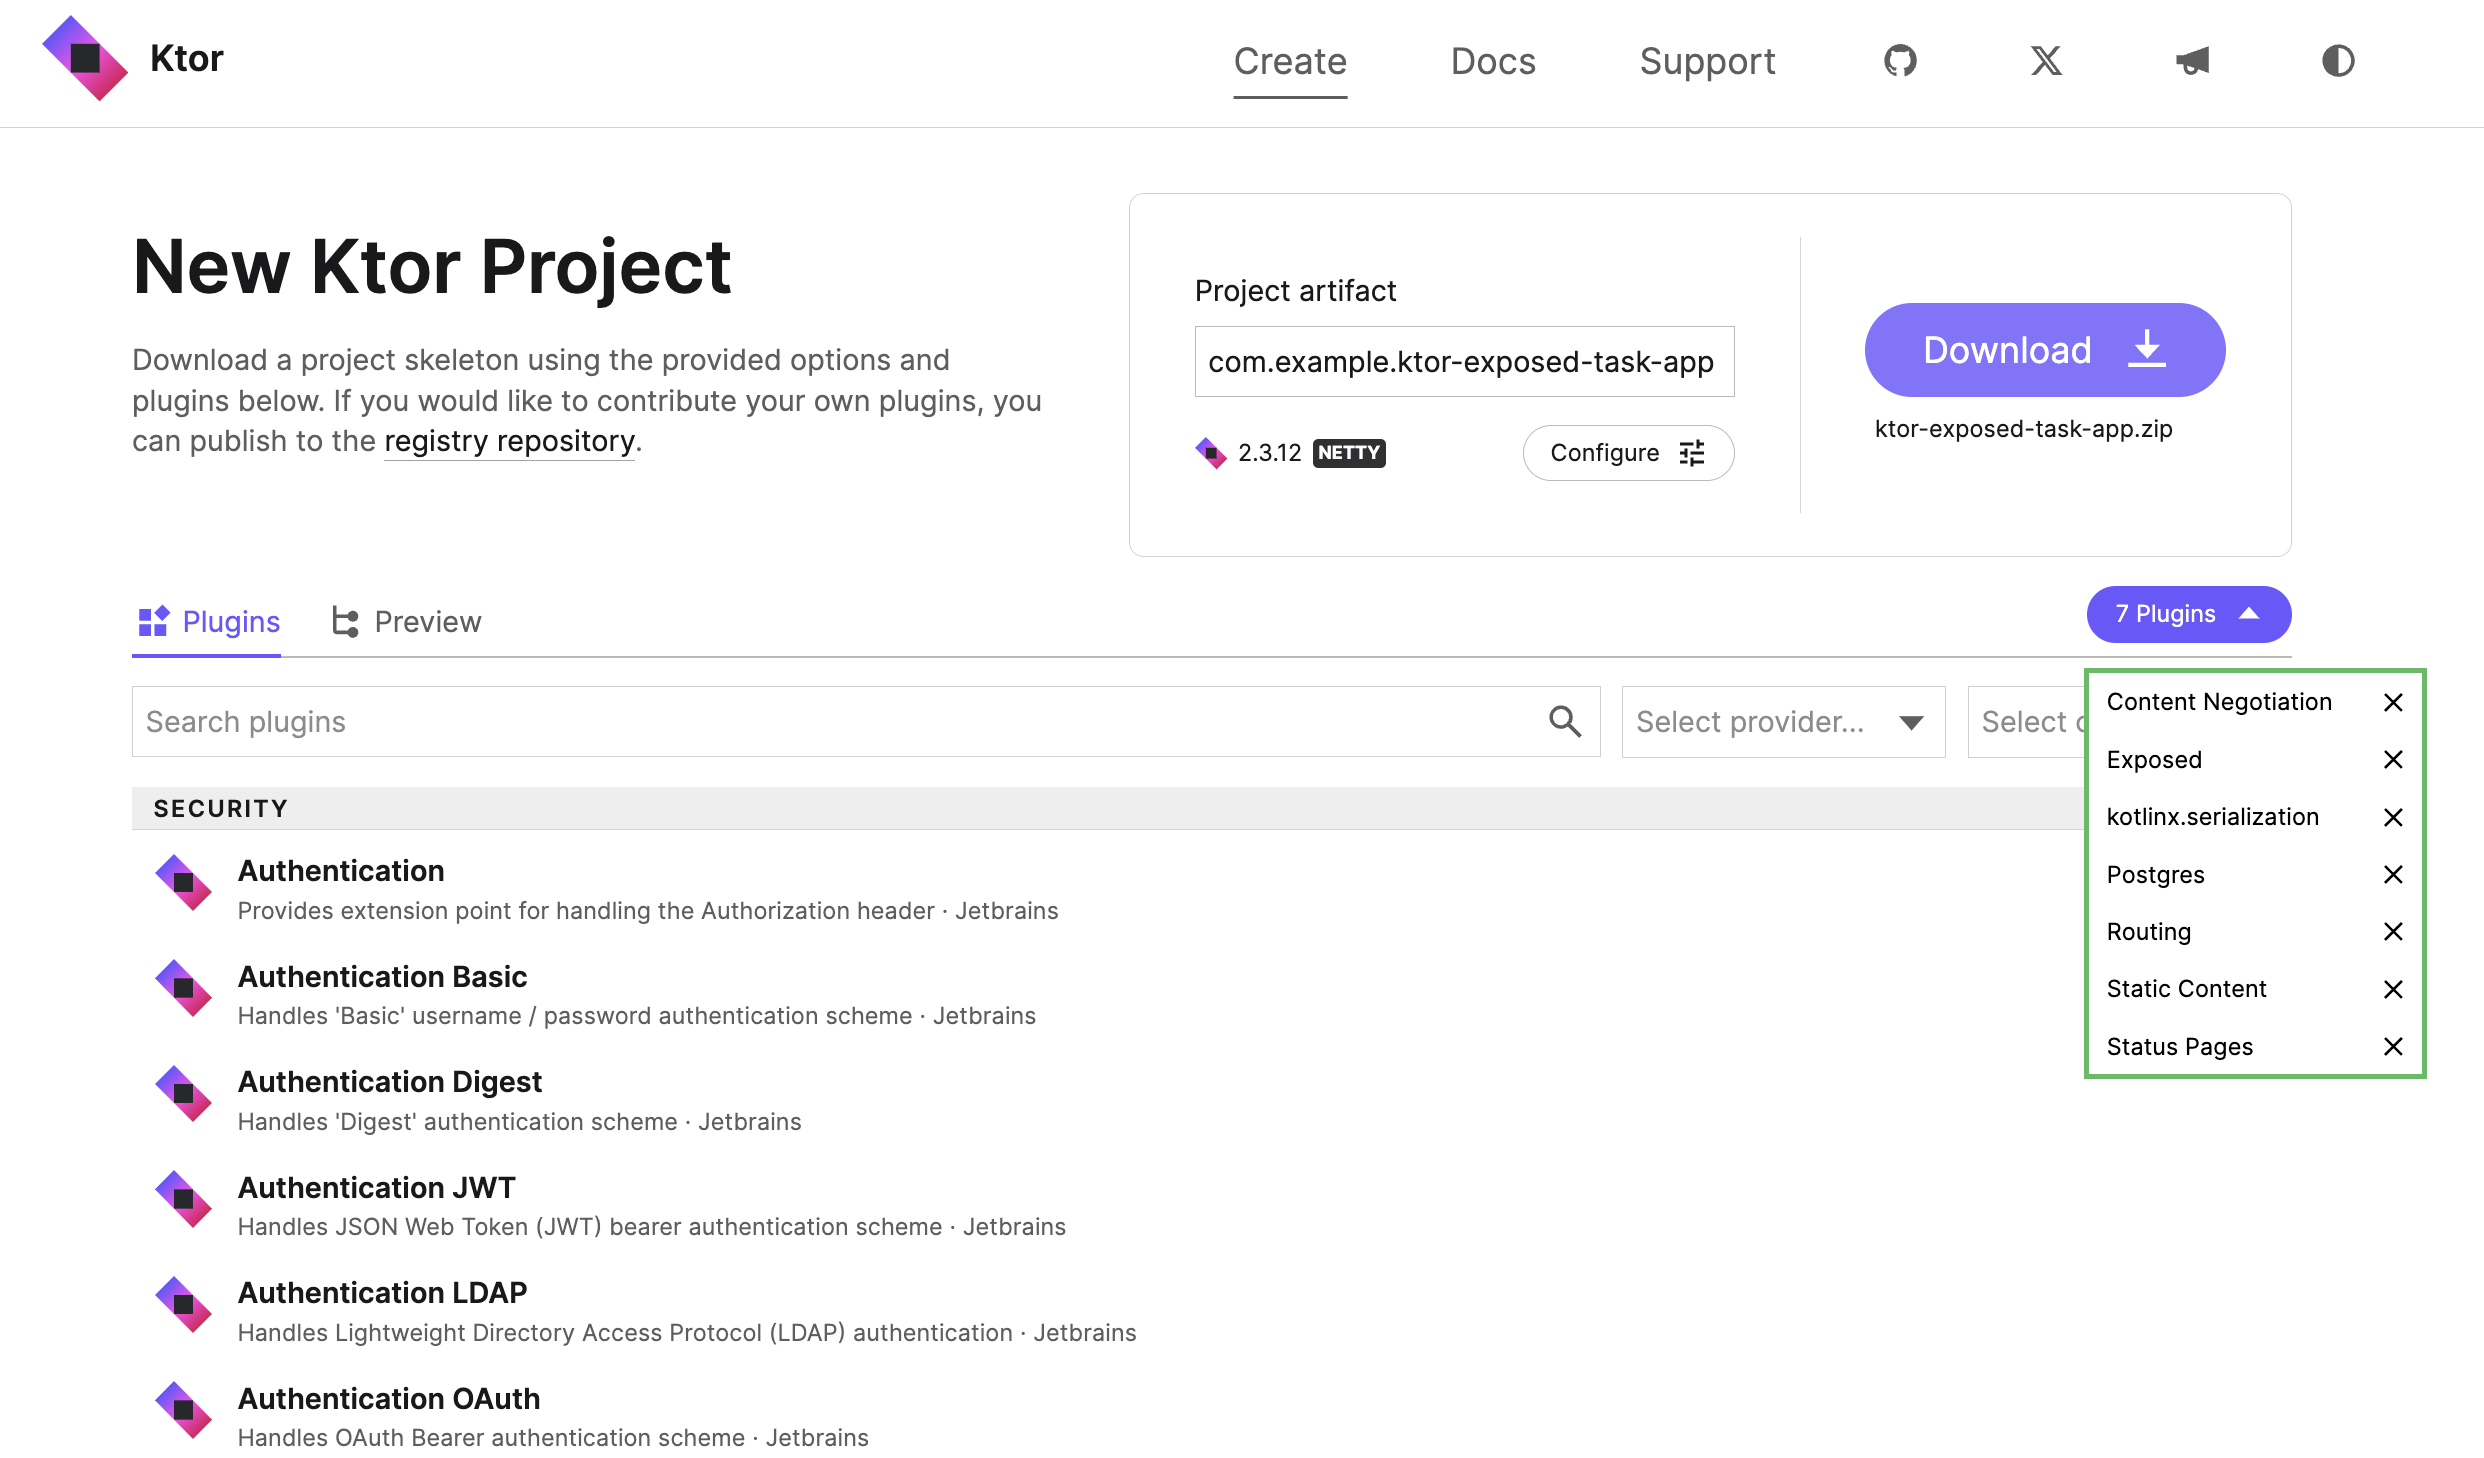
Once you have added the plugins, click on the 7 plugins button at the top right of the plugins section to see the added plugins.
You will then see a list of all the plugins that will be added to your project:
Click the Download button to generate and download your Ktor project.
Open the generated project in IntelliJ IDEA or another IDE of your choice.
Navigate to src/main/kotlin/com/example and delete the files CitySchema.kt and UsersSchema.kt.
Open the Databases.kt file and remove the content of the
configureDatabases()function.fun Application.configureDatabases() { }The reason for removing this functionality is that the Ktor Project Generator has added sample code to show how to persist data about users and cities to HSQLDB or PostgreSQL. You will not be requiring that sample code in this tutorial.
Add starter code
Navigate to src/main/kotlin/com/example and create a subpackage called model.
Inside the model package, create a new Task.kt file.
Open Task.kt and add an
enumto represent priorities and aclassto represent tasks.package com.example.model import kotlinx.serialization.Serializable enum class Priority { Low, Medium, High, Vital } @Serializable data class Task( val name: String, val description: String, val priority: Priority )The
Taskclass is annotated with theSerializabletype from the kotlinx.serialization library.As in previous tutorials, you will create an in-memory repository. However, this time the repository will implement an
interfaceso that you can easily replace it later.In the model subpackage, create a new TaskRepository.kt file.
Open TaskRepository.kt and add the following
interface:package com.example.model interface TaskRepository { fun allTasks(): List<Task> fun tasksByPriority(priority: Priority): List<Task> fun taskByName(name: String): Task? fun addTask(task: Task) fun removeTask(name: String): Boolean }Create a new FakeTaskRepository.kt file inside the same directory.
Open FakeTaskRepository.kt and add the following
class:package com.example.model class FakeTaskRepository : TaskRepository { private val tasks = mutableListOf( Task("cleaning", "Clean the house", Priority.Low), Task("gardening", "Mow the lawn", Priority.Medium), Task("shopping", "Buy the groceries", Priority.High), Task("painting", "Paint the fence", Priority.Medium) ) override fun allTasks(): List<Task> = tasks override fun tasksByPriority(priority: Priority) = tasks.filter { it.priority == priority } override fun taskByName(name: String) = tasks.find { it.name.equals(name, ignoreCase = true) } override fun addTask(task: Task) { if (taskByName(task.name) != null) { throw IllegalStateException("Cannot duplicate task names!") } tasks.add(task) } override fun removeTask(name: String): Boolean { return tasks.removeIf { it.name == name } } }
Add routes
Open the Serialization.kt file in src/main/kotlin/com/example.
Replace the existing
Application.configureSerialization()function with the implementation below:package com.example import com.example.model.Priority import com.example.model.Task import com.example.model.TaskRepository import io.ktor.http.* import io.ktor.serialization.* import io.ktor.serialization.kotlinx.json.* import io.ktor.server.application.* import io.ktor.server.plugins.contentnegotiation.* import io.ktor.server.request.* import io.ktor.server.response.* import io.ktor.server.routing.* fun Application.configureSerialization(repository: TaskRepository) { install(ContentNegotiation) { json() } routing { route("/tasks") { get { val tasks = repository.allTasks() call.respond(tasks) } get("/byName/{taskName}") { val name = call.parameters["taskName"] if (name == null) { call.respond(HttpStatusCode.BadRequest) return@get } val task = repository.taskByName(name) if (task == null) { call.respond(HttpStatusCode.NotFound) return@get } call.respond(task) } get("/byPriority/{priority}") { val priorityAsText = call.parameters["priority"] if (priorityAsText == null) { call.respond(HttpStatusCode.BadRequest) return@get } try { val priority = Priority.valueOf(priorityAsText) val tasks = repository.tasksByPriority(priority) if (tasks.isEmpty()) { call.respond(HttpStatusCode.NotFound) return@get } call.respond(tasks) } catch (ex: IllegalArgumentException) { call.respond(HttpStatusCode.BadRequest) } } post { try { val task = call.receive<Task>() repository.addTask(task) call.respond(HttpStatusCode.NoContent) } catch (ex: IllegalStateException) { call.respond(HttpStatusCode.BadRequest) } catch (ex: JsonConvertException) { call.respond(HttpStatusCode.BadRequest) } } delete("/{taskName}") { val name = call.parameters["taskName"] if (name == null) { call.respond(HttpStatusCode.BadRequest) return@delete } if (repository.removeTask(name)) { call.respond(HttpStatusCode.NoContent) } else { call.respond(HttpStatusCode.NotFound) } } } } }This is the same routing that you implemented in the Create RESTful APIs tutorial, except that you are now passing the repository into the
routing()function as a parameter. Because the type of the parameter is aninterface, many different implementations can be injected.Now that you have added a parameter to
configureSerialization(), existing calls will no longer compile. Fortunately, this function is only called once.Open the Application.kt file within src/main/kotlin/com/example.
Replace the
module()function with the implementation below:import com.example.model.FakeTaskRepository //... fun Application.module() { val repository = FakeTaskRepository() configureSerialization(repository) configureDatabases() configureRouting() }You are now injecting an instance of your
FakeTaskRepositoryintoconfigureSerialization(). The long-term goal is to be able to replace this with aPostgresTaskRepository.
Add a client page
Open the index.html file in src/main/resources/static.
Replace the current content with the implementation below:
<html> <head> <title>A Simple SPA For Tasks</title> <script type="application/javascript"> function displayAllTasks() { clearTasksTable(); fetchAllTasks().then(displayTasks) } function displayTasksWithPriority() { clearTasksTable(); const priority = readTaskPriority(); fetchTasksWithPriority(priority).then(displayTasks) } function displayTask(name) { fetchTaskWithName(name).then(t => taskDisplay().innerHTML = `${t.priority} priority task ${t.name} with description "${t.description}"` ) } function deleteTask(name) { deleteTaskWithName(name).then(() => { clearTaskDisplay(); displayAllTasks(); }) } function deleteTaskWithName(name) { return sendDELETE(`/tasks/${name}`) } function addNewTask() { const task = buildTaskFromForm(); sendPOST("/tasks", task).then(displayAllTasks); } function buildTaskFromForm() { return { name: getTaskFormValue("newTaskName"), description: getTaskFormValue("newTaskDescription"), priority: getTaskFormValue("newTaskPriority") } } function getTaskFormValue(controlName) { return document.addTaskForm[controlName].value; } function taskDisplay() { return document.getElementById("currentTaskDisplay"); } function readTaskPriority() { return document.priorityForm.priority.value } function fetchTasksWithPriority(priority) { return sendGET(`/tasks/byPriority/${priority}`); } function fetchTaskWithName(name) { return sendGET(`/tasks/byName/${name}`); } function fetchAllTasks() { return sendGET("/tasks") } function sendGET(url) { return fetch( url, {headers: {'Accept': 'application/json'}} ).then(response => { if (response.ok) { return response.json() } return []; }); } function sendPOST(url, data) { return fetch(url, { method: 'POST', headers: {'Content-Type': 'application/json'}, body: JSON.stringify(data) }); } function sendDELETE(url) { return fetch(url, { method: "DELETE" }); } function tasksTable() { return document.getElementById("tasksTableBody"); } function clearTasksTable() { tasksTable().innerHTML = ""; } function clearTaskDisplay() { taskDisplay().innerText = "None"; } function displayTasks(tasks) { const tasksTableBody = tasksTable() tasks.forEach(task => { const newRow = taskRow(task); tasksTableBody.appendChild(newRow); }); } function taskRow(task) { return tr([ td(task.name), td(task.priority), td(viewLink(task.name)), td(deleteLink(task.name)), ]); } function tr(children) { const node = document.createElement("tr"); children.forEach(child => node.appendChild(child)); return node; } function td(content) { const node = document.createElement("td"); if (content instanceof Element) { node.appendChild(content) } else { node.appendChild(document.createTextNode(content)); } return node; } function viewLink(taskName) { const node = document.createElement("a"); node.setAttribute( "href", `javascript:displayTask("${taskName}")` ) node.appendChild(document.createTextNode("view")); return node; } function deleteLink(taskName) { const node = document.createElement("a"); node.setAttribute( "href", `javascript:deleteTask("${taskName}")` ) node.appendChild(document.createTextNode("delete")); return node; } </script> </head> <body onload="displayAllTasks()"> <h1>Task Manager Client</h1> <form action="javascript:displayAllTasks()"> <span>View all the tasks</span> <input type="submit" value="Go"> </form> <form name="priorityForm" action="javascript:displayTasksWithPriority()"> <span>View tasks with priority</span> <select name="priority"> <option name="Low">Low</option> <option name="Medium">Medium</option> <option name="High">High</option> <option name="Vital">Vital</option> </select> <input type="submit" value="Go"> </form> <form name="addTaskForm" action="javascript:addNewTask()"> <span>Create new task with</span> <label for="newTaskName">name</label> <input type="text" id="newTaskName" name="newTaskName" size="10"> <label for="newTaskDescription">description</label> <input type="text" id="newTaskDescription" name="newTaskDescription" size="20"> <label for="newTaskPriority">priority</label> <select id="newTaskPriority" name="newTaskPriority"> <option name="Low">Low</option> <option name="Medium">Medium</option> <option name="High">High</option> <option name="Vital">Vital</option> </select> <input type="submit" value="Go"> </form> <hr> <div> Current task is <em id="currentTaskDisplay">None</em> </div> <hr> <table> <thead> <tr> <th>Name</th> <th>Priority</th> <th></th> <th></th> </tr> </thead> <tbody id="tasksTableBody"> </tbody> </table> </body> </html>This is the same SPA that was used in previous tutorials. Because it is written in JavaScript and only uses libraries available within the browser, you do not have to worry about client-side dependencies.
Test the application manually
Because this first iteration is using an in-memory repository instead of connecting to a database, you need to ensure the application is properly configured.
Navigate to src/main/resources/application.yaml and remove the
postgresconfiguration.ktor: application: modules: - com.example.ApplicationKt.module deployment: port: 8080In IntelliJ IDEA, click on the run button (
) to start the application.
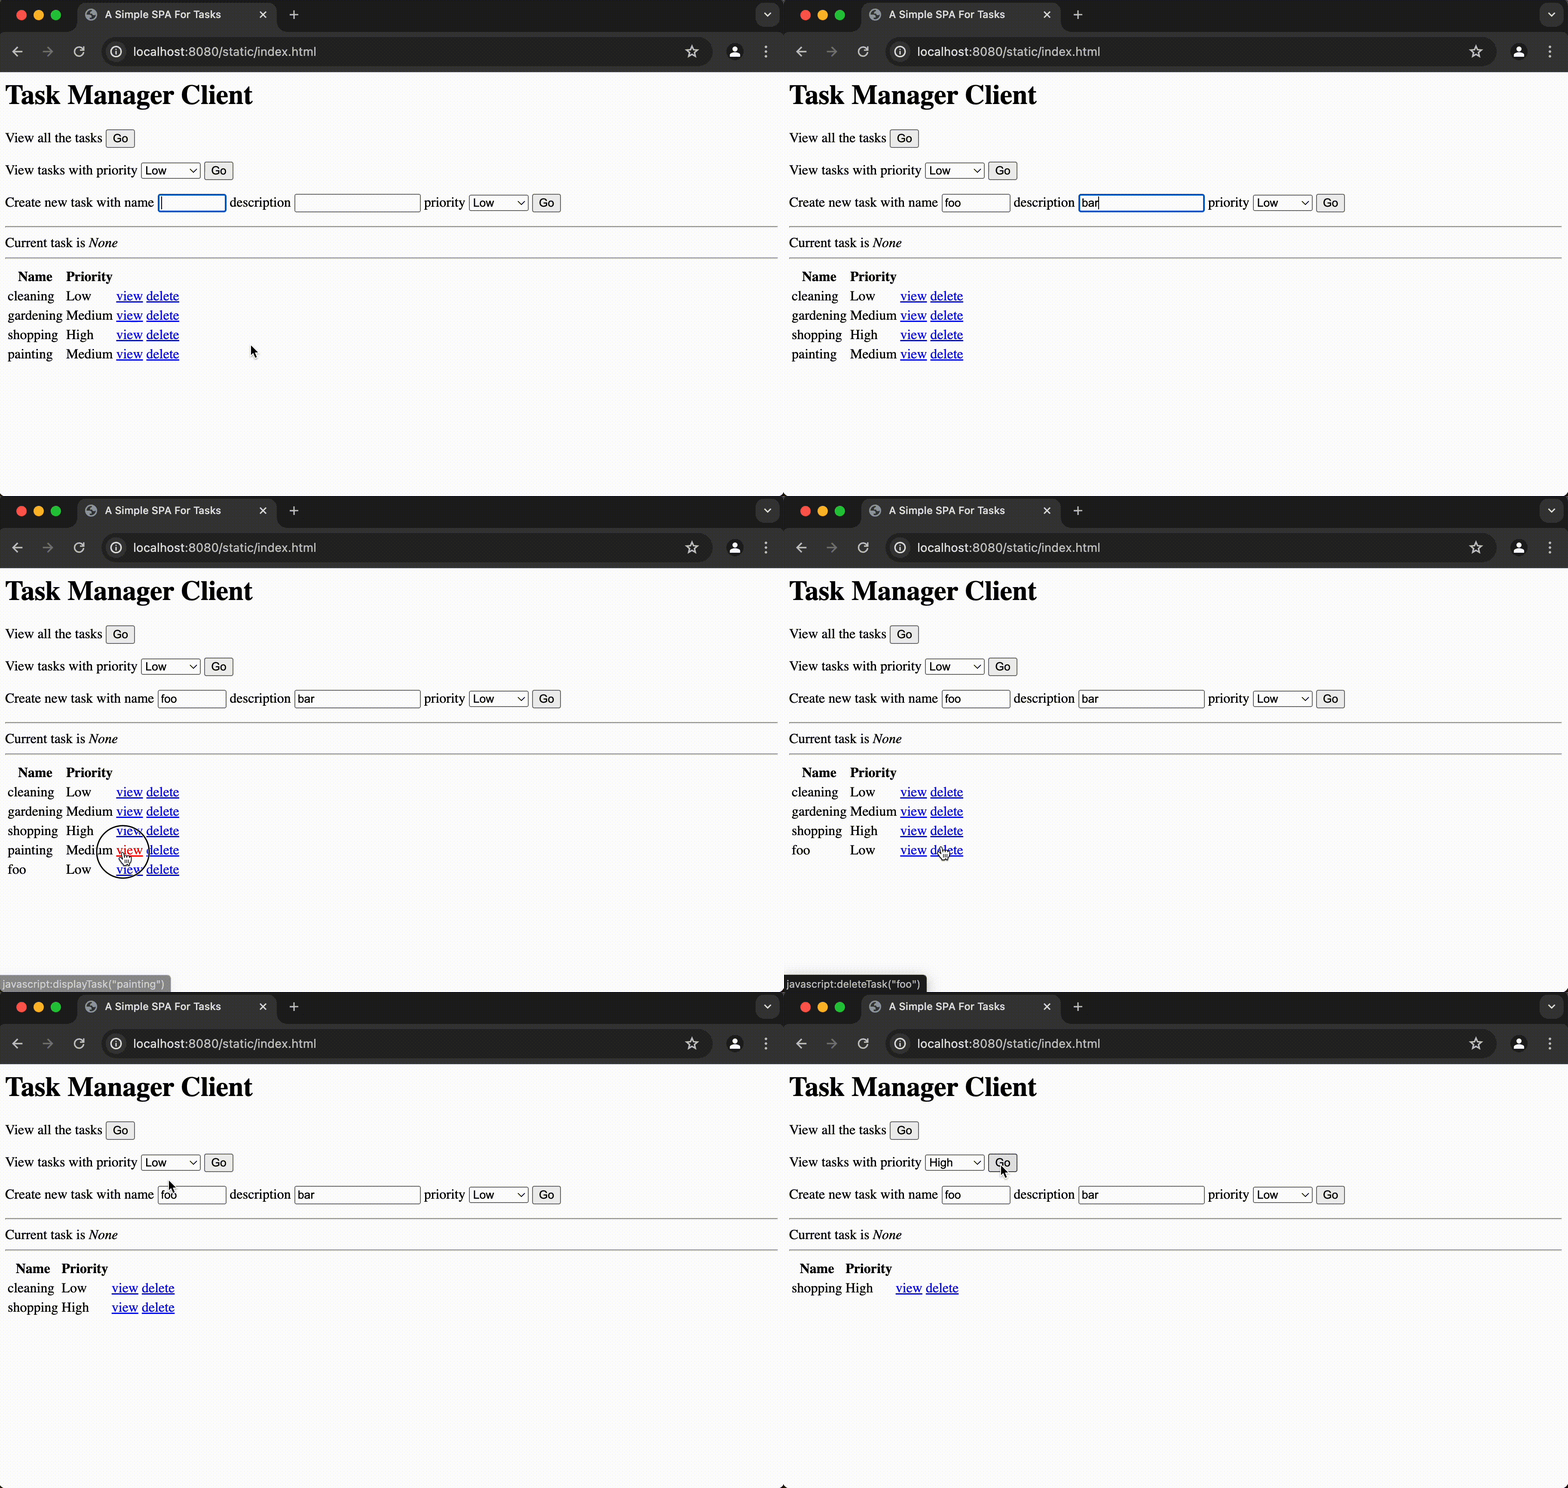
Navigate to http://0.0.0.0:8080/static/index.html in your browser. You should see the client page consisting of three forms and a table displaying the filtered results.
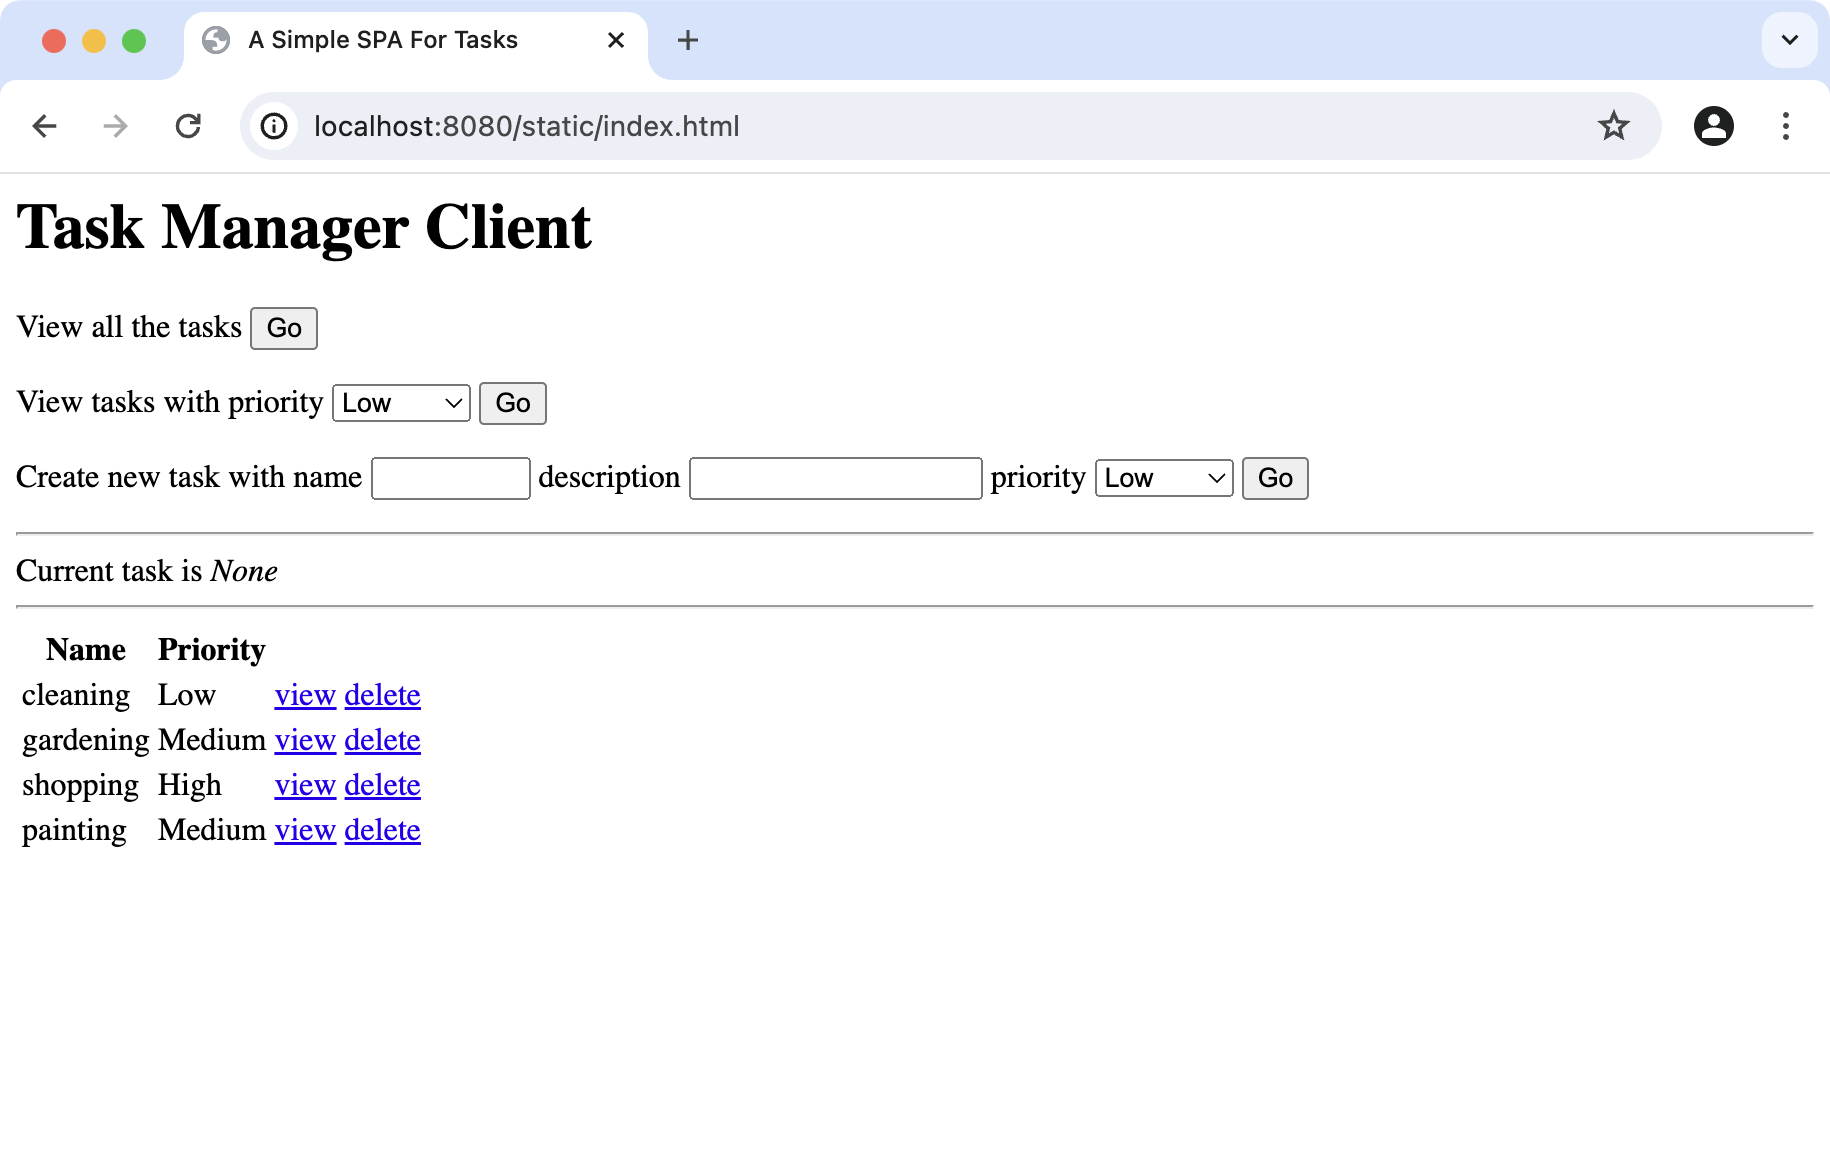
Test the application by filling out and sending the forms using the Go buttons. Use the View and Delete buttons on the table items.
Add automated unit tests
Open ApplicationTest.kt in src/test/kotlin/com/example and add the following tests:
package com.example import com.example.model.Priority import com.example.model.Task import io.ktor.client.call.* import io.ktor.client.plugins.contentnegotiation.* import io.ktor.client.request.* import io.ktor.http.* import io.ktor.serialization.kotlinx.json.* import io.ktor.server.testing.* import kotlin.test.* class ApplicationTest { @Test fun tasksCanBeFoundByPriority() = testApplication { application { val repository = FakeTaskRepository() configureSerialization(repository) configureRouting() } val client = createClient { install(ContentNegotiation) { json() } } val response = client.get("/tasks/byPriority/Medium") val results = response.body<List<Task>>() assertEquals(HttpStatusCode.OK, response.status) val expectedTaskNames = listOf("gardening", "painting") val actualTaskNames = results.map(Task::name) assertContentEquals(expectedTaskNames, actualTaskNames) } @Test fun invalidPriorityProduces400() = testApplication { application { val repository = FakeTaskRepository() configureSerialization(repository) configureRouting() } val response = client.get("/tasks/byPriority/Invalid") assertEquals(HttpStatusCode.BadRequest, response.status) } @Test fun unusedPriorityProduces404() = testApplication { application { val repository = FakeTaskRepository() configureSerialization(repository) configureRouting() } val response = client.get("/tasks/byPriority/Vital") assertEquals(HttpStatusCode.NotFound, response.status) } @Test fun newTasksCanBeAdded() = testApplication { application { val repository = FakeTaskRepository() configureSerialization(repository) configureRouting() } val client = createClient { install(ContentNegotiation) { json() } } val task = Task("swimming", "Go to the beach", Priority.Low) val response1 = client.post("/tasks") { header( HttpHeaders.ContentType, ContentType.Application.Json ) setBody(task) } assertEquals(HttpStatusCode.NoContent, response1.status) val response2 = client.get("/tasks") assertEquals(HttpStatusCode.OK, response2.status) val taskNames = response2 .body<List<Task>>() .map { it.name } assertContains(taskNames, "swimming") } }For these tests to compile and run, you will need to add a dependency on the Content Negotiation plugin for the Ktor Client.
Open the gradle/libs.versions.toml file and specify the following library:
[libraries] #... ktor-client-content-negotiation = { module = "io.ktor:ktor-client-content-negotiation", version.ref = "ktor-version" }Open the build.gradle.kts and add the following dependency:
dependencies { //... testImplementation(libs.ktor.client.content.negotiation) }In intelliJ IDEA, click on the notification Gradle icon (
) on the right side of the editor to load Gradle changes.
In IntelliJ IDEA, click on the run button (
) next to the test class definition to run the tests.
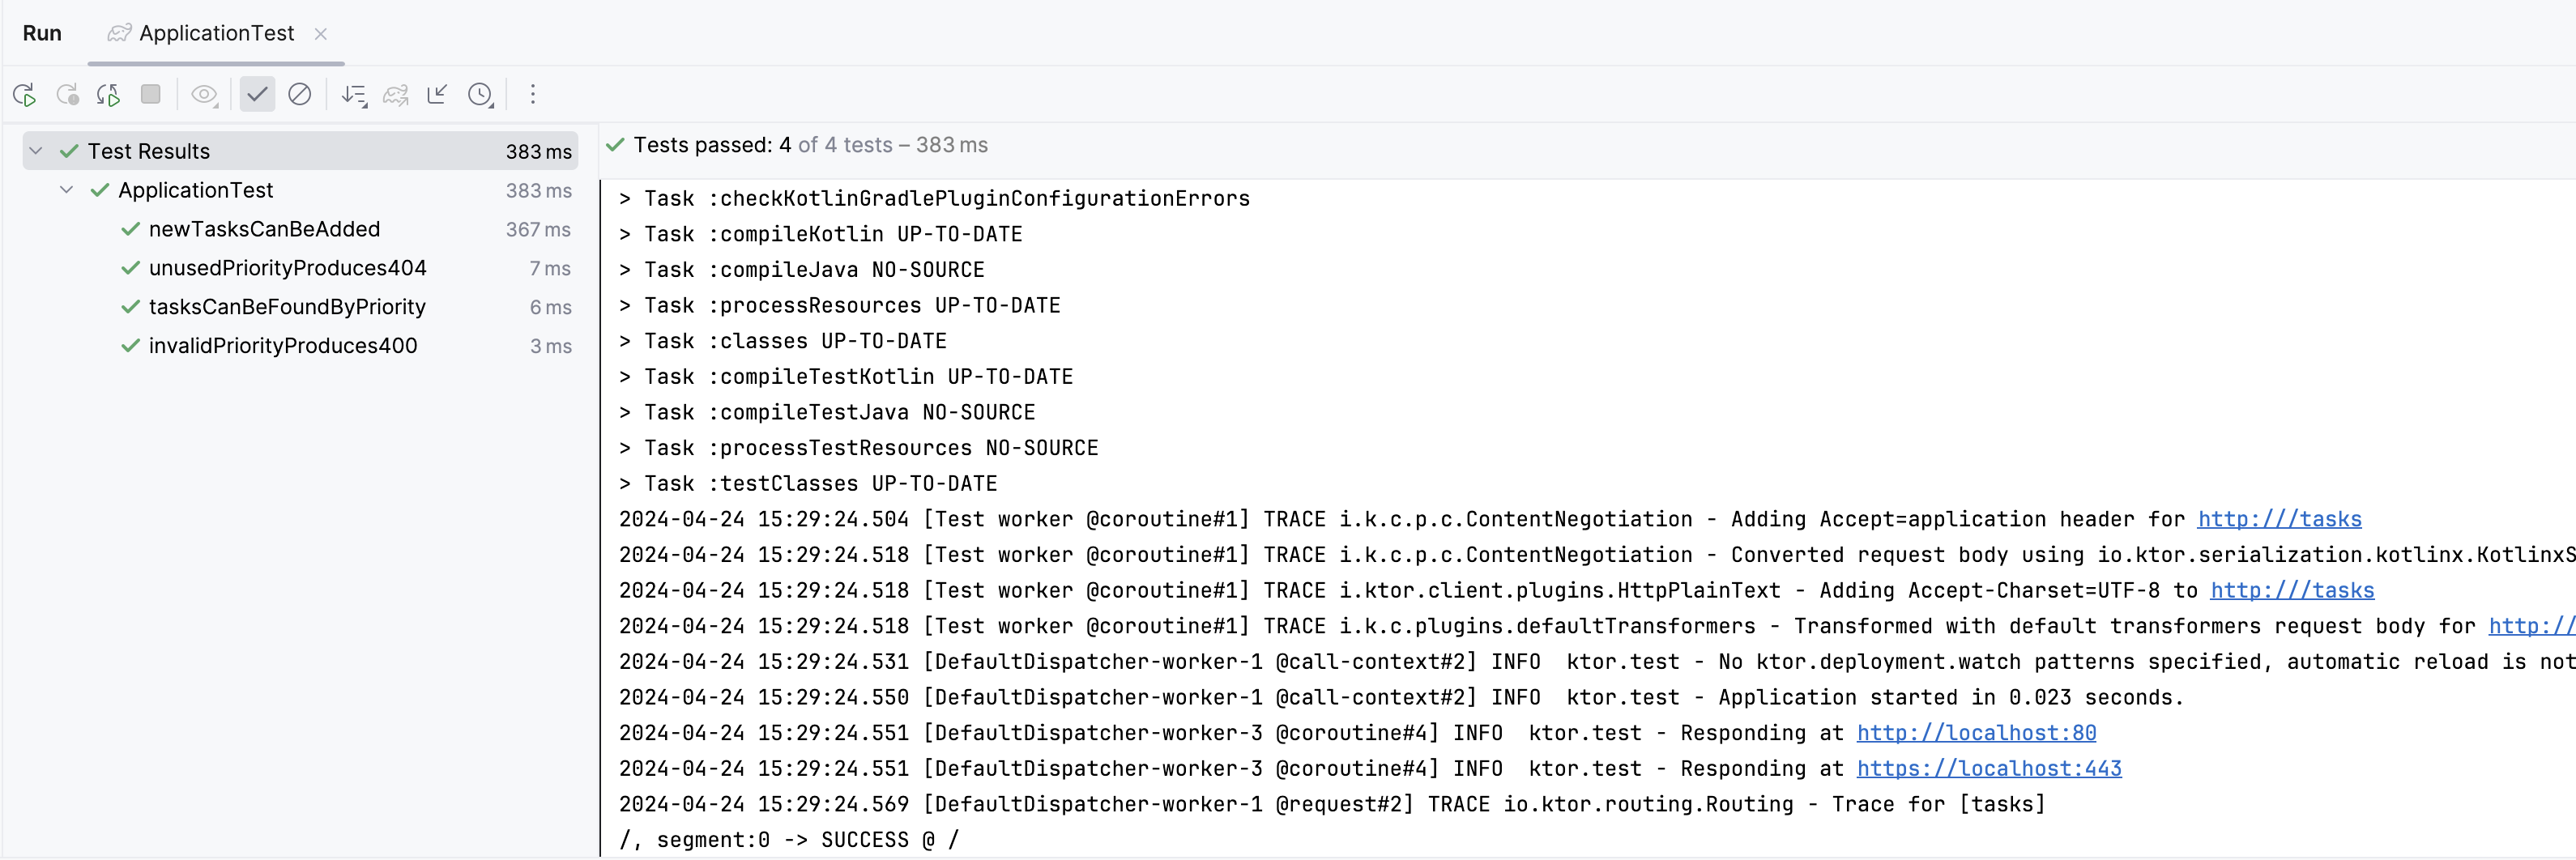
You should then see that the tests ran successfully in the Run pane.
Add a PostgreSQL Repository
Now that you have a working application that uses in-memory data, the next step is to externalize the data storage to a PostgreSQL database.
You will achieve this by doing the following:
Create the database schema
Using your database management tool of choice, create a new database within PostgreSQL. The name does not matter as long as you remember it. In this example, we will use ktor_tutorial_db.
Run the SQL commands below against your database. These commands will create and populate the database schema:
DROP TABLE IF EXISTS task; CREATE TABLE task(id SERIAL PRIMARY KEY, name VARCHAR(50), description VARCHAR(50), priority VARCHAR(50)); INSERT INTO task (name, description, priority) VALUES ('cleaning', 'Clean the house', 'Low'); INSERT INTO task (name, description, priority) VALUES ('gardening', 'Mow the lawn', 'Medium'); INSERT INTO task (name, description, priority) VALUES ('shopping', 'Buy the groceries', 'High'); INSERT INTO task (name, description, priority) VALUES ('painting', 'Paint the fence', 'Medium'); INSERT INTO task (name, description, priority) VALUES ('exercising', 'Walk the dog', 'Medium'); INSERT INTO task (name, description, priority) VALUES ('meditating', 'Contemplate the infinite', 'High');Note the following:
You are creating a single table called task, with columns for the name, description, and priority. These will need to be mapped to the properties of the
Taskclass.You are re-creating the table if it already exists, so you can run the script repeatedly.
There is an additional column called id, which is of type
SERIAL. This will be an integer value, used to give each row its primary key. These values will be assigned by the database on your behalf.
Adapt the existing repository
When executing queries against the database, it's preferable for them to run asynchronously to avoid blocking the thread handling the HTTP request. In Kotlin, this is best managed through coroutines.
Open the TaskRepository.kt file in src/main/kotlin/com/example/model.
Add the
suspendkeyword to all interface methods:interface TaskRepository { suspend fun allTasks(): List<Task> suspend fun tasksByPriority(priority: Priority): List<Task> suspend fun taskByName(name: String): Task? suspend fun addTask(task: Task) suspend fun removeTask(name: String): Boolean }This will allow implementations of the interface methods to start jobs of work on a different Coroutine Dispatcher.
You now need to adjust the methods of the
FakeTaskRepositoryto match, although you do not need to switch Dispatcher in that implementation.Open the FakeTaskRepository.kt file and add the
suspendkeyword to all methods:class FakeTaskRepository : TaskRepository { //... override suspend fun allTasks(): List<Task> = tasks override suspend fun tasksByPriority(priority: Priority) = tasks.filter { //... } override suspend fun taskByName(name: String) = tasks.find { //... } override suspend fun addTask(task: Task) { //... } override suspend fun removeTask(name: String): Boolean { //... } }Up to this point, you haven’t introduced any new functionality. Instead, you’ve laid the groundwork for creating a
PostgresTaskRepositorythat will asynchronously run queries against the database.
Configure the database connection
In the first part of this tutorial, you deleted the sample code in the configureDatabases() method, found within Databases.kt. You are now ready to add in your own implementation.
Open the Databases.kt file in src/main/kotlin/com/example.
Use the
Database.connect()function to connect to your database, adjusting the values of the settings to match your environment:fun Application.configureDatabases() { Database.connect( "jdbc:postgresql://localhost:5432/ktor_tutorial_db", user = "postgres", password = "password" ) }Note that the
urlincludes the following components:localhost:5432is the host and port on which the PostgreSQL database is running.ktor_tutorial_dbis the name of the database created when running services.
Create the Object / Relational mapping
Navigate to src/main/kotlin/com/example and create a new package called db.
Inside the db package, create a new mapping.kt file.
Open mapping.kt and add the types
TaskTableandTaskDAO:package com.example.db import kotlinx.coroutines.Dispatchers import org.jetbrains.exposed.dao.IntEntity import org.jetbrains.exposed.dao.IntEntityClass import org.jetbrains.exposed.dao.id.EntityID import org.jetbrains.exposed.dao.id.IntIdTable object TaskTable : IntIdTable("task") { val name = varchar("name", 50) val description = varchar("description", 50) val priority = varchar("priority", 50) } class TaskDAO(id: EntityID<Int>) : IntEntity(id) { companion object : IntEntityClass<TaskDAO>(TaskTable) var name by TaskTable.name var description by TaskTable.description var priority by TaskTable.priority }These types use the Exposed library to map the properties in the
Tasktype to the columns in the task table in the database. TheTaskTabletype defines the basic mapping, whilst theTaskDAOtype adds the helper methods to create, find, update, and delete tasks.Support for the DAO types hasn’t been added by the Ktor Project Generator, so you will need to add the relevant dependency in the Gradle build file.
Open the gradle/libs.versions.toml file and specify the following library:
[libraries] #... exposed-dao = { module = "org.jetbrains.exposed:exposed-dao", version.ref = "exposed-version" }Open the build.gradle.kts file and add the following dependency:
dependencies { //... implementation(libs.exposed.dao) }In intelliJ IDEA, click on the notification Gradle icon (
) on the right side of the editor to load Gradle changes.
Navigate back to the mapping.kt file and add the following two helper functions:
suspend fun <T> suspendTransaction(block: Transaction.() -> T): T = newSuspendedTransaction(Dispatchers.IO, statement = block) fun daoToModel(dao: TaskDAO) = Task( dao.name, dao.description, Priority.valueOf(dao.priority) )suspendTransaction()takes a block of code and runs it within a database transaction, through the IO Dispatcher. This is designed to offload blocking jobs of work onto a thread pool.daoToModel()transforms an instance of theTaskDAOtype to theTaskobject.Add the following missing imports:
import com.example.model.Priority import com.example.model.Task import org.jetbrains.exposed.sql.Transaction import org.jetbrains.exposed.sql.transactions.experimental.newSuspendedTransaction
Write the New Repository
You now have all the resources needed to create a database-specific repository.
Navigate to src/main/kotlin/com/example/model and create a new PostgresTaskRepository.kt file.
Open the PostgresTaskRepository.kt file and create a new type with the following implementation:
package com.example.model import com.example.db.TaskDAO import com.example.db.TaskTable import com.example.db.daoToModel import com.example.db.suspendTransaction import org.jetbrains.exposed.sql.SqlExpressionBuilder.eq import org.jetbrains.exposed.sql.deleteWhere class PostgresTaskRepository : TaskRepository { override suspend fun allTasks(): List<Task> = suspendTransaction { TaskDAO.all().map(::daoToModel) } override suspend fun tasksByPriority(priority: Priority): List<Task> = suspendTransaction { TaskDAO .find { (TaskTable.priority eq priority.toString()) } .map(::daoToModel) } override suspend fun taskByName(name: String): Task? = suspendTransaction { TaskDAO .find { (TaskTable.name eq name) } .limit(1) .map(::daoToModel) .firstOrNull() } override suspend fun addTask(task: Task): Unit = suspendTransaction { TaskDAO.new { name = task.name description = task.description priority = task.priority.toString() } } override suspend fun removeTask(name: String): Boolean = suspendTransaction { val rowsDeleted = TaskTable.deleteWhere { TaskTable.name eq name } rowsDeleted == 1 } }In this implementation, you use the helper methods of the
TaskDAOandTaskTabletypes to interact with the database. Having created this new repository, the only remaining task is to switch to using it within your routes.
Switch to the new repository
To switch to an external database, you simply need to change the repository type.
Open the Application.kt file in src/main/kotlin/com/example.
In the
Application.module()function, replaceFakeTaskRepositorywithPostgresTaskRepository://... import com.example.model.PostgresTaskRepository //... fun Application.module() { val repository = PostgresTaskRepository() configureSerialization(repository) configureDatabases() configureRouting() }Because you are injecting the dependency through the interface, the switch in implementation is transparent to the code for managing routes.
In IntelliJ IDEA, click the rerun button (
) to restart the application.
Navigate to http://0.0.0.0:8080/static/index.html. The UI remains unchanged, but it now fetches the data from the database.
To verify this, add a new task using the form and query the data held in the tasks table in PostgreSQL.
With this, you have successfully completed integrating a database into your application.
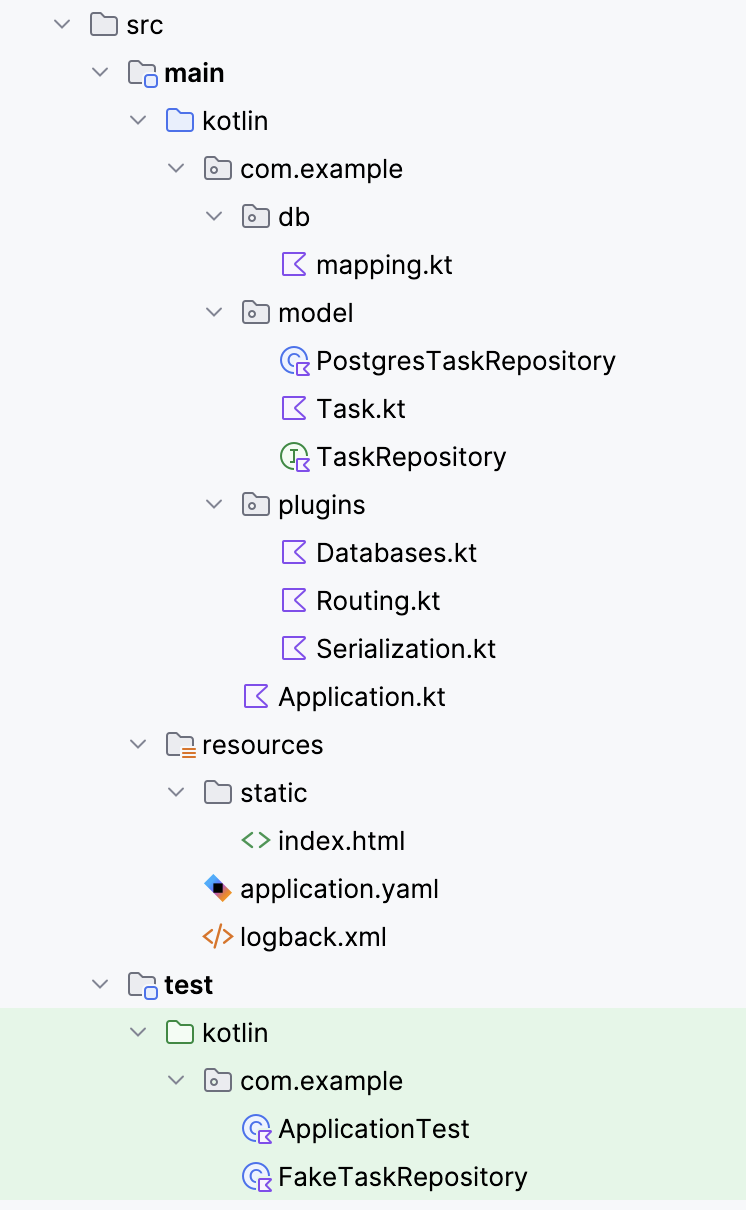
As the FakeTaskRepository type is no longer needed in production code, you can move it to the testing source set, in src/test/com/example.
The final project structure should look something like this:
Next steps
You now have an application communicating with a Ktor RESTful service. This in turn uses a repository written with Exposed to access PostgreSQL. You also have a suite of tests that verifies the core functionality, without requiring either a web server or a database.
This structure can be expanded as required to support arbitrary functionality, however, you might want to consider non-functional aspects of the design first, such as fault-tolerance, security, and scalability. You can start by extracting the database connection settings to a configuration file.
