Create, open, and run a new Ktor project
In this tutorial, you will learn how to create, open and run your first Ktor server project. Once you get up and running, you can complete a series of tasks to familiarize yourself with Ktor.
This is the first of a series of tutorials to get you started with building server applications with Ktor. You can do each tutorial independently, however, we strongly recommend that you follow the suggested order:
Create, open, and run a new Ktor project.
Create a new Ktor project
One of the fastest ways to create a new Ktor project is by using the web-based Ktor project generator.
Alternatively, you can generate a project using the dedicated Ktor plugin for IntelliJ IDEA Ultimate or the Ktor CLI tool.
Use the Ktor project generator
To create a new project with the Ktor project generator, follow the steps below:
Navigate to the Ktor project generator.
In the Project artifact field, enter com.example.ktor-sample as the name of your project artifact.
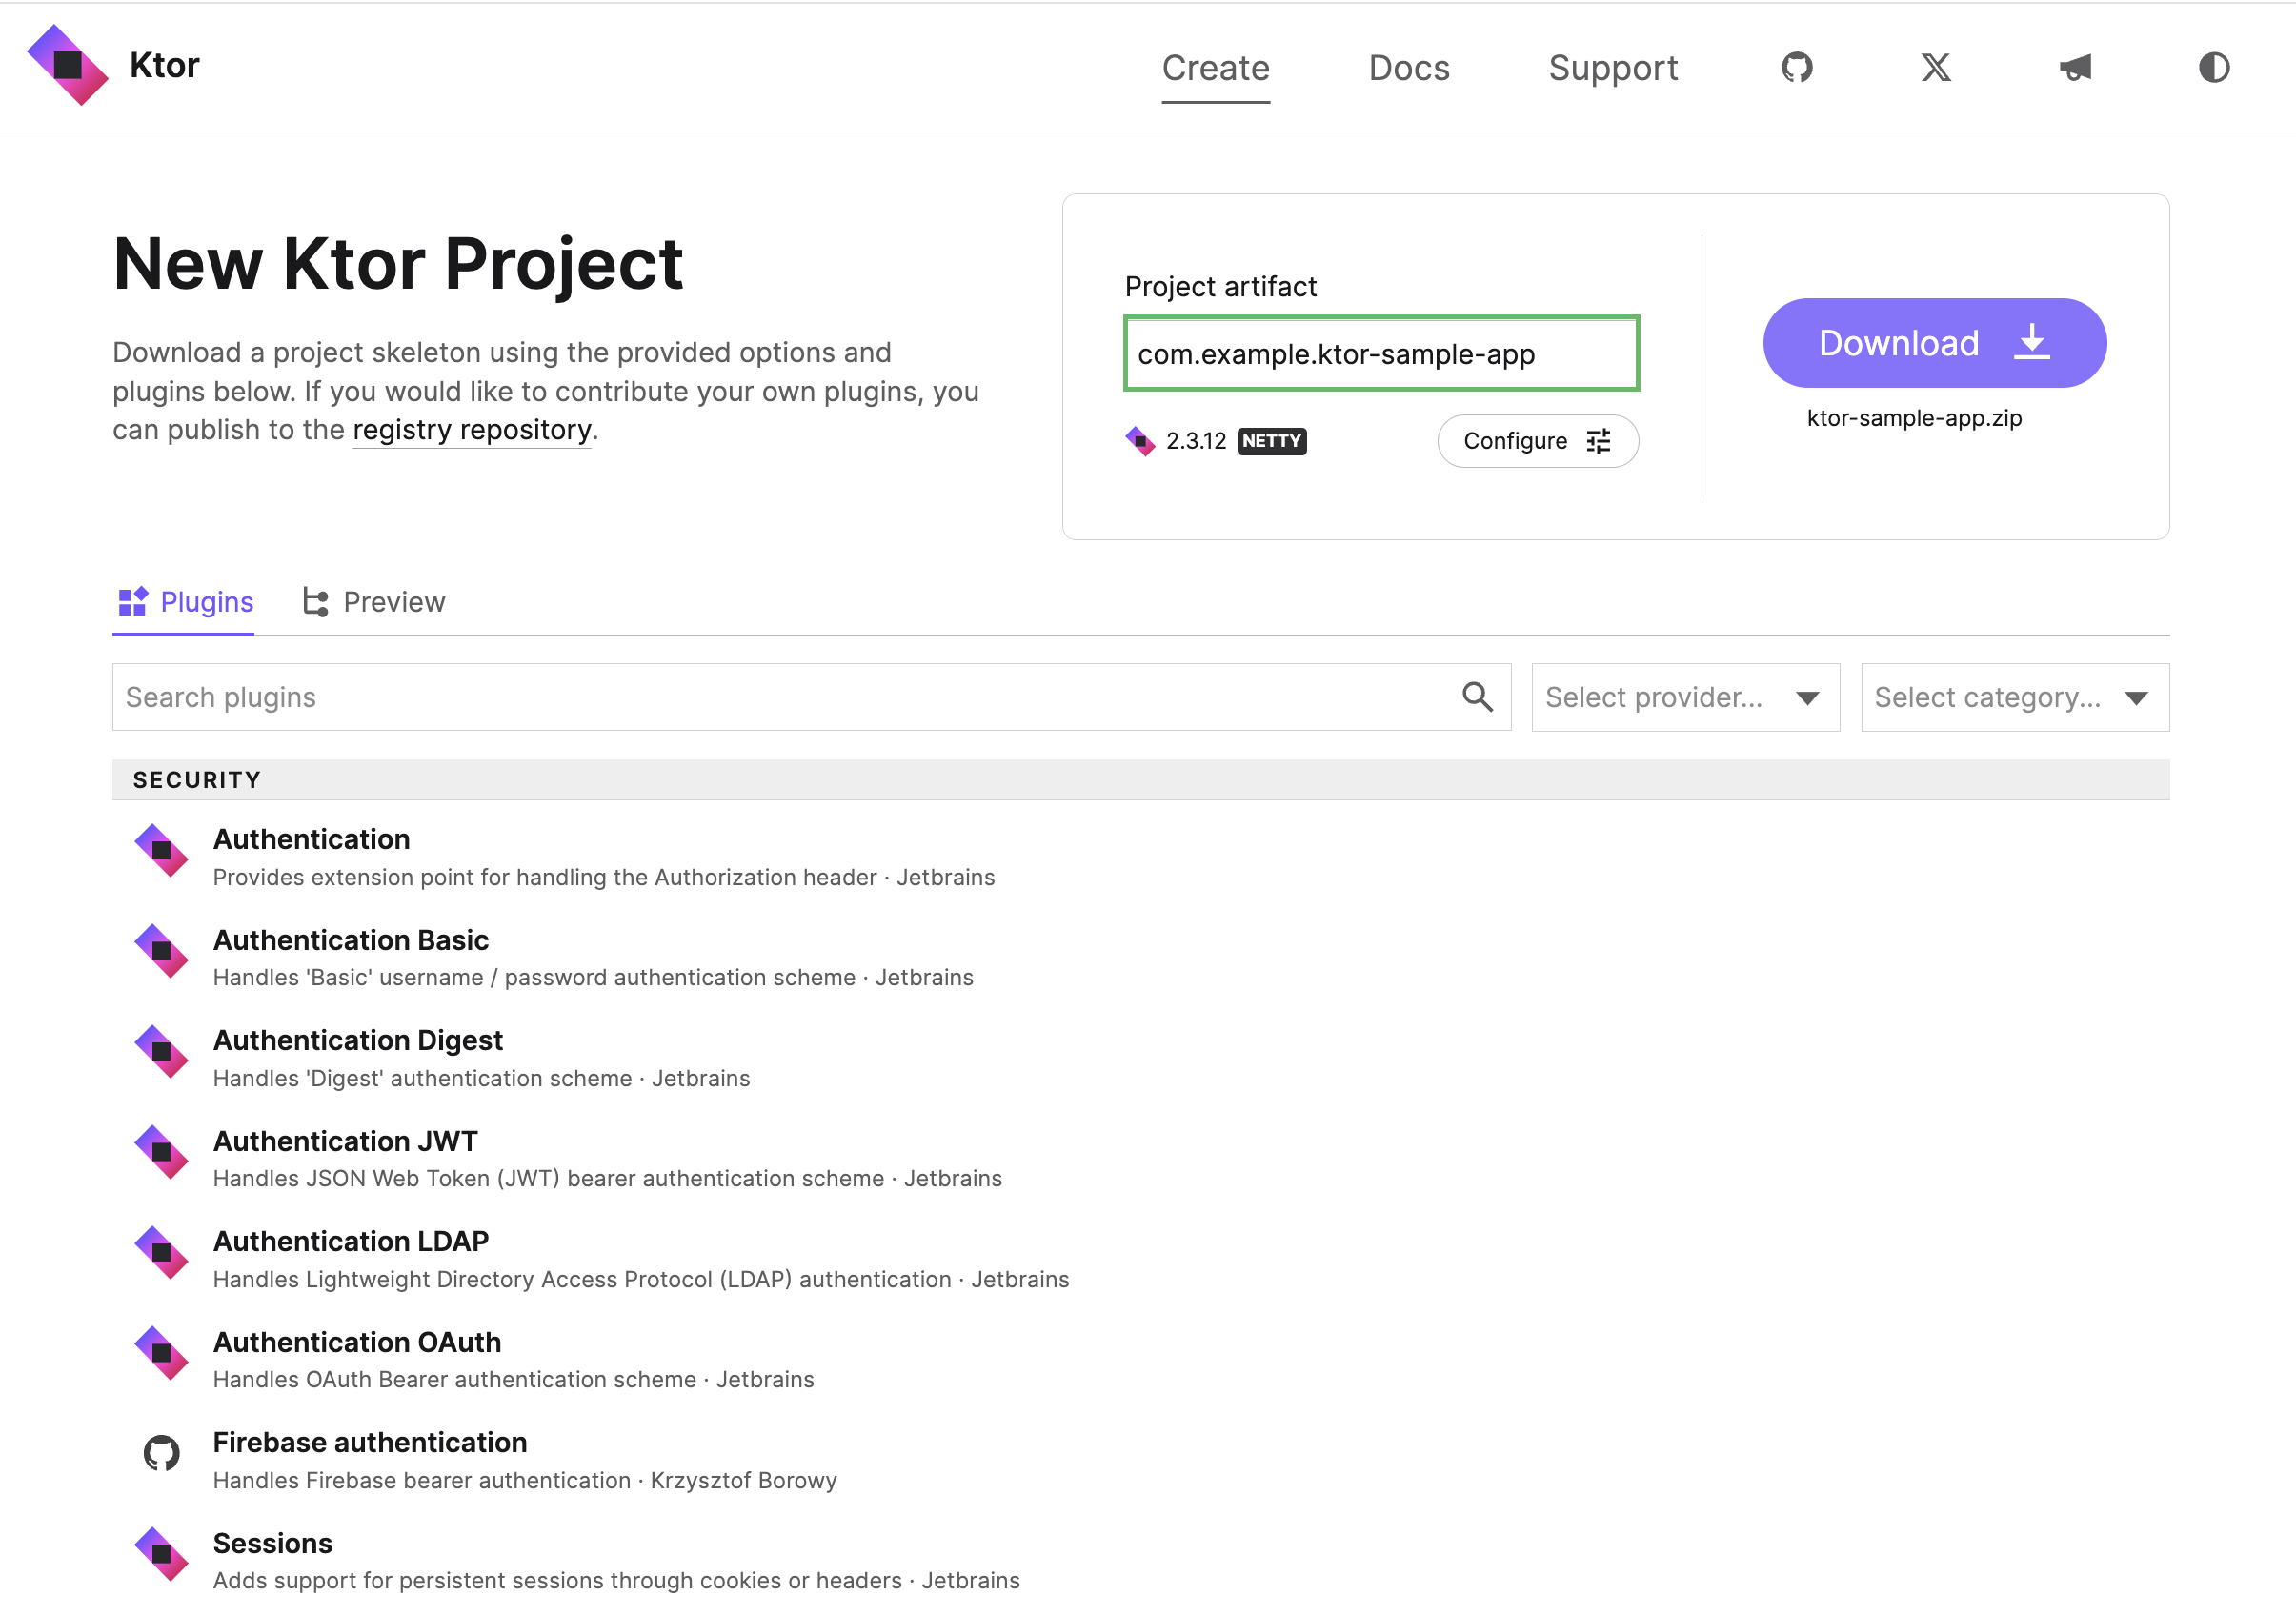
Click Configure to open the settings dropdown menu:
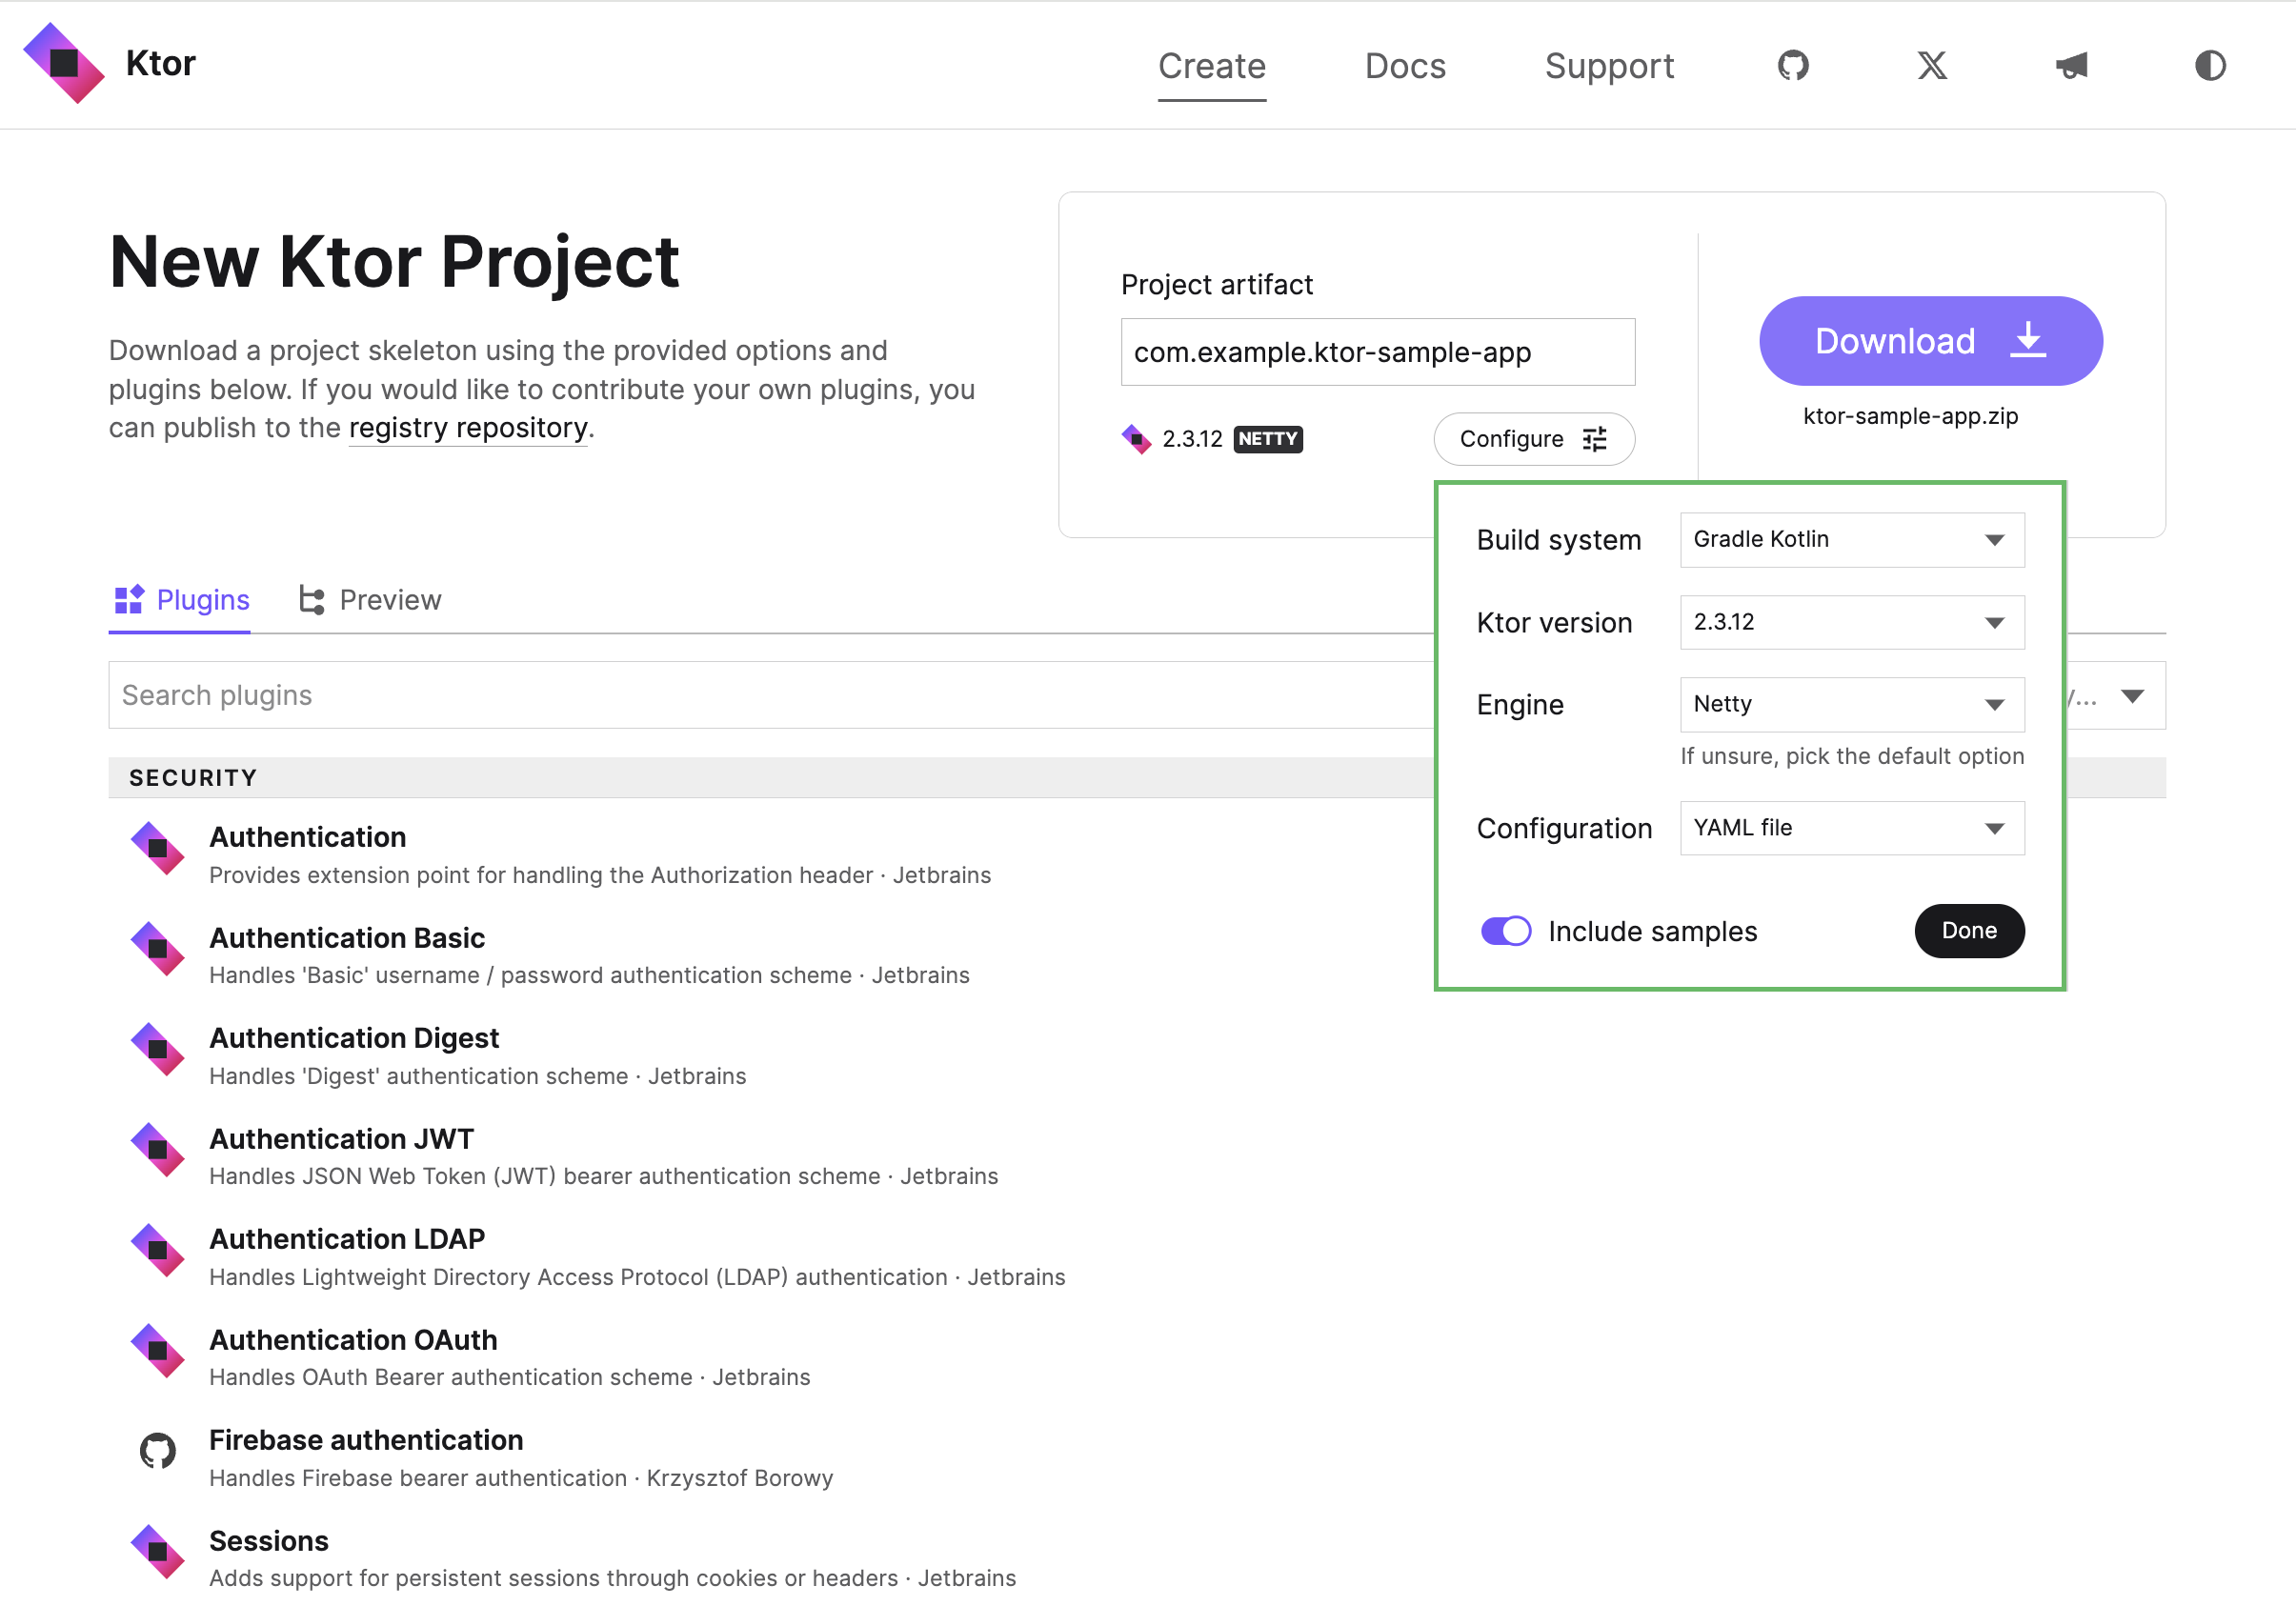
The following settings are available:
Build System: Choose the desired build system. This can be Gradle Kotlin, Gradle Groovy, Maven, or Amper.
Use version catalog: Select this option to use a version catalog (libs.versions.toml) for managing dependency versions in Gradle and Amper projects. Requires Gradle 7 or later.
Ktor version: Choose the required Ktor version.
Engine: Select an engine used to run a server.
Configuration: Choose whether to specify server parameters in a YAML or HOCON file, or in code.
Include samples: Leave this option enabled to add sample code for plugins.
For this tutorial, you can leave the default values for these settings.
Click Done to save the configuration and close the menu.
Below you will find a set of plugins that you can add to your project. Plugins are building blocks that provide common functionality in a Ktor application, such as authentication, serialization and content encoding, compression, cookie support, and more.
For the sake of this tutorial, you don’t need to add any plugins at this stage.
Click the Download button to generate and download your Ktor project.
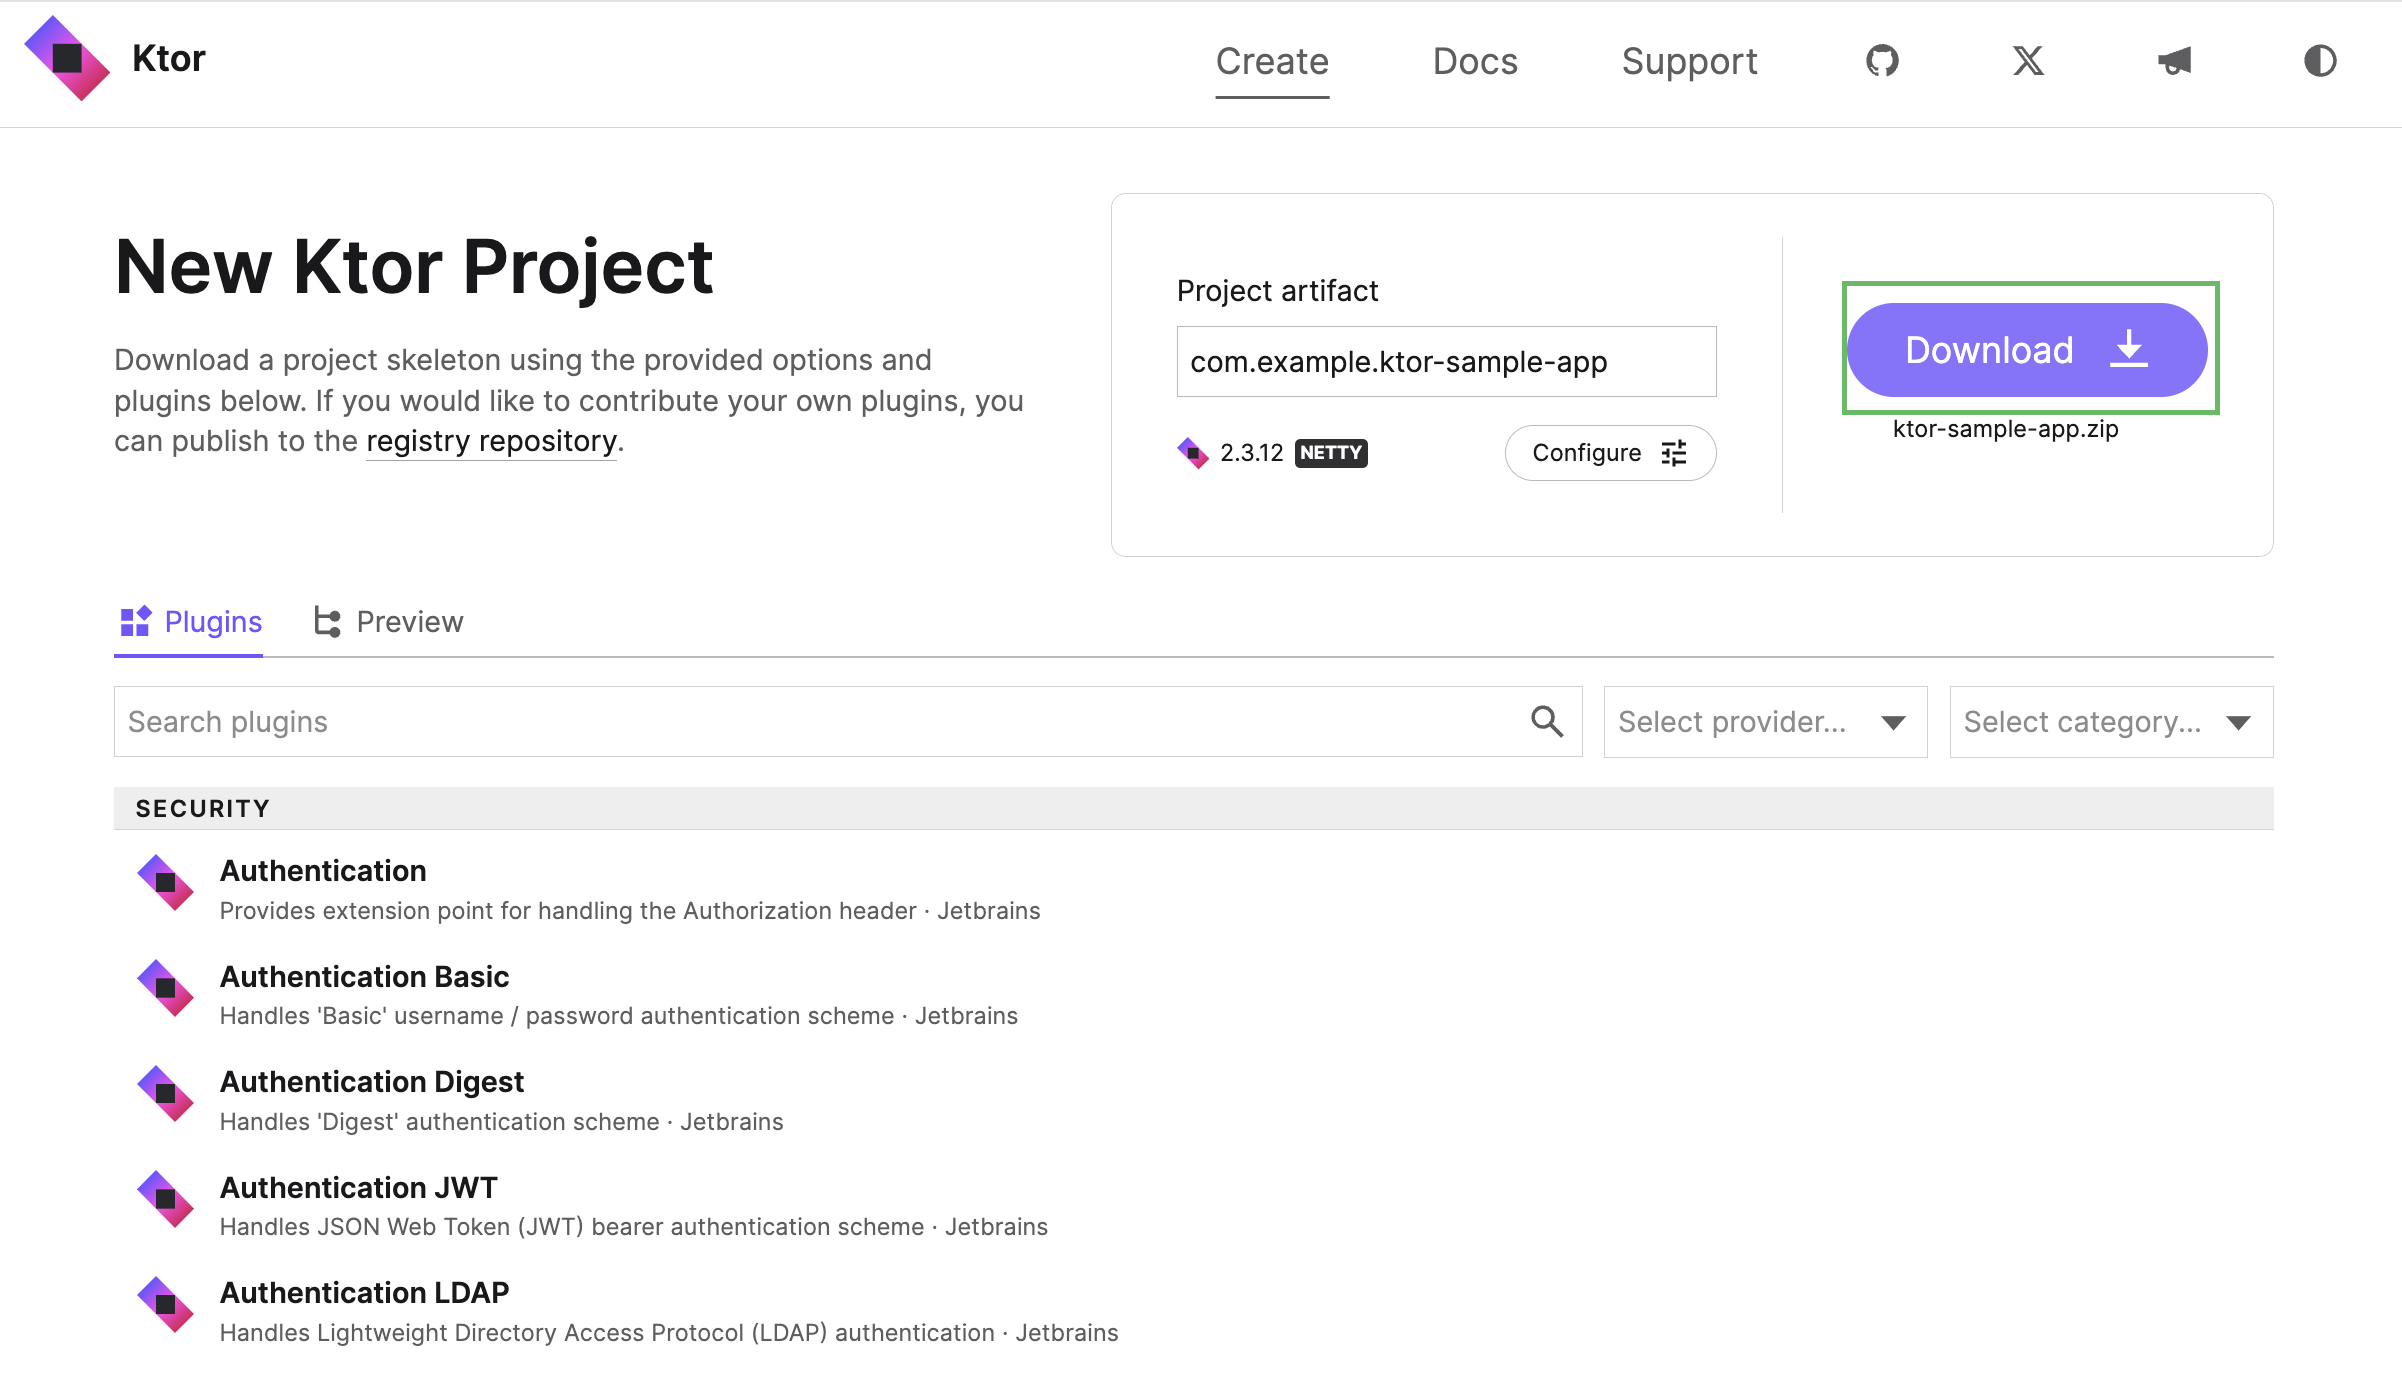
Your download should start automatically.
Now that you have generated a new project, continue to unpack and run your Ktor project.
Use the Ktor plugin for IntelliJ IDEA Ultimate
This section describes project setup using the Ktor plugin for IntelliJ IDEA Ultimate.
To create a new Ktor project, open IntelliJ IDEA and follow the steps below:
On the Welcome screen, click New Project.
Otherwise, from the main menu, select .
In the New Project wizard, choose Ktor from the list on the left.
On the right pane, you can specify the following settings:
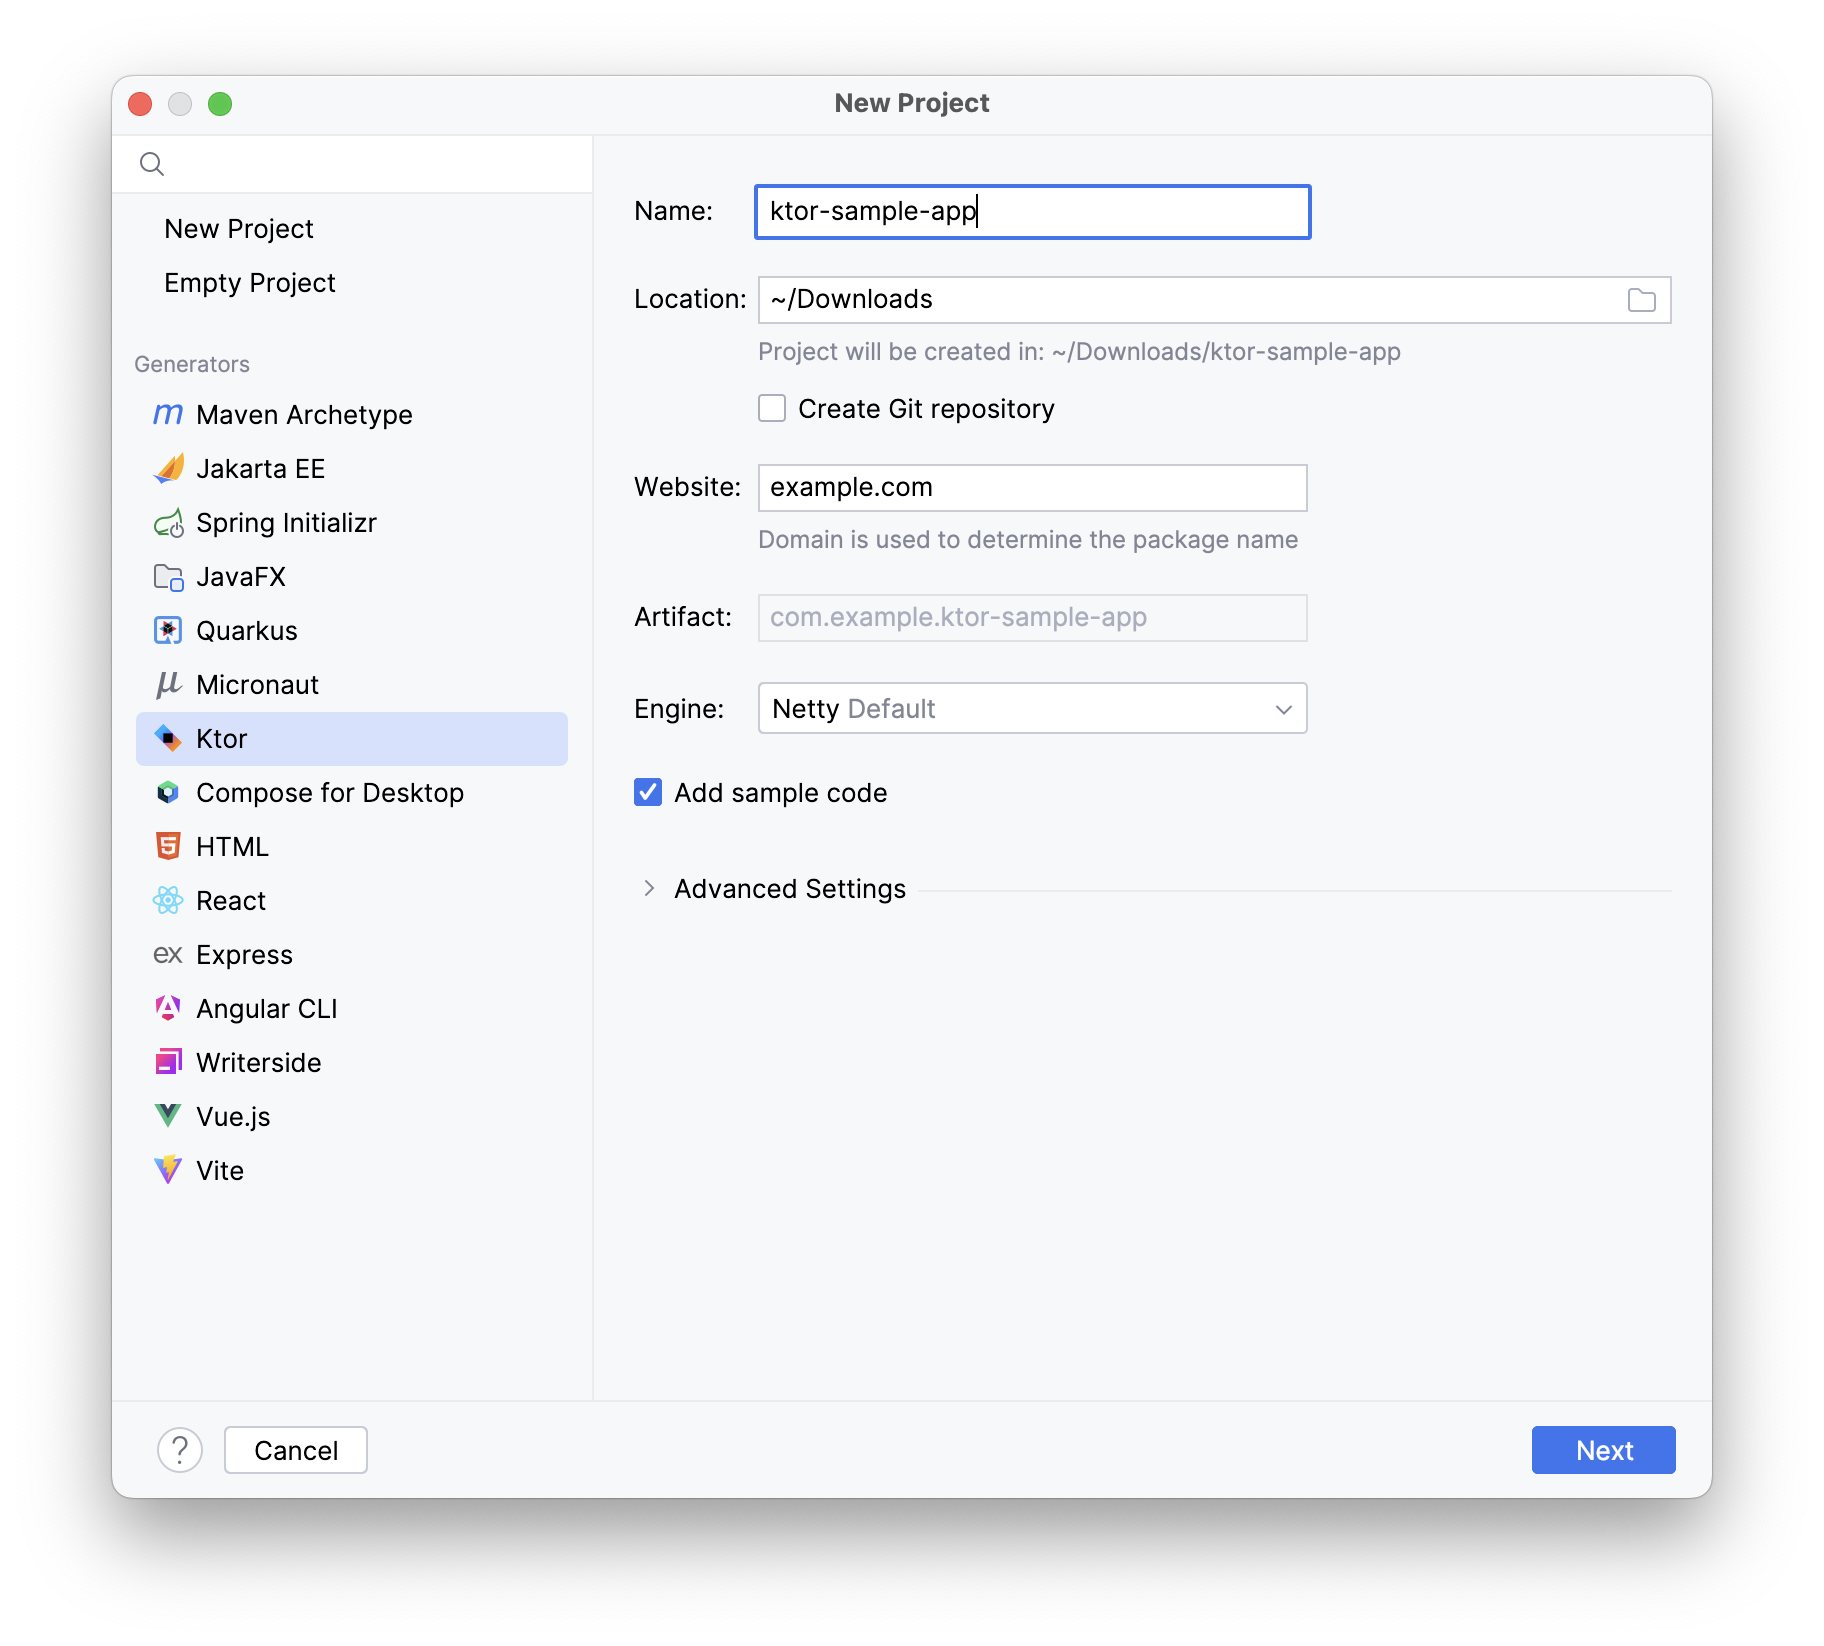
Name: Specify a project name. Enter ktor-sample as the name of your project.
Location: Specify a directory for your project.
Website: Specify a domain used to generate a package name.
Artifact: This field shows a generated artifact name.
Engine: Select an engine used to run a server.
Include samples: Leave this option enabled to add sample code for plugins.
Click Advanced Settings to expand the additional settings menu:
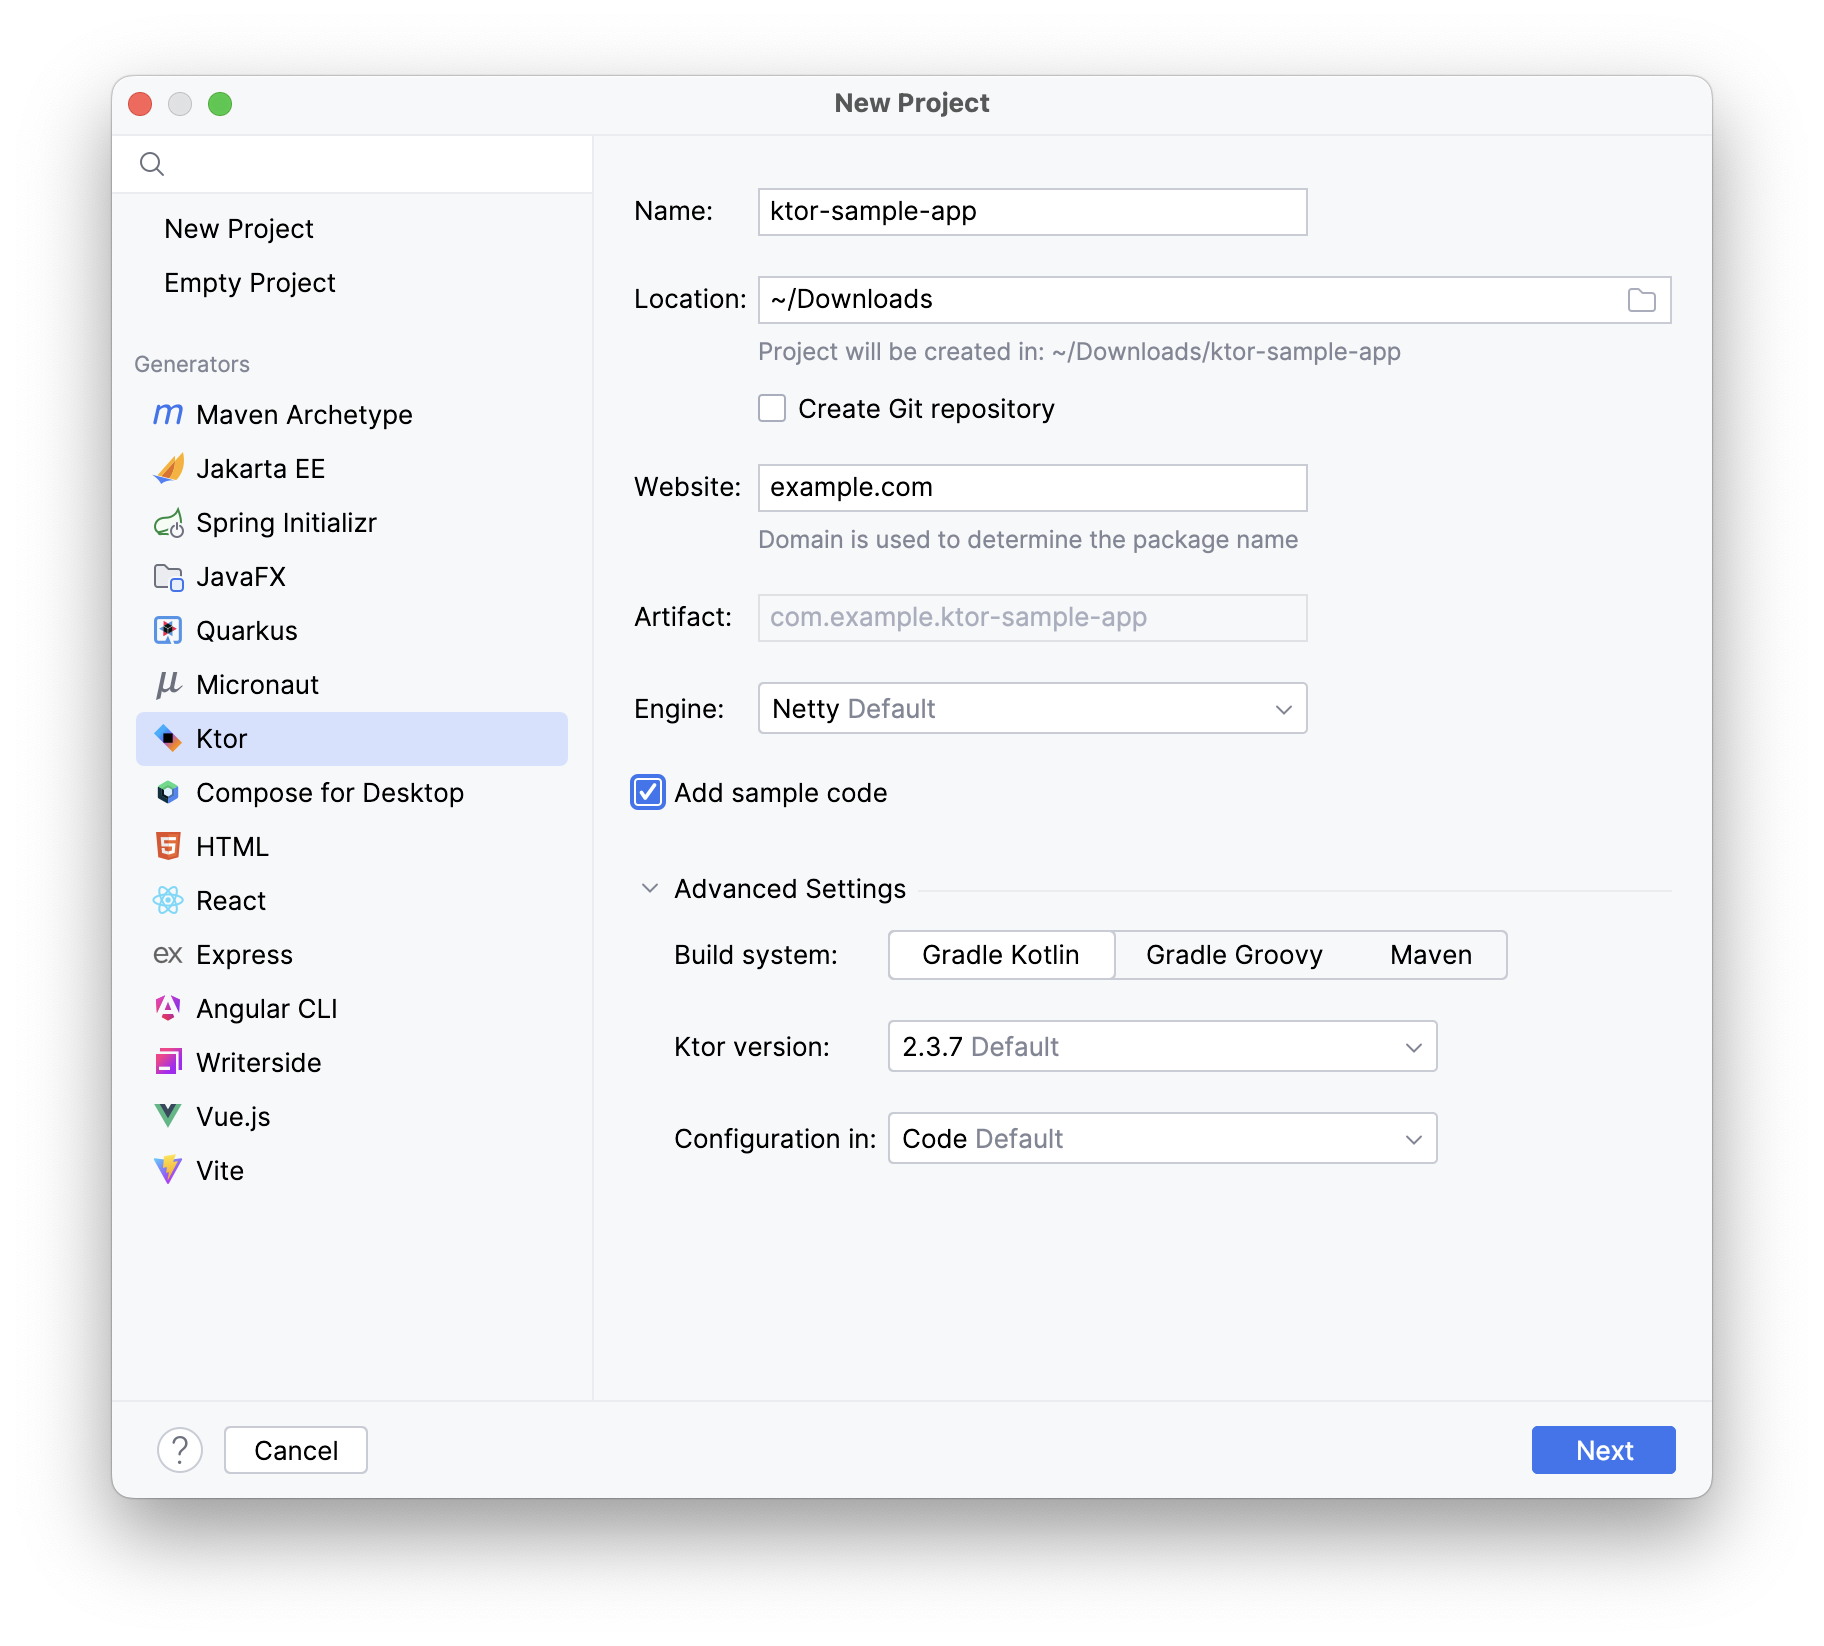
The following settings are available:
Build System: Choose the desired build system. This can be Gradle Kotlin, Gradle Groovy, Maven, or Amper.
Ktor version: Choose the required Ktor version.
Configuration: Choose whether to specify server parameters in a YAML or HOCON file, or in code.
For the sake of this tutorial, you can leave the default values of these settings.
Click Next to go to the next page.
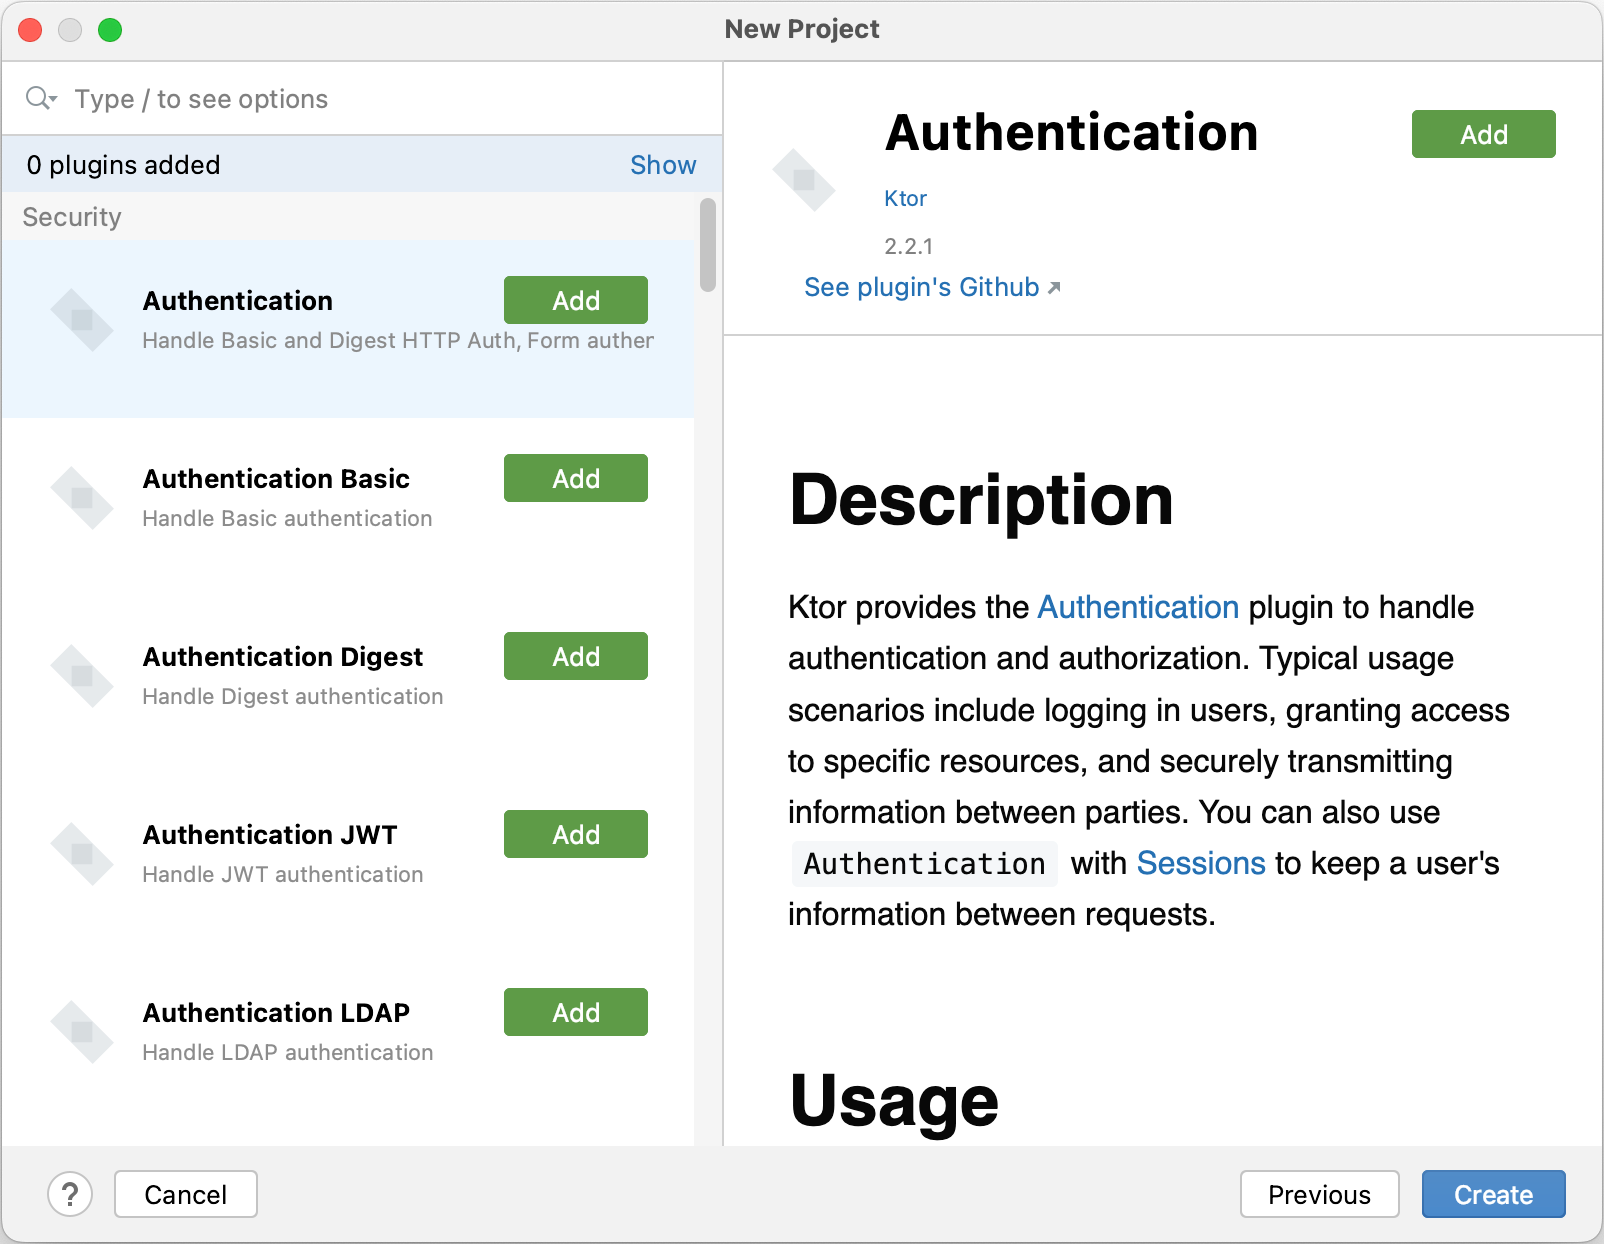
On this page, you can choose a set of plugins - building blocks that provide common functionality of a Ktor application, for example, authentication, serialization and content encoding, compression, cookie support, and so on.
For the sake of this tutorial, you don’t need to add any plugins at this stage.
Click Create and wait until IntelliJ IDEA generates a project and installs the dependencies.
Now that you've created a new project, continue to learn how to open, explore and run the application.
Use the Ktor CLI tool
This section describes project setup using the Ktor CLI tool.
To create a new Ktor project, open a terminal of your choice and follow these steps:
Install the Ktor CLI tool using one of the following commands:
brew install ktorwinget install JetBrains.KtorCLITo generate a new project in interactive mode, use the following command:
ktor newEnter ktor-sample as the name of your project:
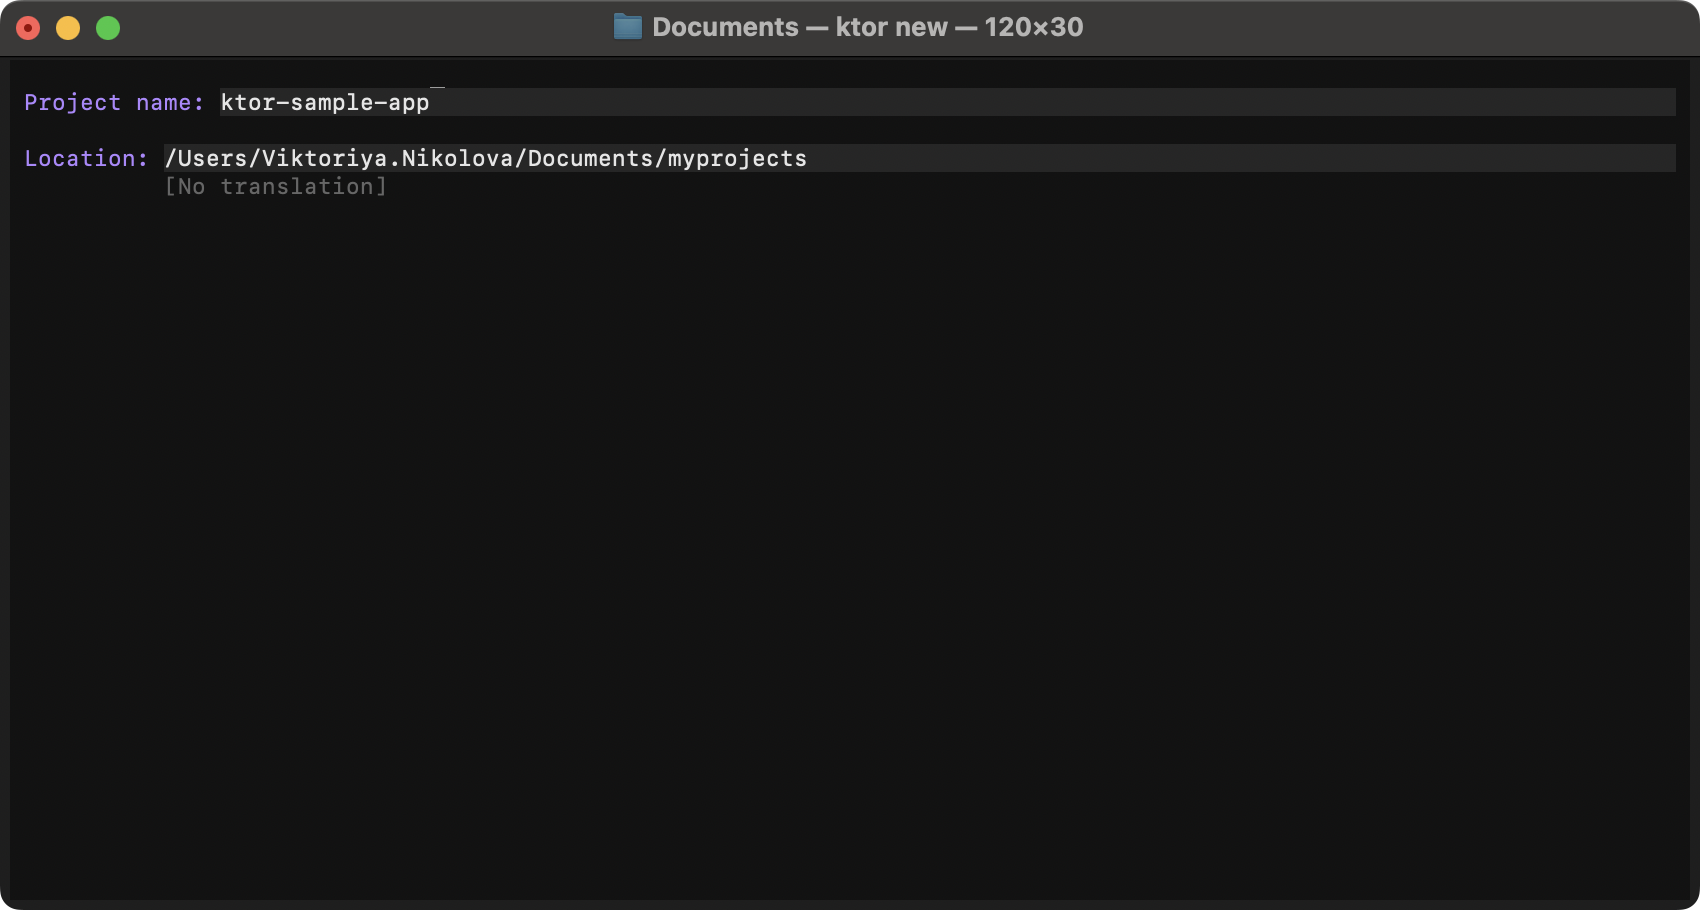
(Optional) You can also change the location where the project will be saved by editing the path below the project name.
Press Enter to continue.
In the next step, you can search for and add plugins to your project. Plugins are building blocks that provide common functionality in a Ktor application, such as authentication, serialization and content encoding, compression, cookie support, and more.
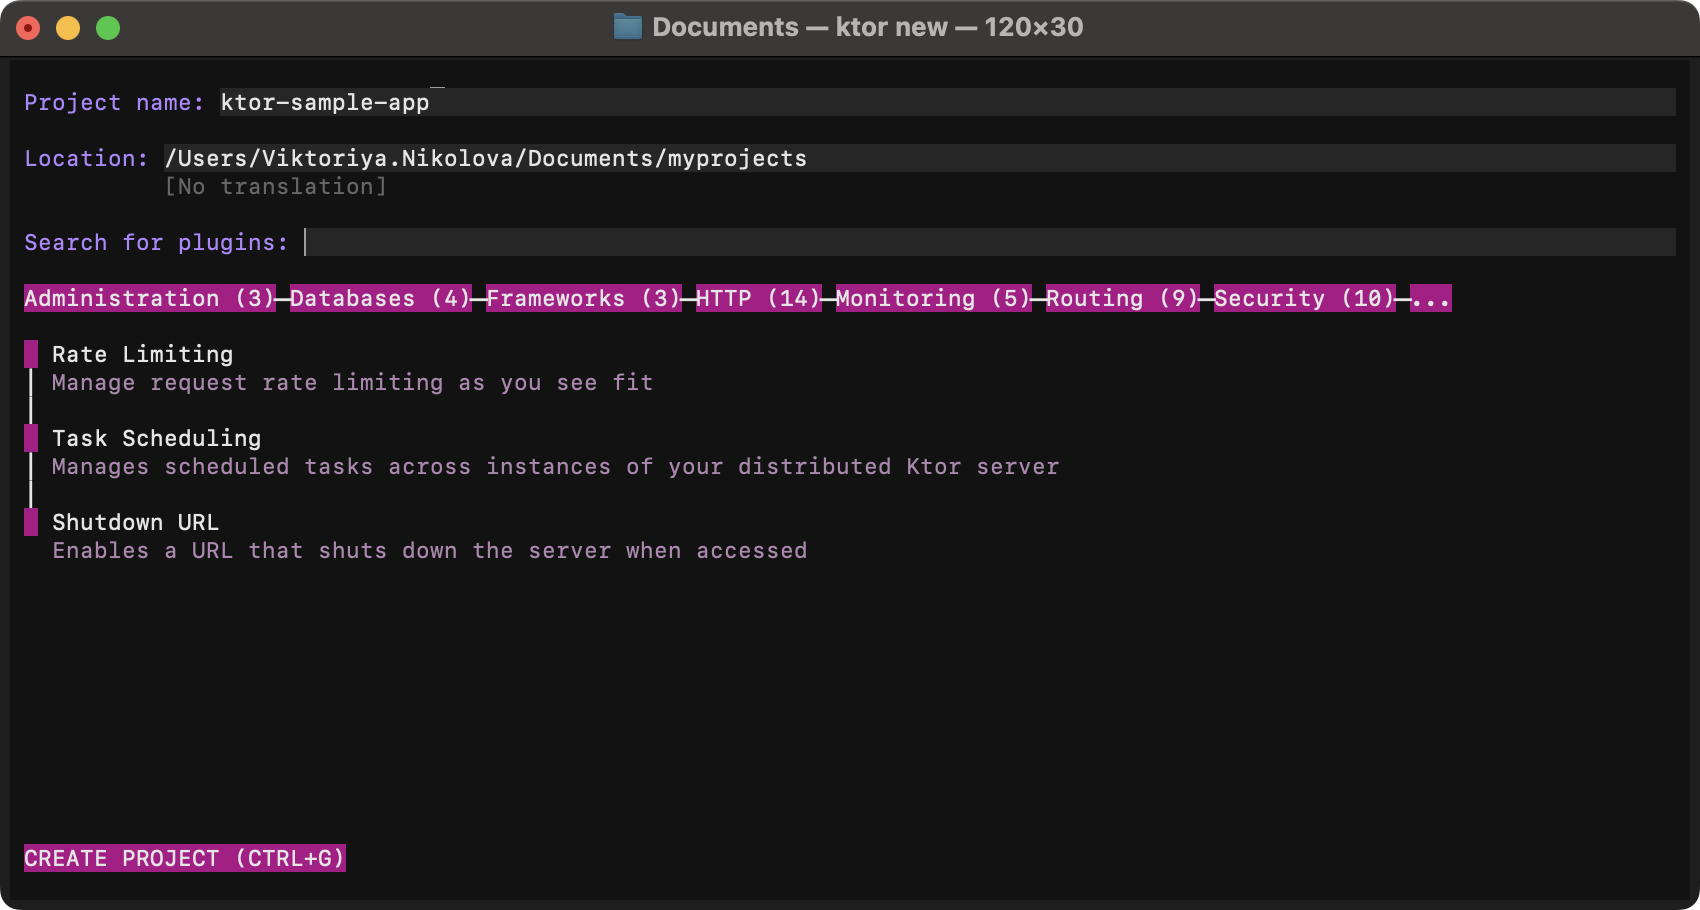
For the sake of this tutorial, you don’t need to add any plugins at this stage.
Press CTRL+G to generate the project.
Alternatively, you can generate the project by selecting CREATE PROJECT (CTRL+G) and pressing Enter.
Unpack and run your Ktor project
In this section you will learn how to unpack, build, and run the project from the command line. The steps below assume that:
You have created and downloaded a Gradle project called ktor-sample.
This project is located in a folder called myprojects in your home directory.
If necessary, alter the names and paths to match your own setup.
Open a command-line tool of your choice and follow the steps:
In a terminal window, navigate to the folder where you downloaded the project:
cd ~/myprojectsUnpack the ZIP archive into a folder of the same name:
unzip ktor-sample.zip -d ktor-sampletar -xf ktor-sample.zipYour directory will now contain the ZIP archive and the unpacked folder.
From the directory, navigate into the newly created folder:
cd ktor-sampleOn macOS and UNIX systems, you must make the Gradle helper script executable, so the system recognizes it as a runnable command. To do that, use the
chmodcommand:chmod +x ./gradlewTo build the project, use the following command:
./gradlew buildgradlew buildWhen the build succeeds, continue to the next step to run the project.
To run the project, use the following command:
./gradlew rungradlew runTo verify that the project is running, open a browser at the URL shown in the terminal output (http://0.0.0.0:8080). You should see the message "Hello World!" displayed in your browser:
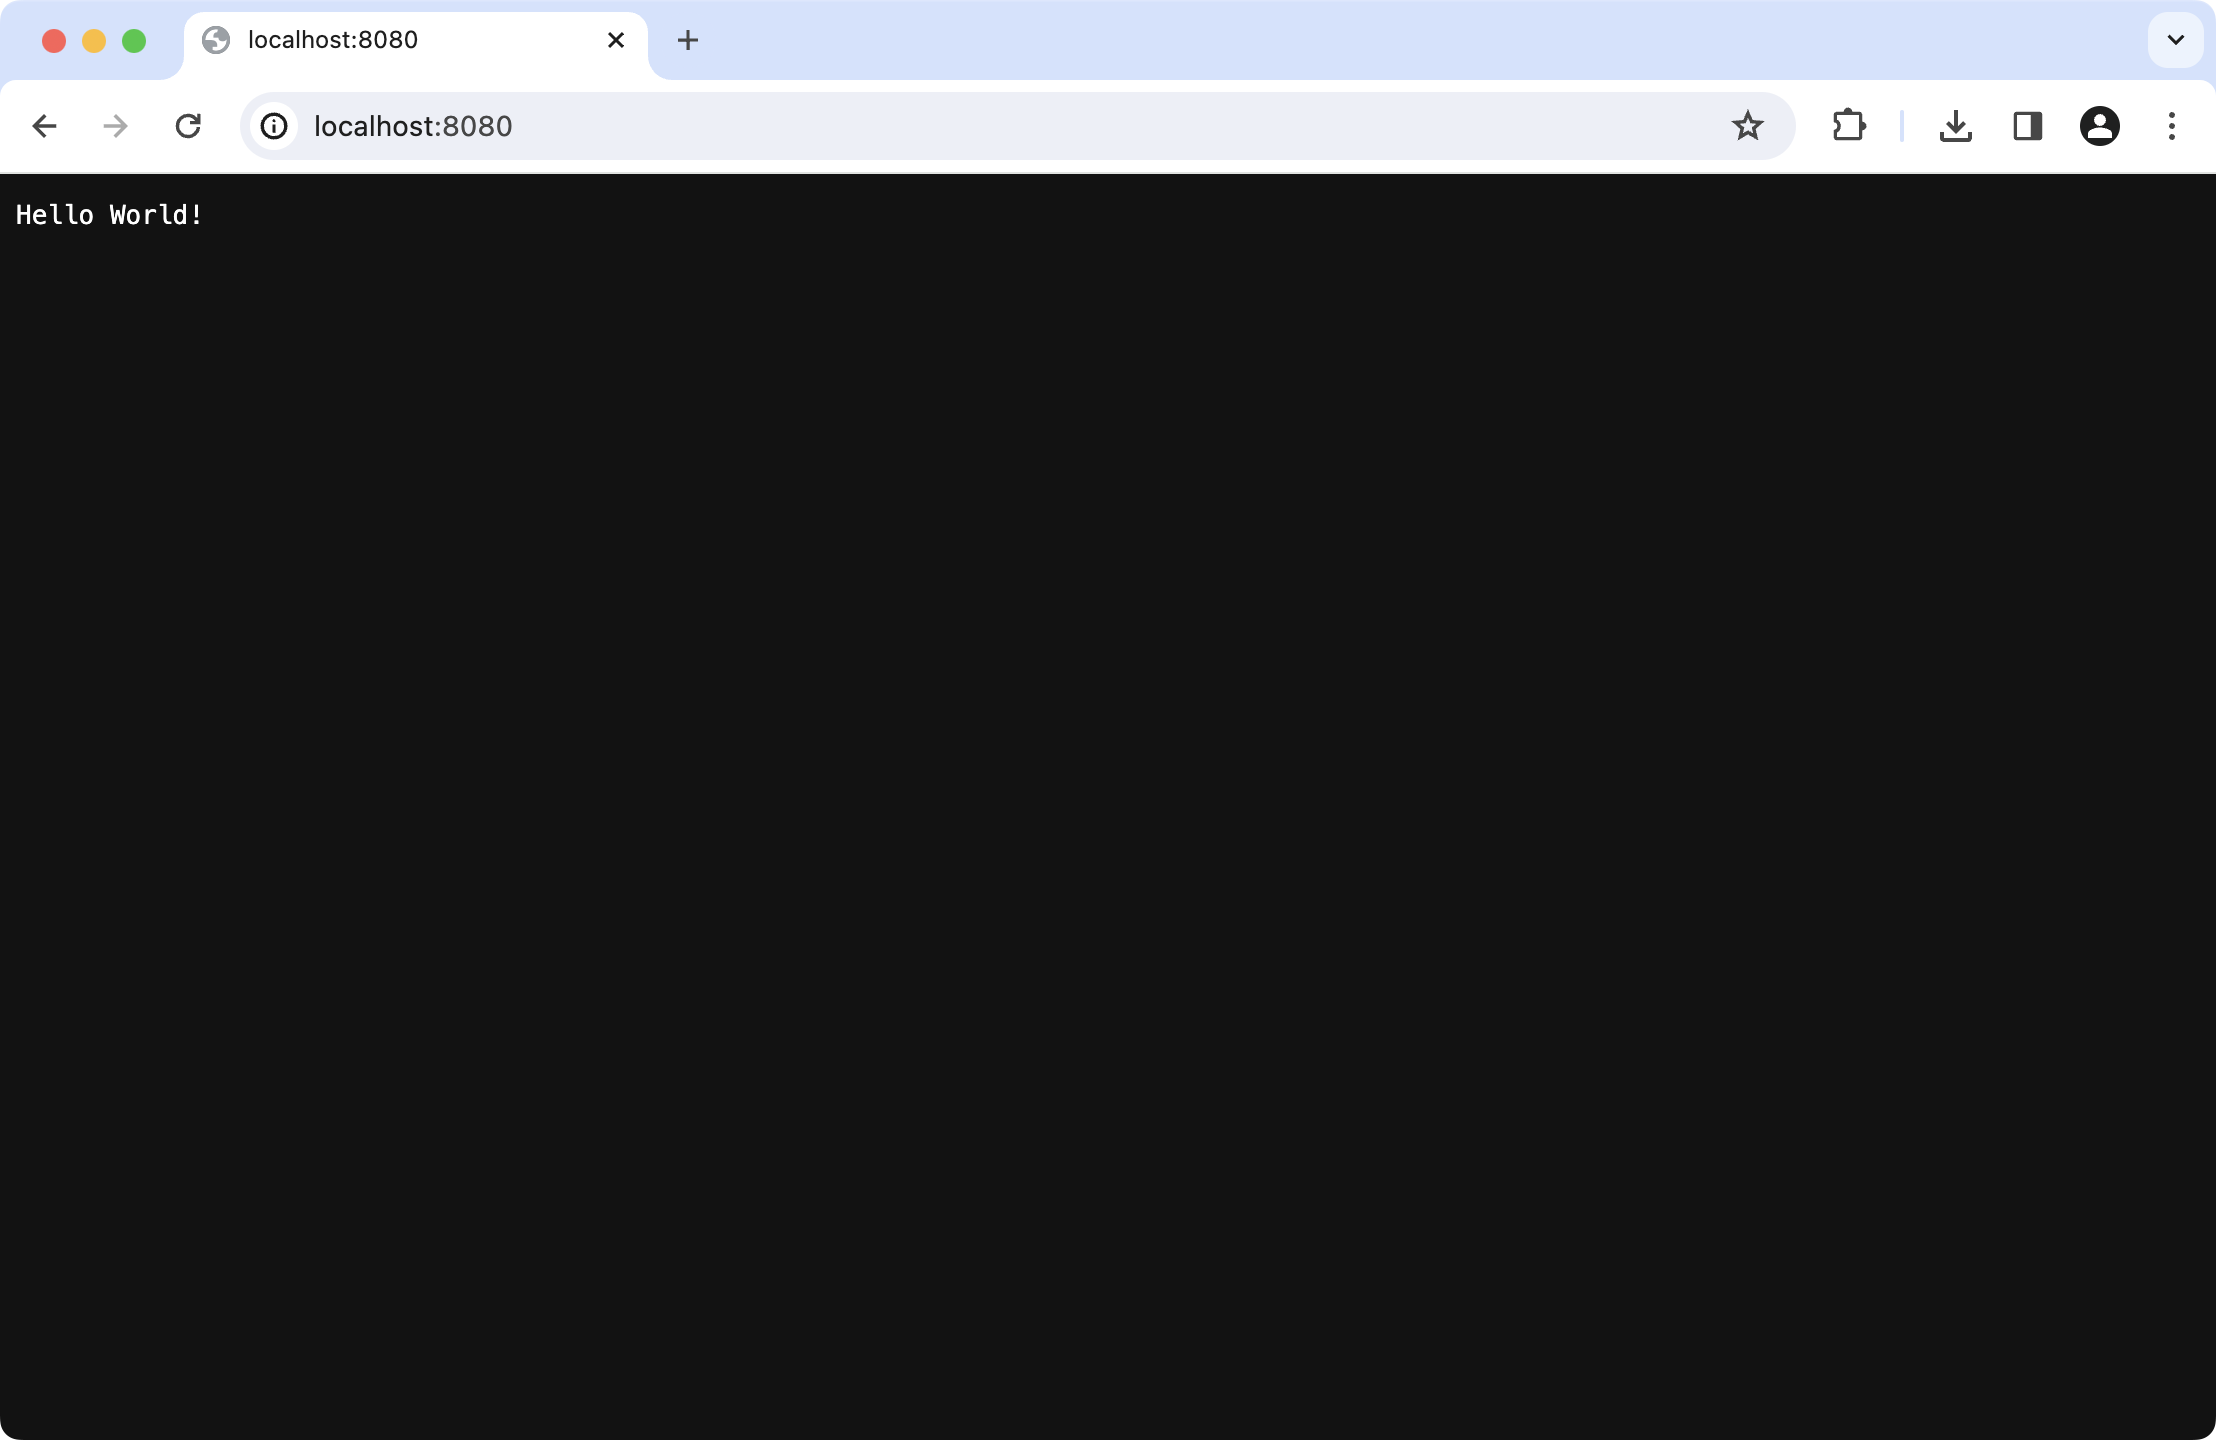
Congratulations! You have successfully started your Ktor project.
Open, explore, and run your Ktor project in IntelliJ IDEA
Open the project
If you have IntelliJ IDEA installed, you can easily open the project from the command line.
Make sure you are in the project folder and then type the idea command, followed by a period to represent the current folder:
Alternatively, to open the project manually, launch IntelliJ IDEA.
If the Welcome screen opens, click Open. Otherwise, go to in the main menu and select the ktor-sample folder to open it.
Explore the project
After opening the project, you can see the following structure:
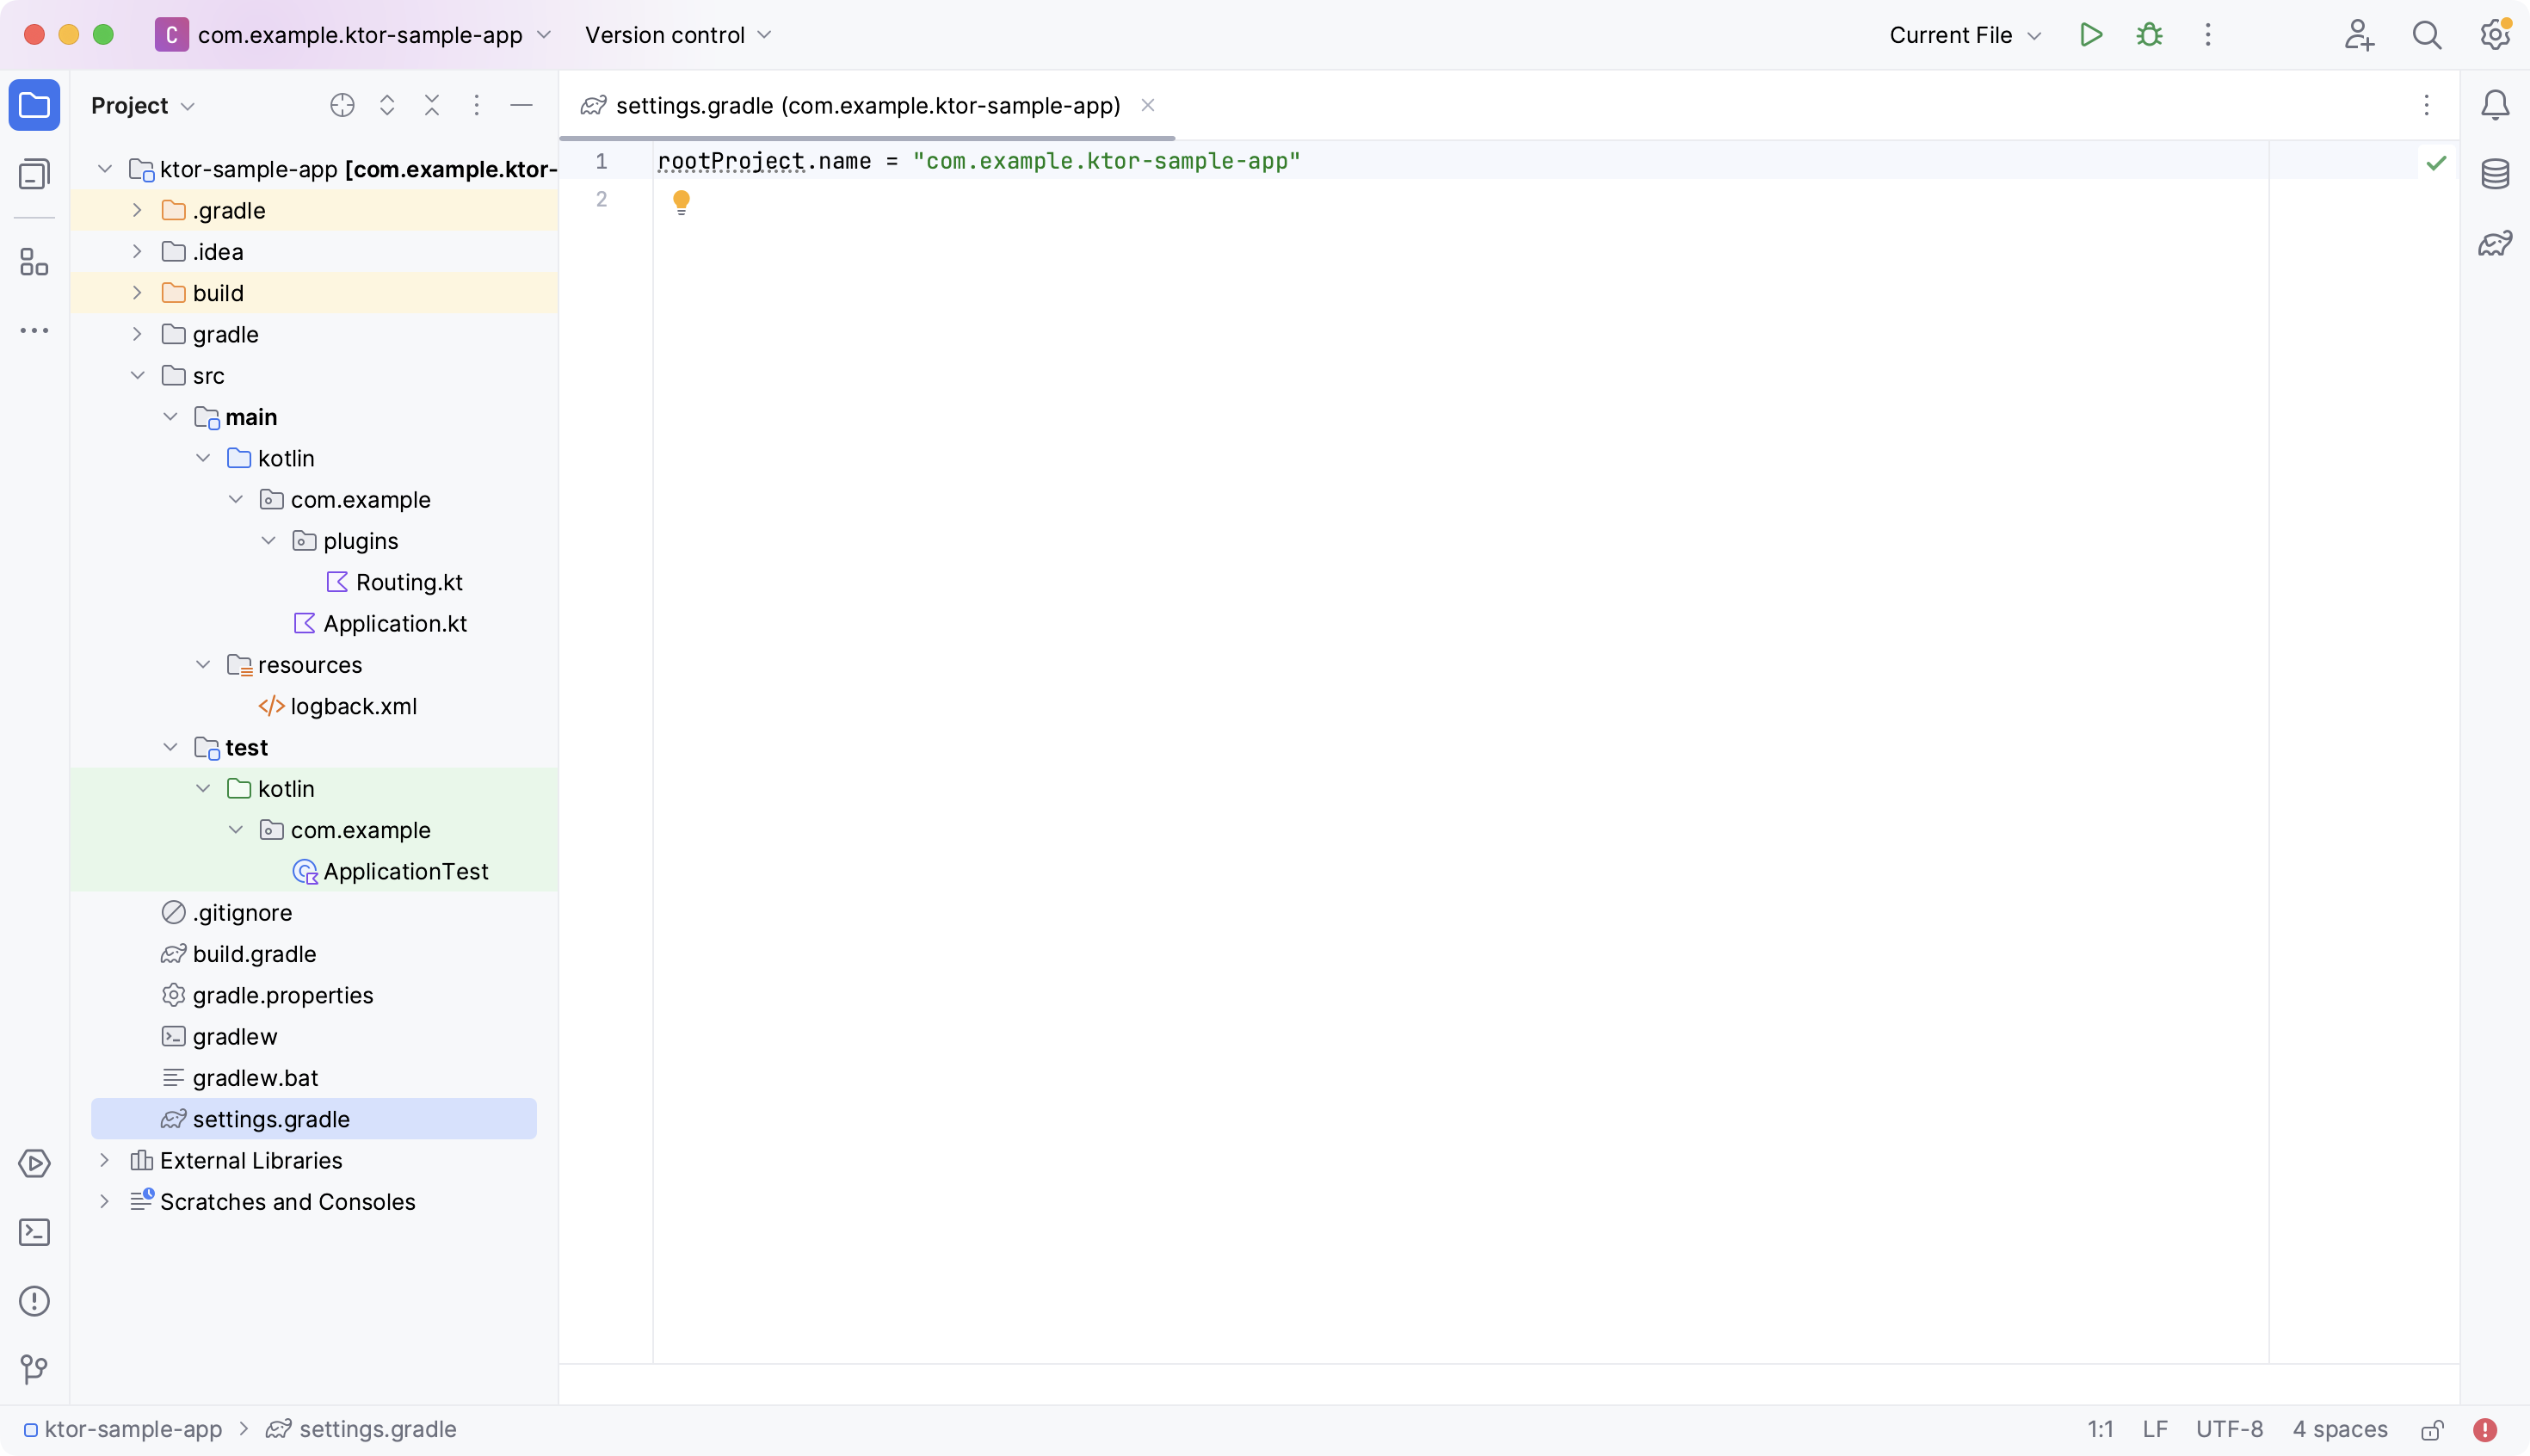
To view the full layout, expand the folders in the Project view by clicking the expand arrows next to each folder.
The application source code is located under src/main/kotlin. Two files are created by default, named Application.kt and Routing.kt
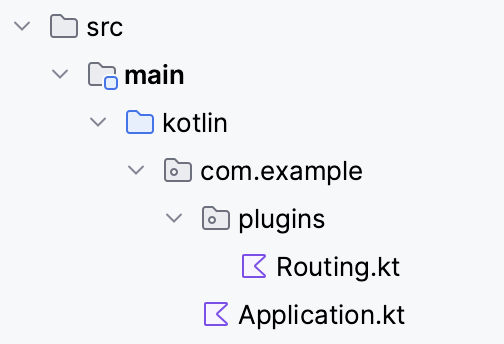
The name of the project is configured in settings.gradle.kts with the following contents:
Configuration files, and other kinds of content, live within the src/main/resources folder.
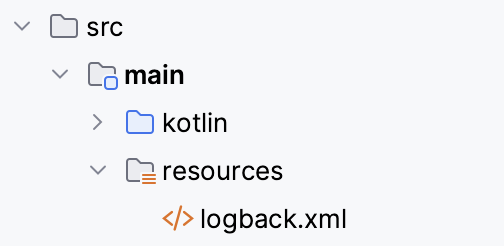
Run the project
To run the project from within IntelliJ IDEA:
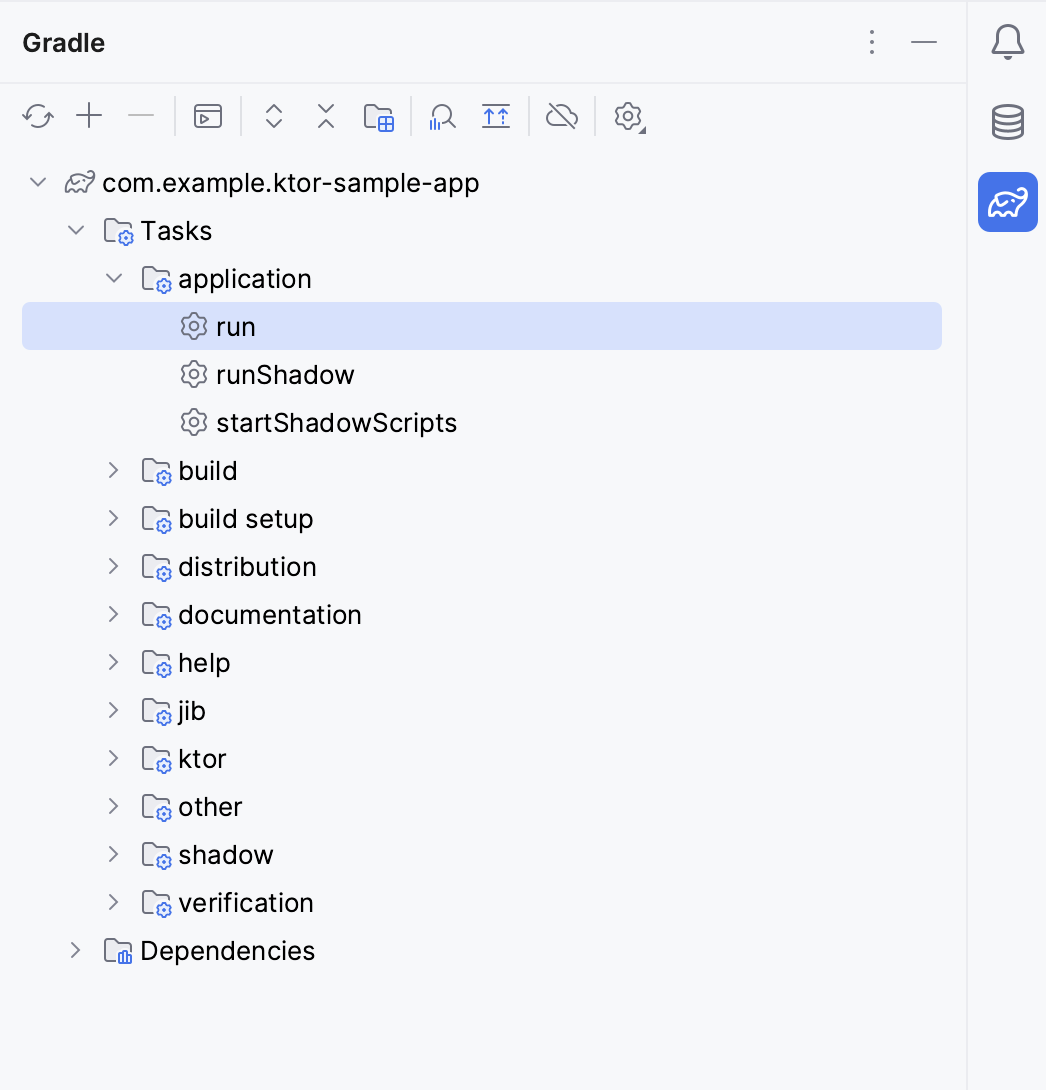
Open the Gradle tool window by clicking the Gradle icon (
) on the right sidebar.
Within this tool window, navigate to and double-click on the run task.
Your Ktor application starts in the Run tool window at the bottom of the IDE:
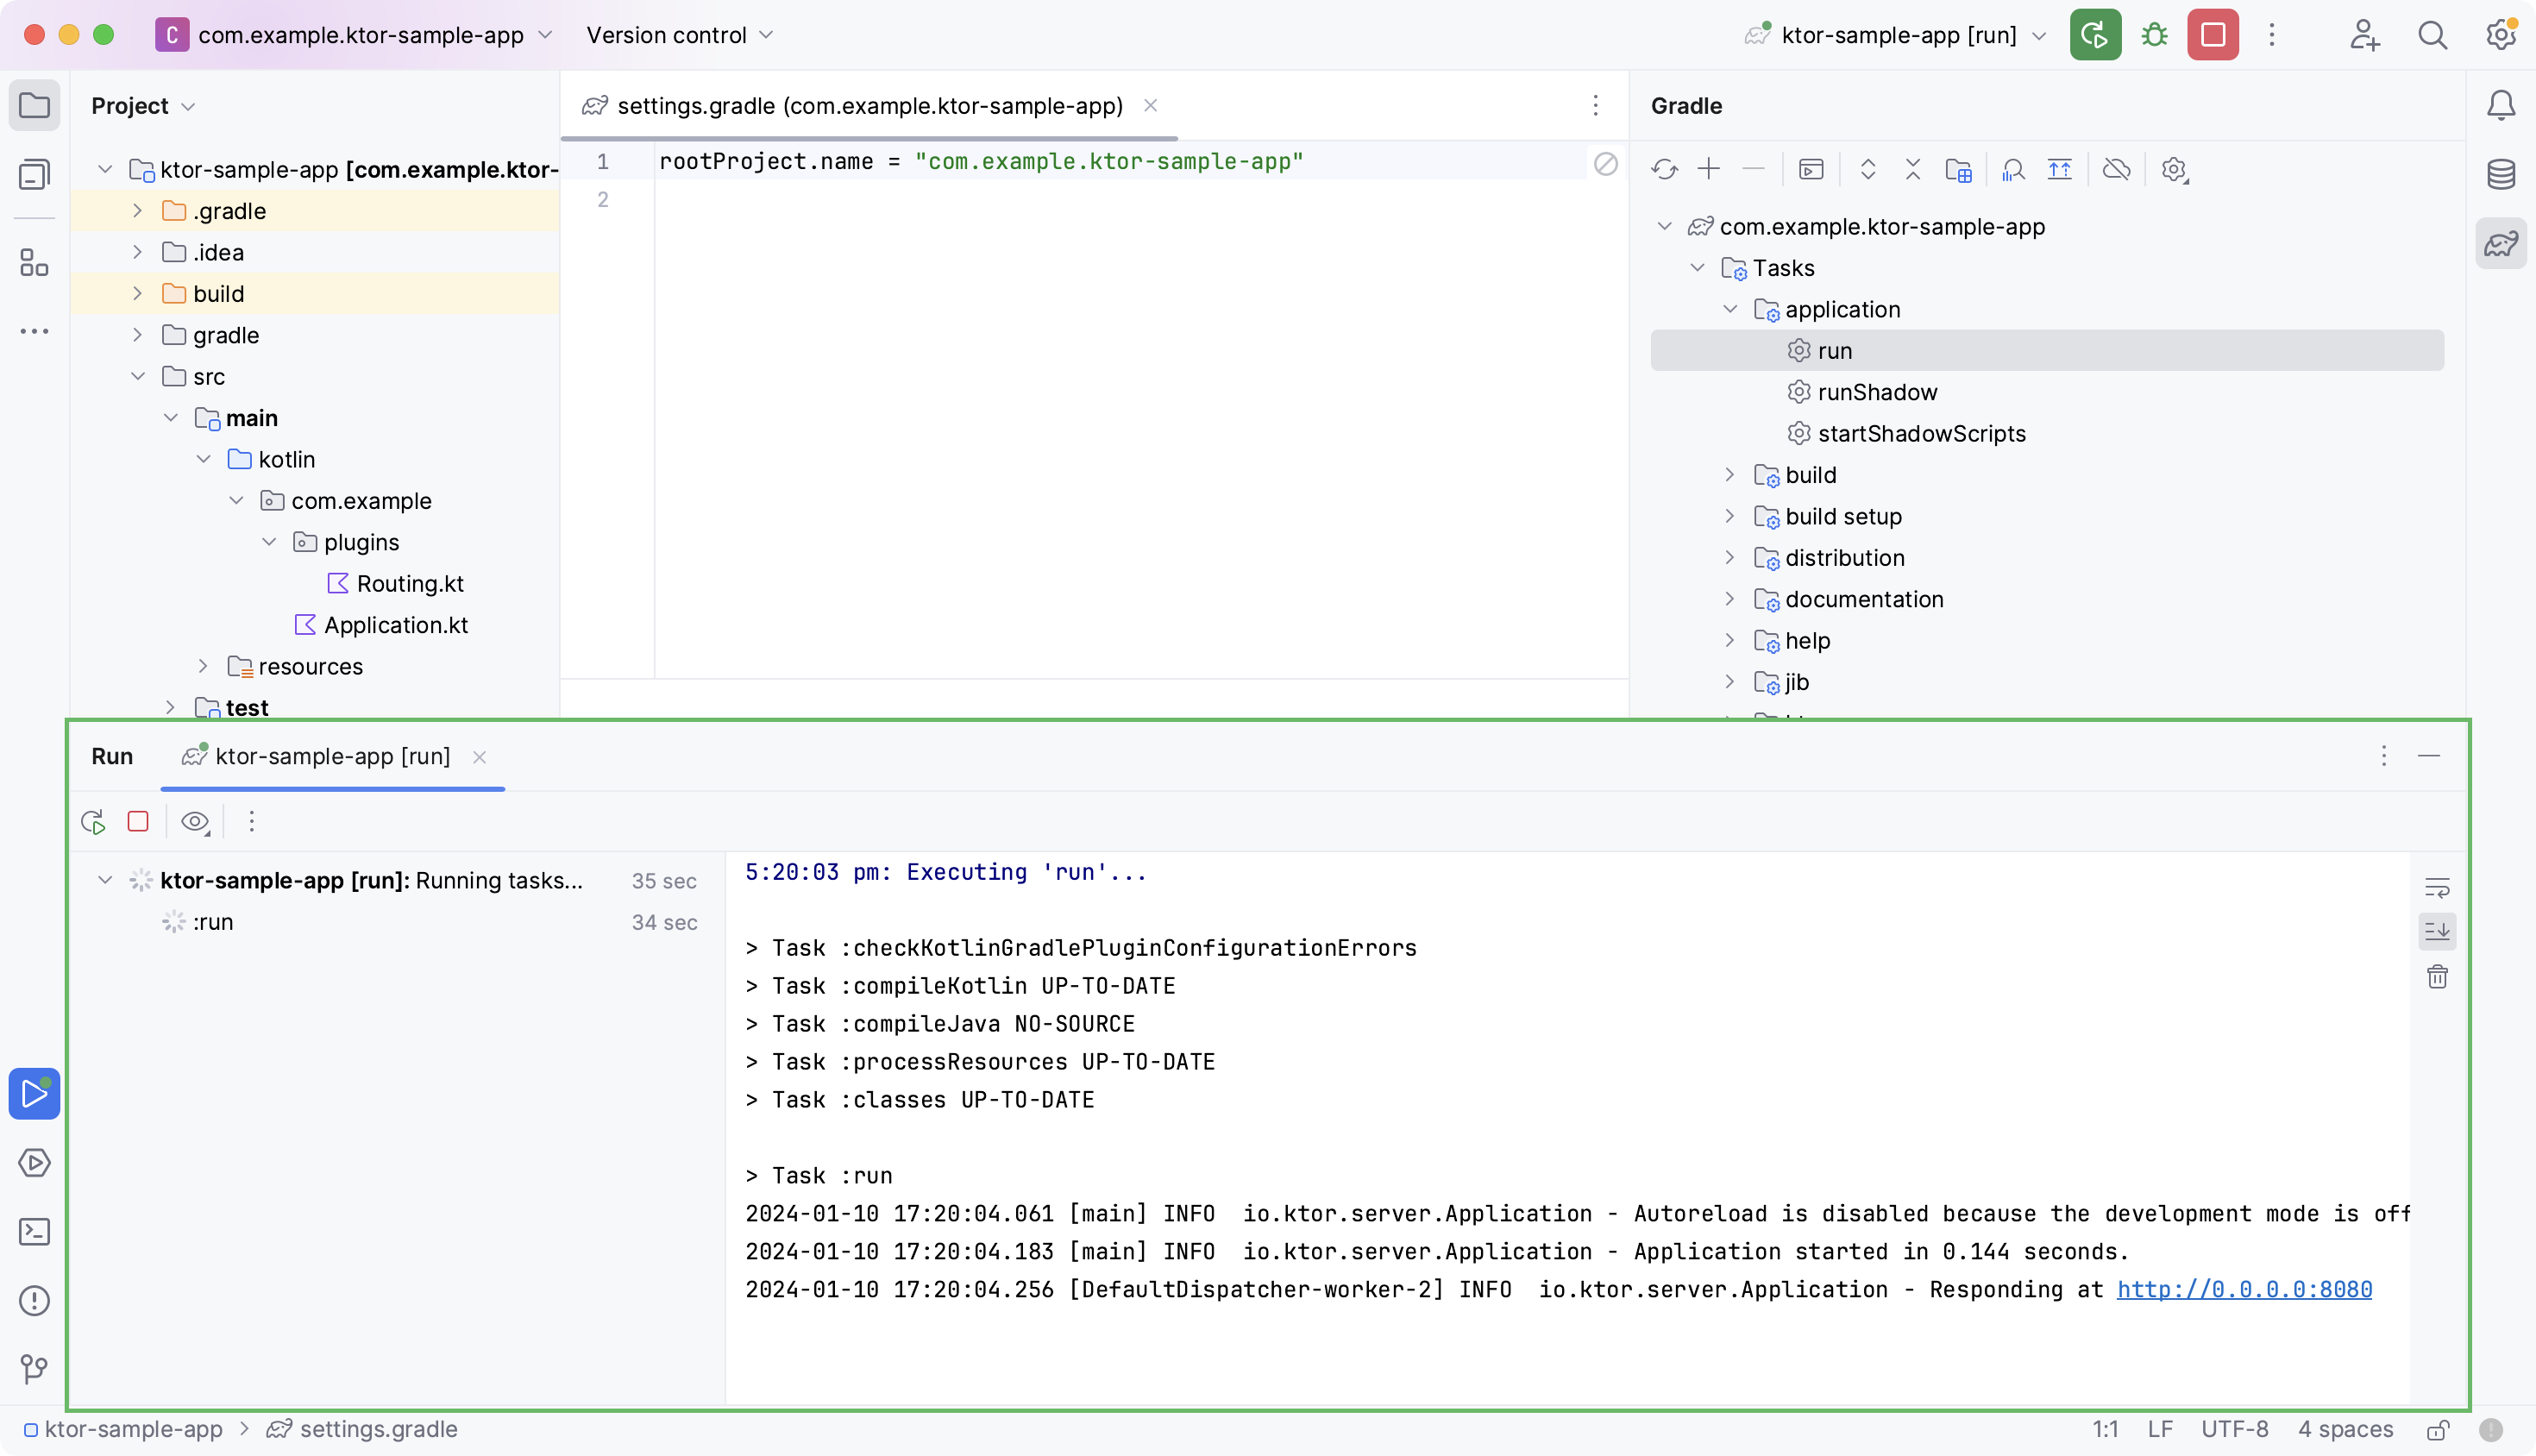
The same messages that were previously displayed on the command line will now be visible in the tool window.
To confirm the project is running, open your browser at the specified URL (http://0.0.0.0:8080).
You should once again see the message "Hello World!" displayed on the screen:

You can manage the application via the tool window.
To terminate the application, click the stop button
.
To restart the process, click the rerun button
.
These options are explained further in the IntelliJ IDEA Run Tool Window documentation.
Additional tasks to attempt
Here are some additional tasks you may wish to try:
These tasks do not depend on one another but gradually increase in complexity. Attempting them in the order declared is the easiest way to learn incrementally. For simplicity and to avoid duplication, the descriptions below assume you are attempting the tasks in order.
Where coding is required, we have specified both the code and the corresponding imports. The IDE may add these imports for you automatically.
Change the default port
Change the port in a configuration file
If you had chosen to store configuration externally, within a YAML or a HOCON file, in the view navigate to the src/main/resources folder and follow the steps:
Open your configuration file (application.yaml or application.conf). It should look like the following:
ktor: application: modules: - com.example.ApplicationKt.module deployment: port: 8080ktor { deployment { port = 8080 port = ${?PORT} } application { modules = [ com.example.ApplicationKt.module ] } }Change the
portvalue in the file to another number of your choosing, such as9292.Click on the rerun button (
) to restart the application.
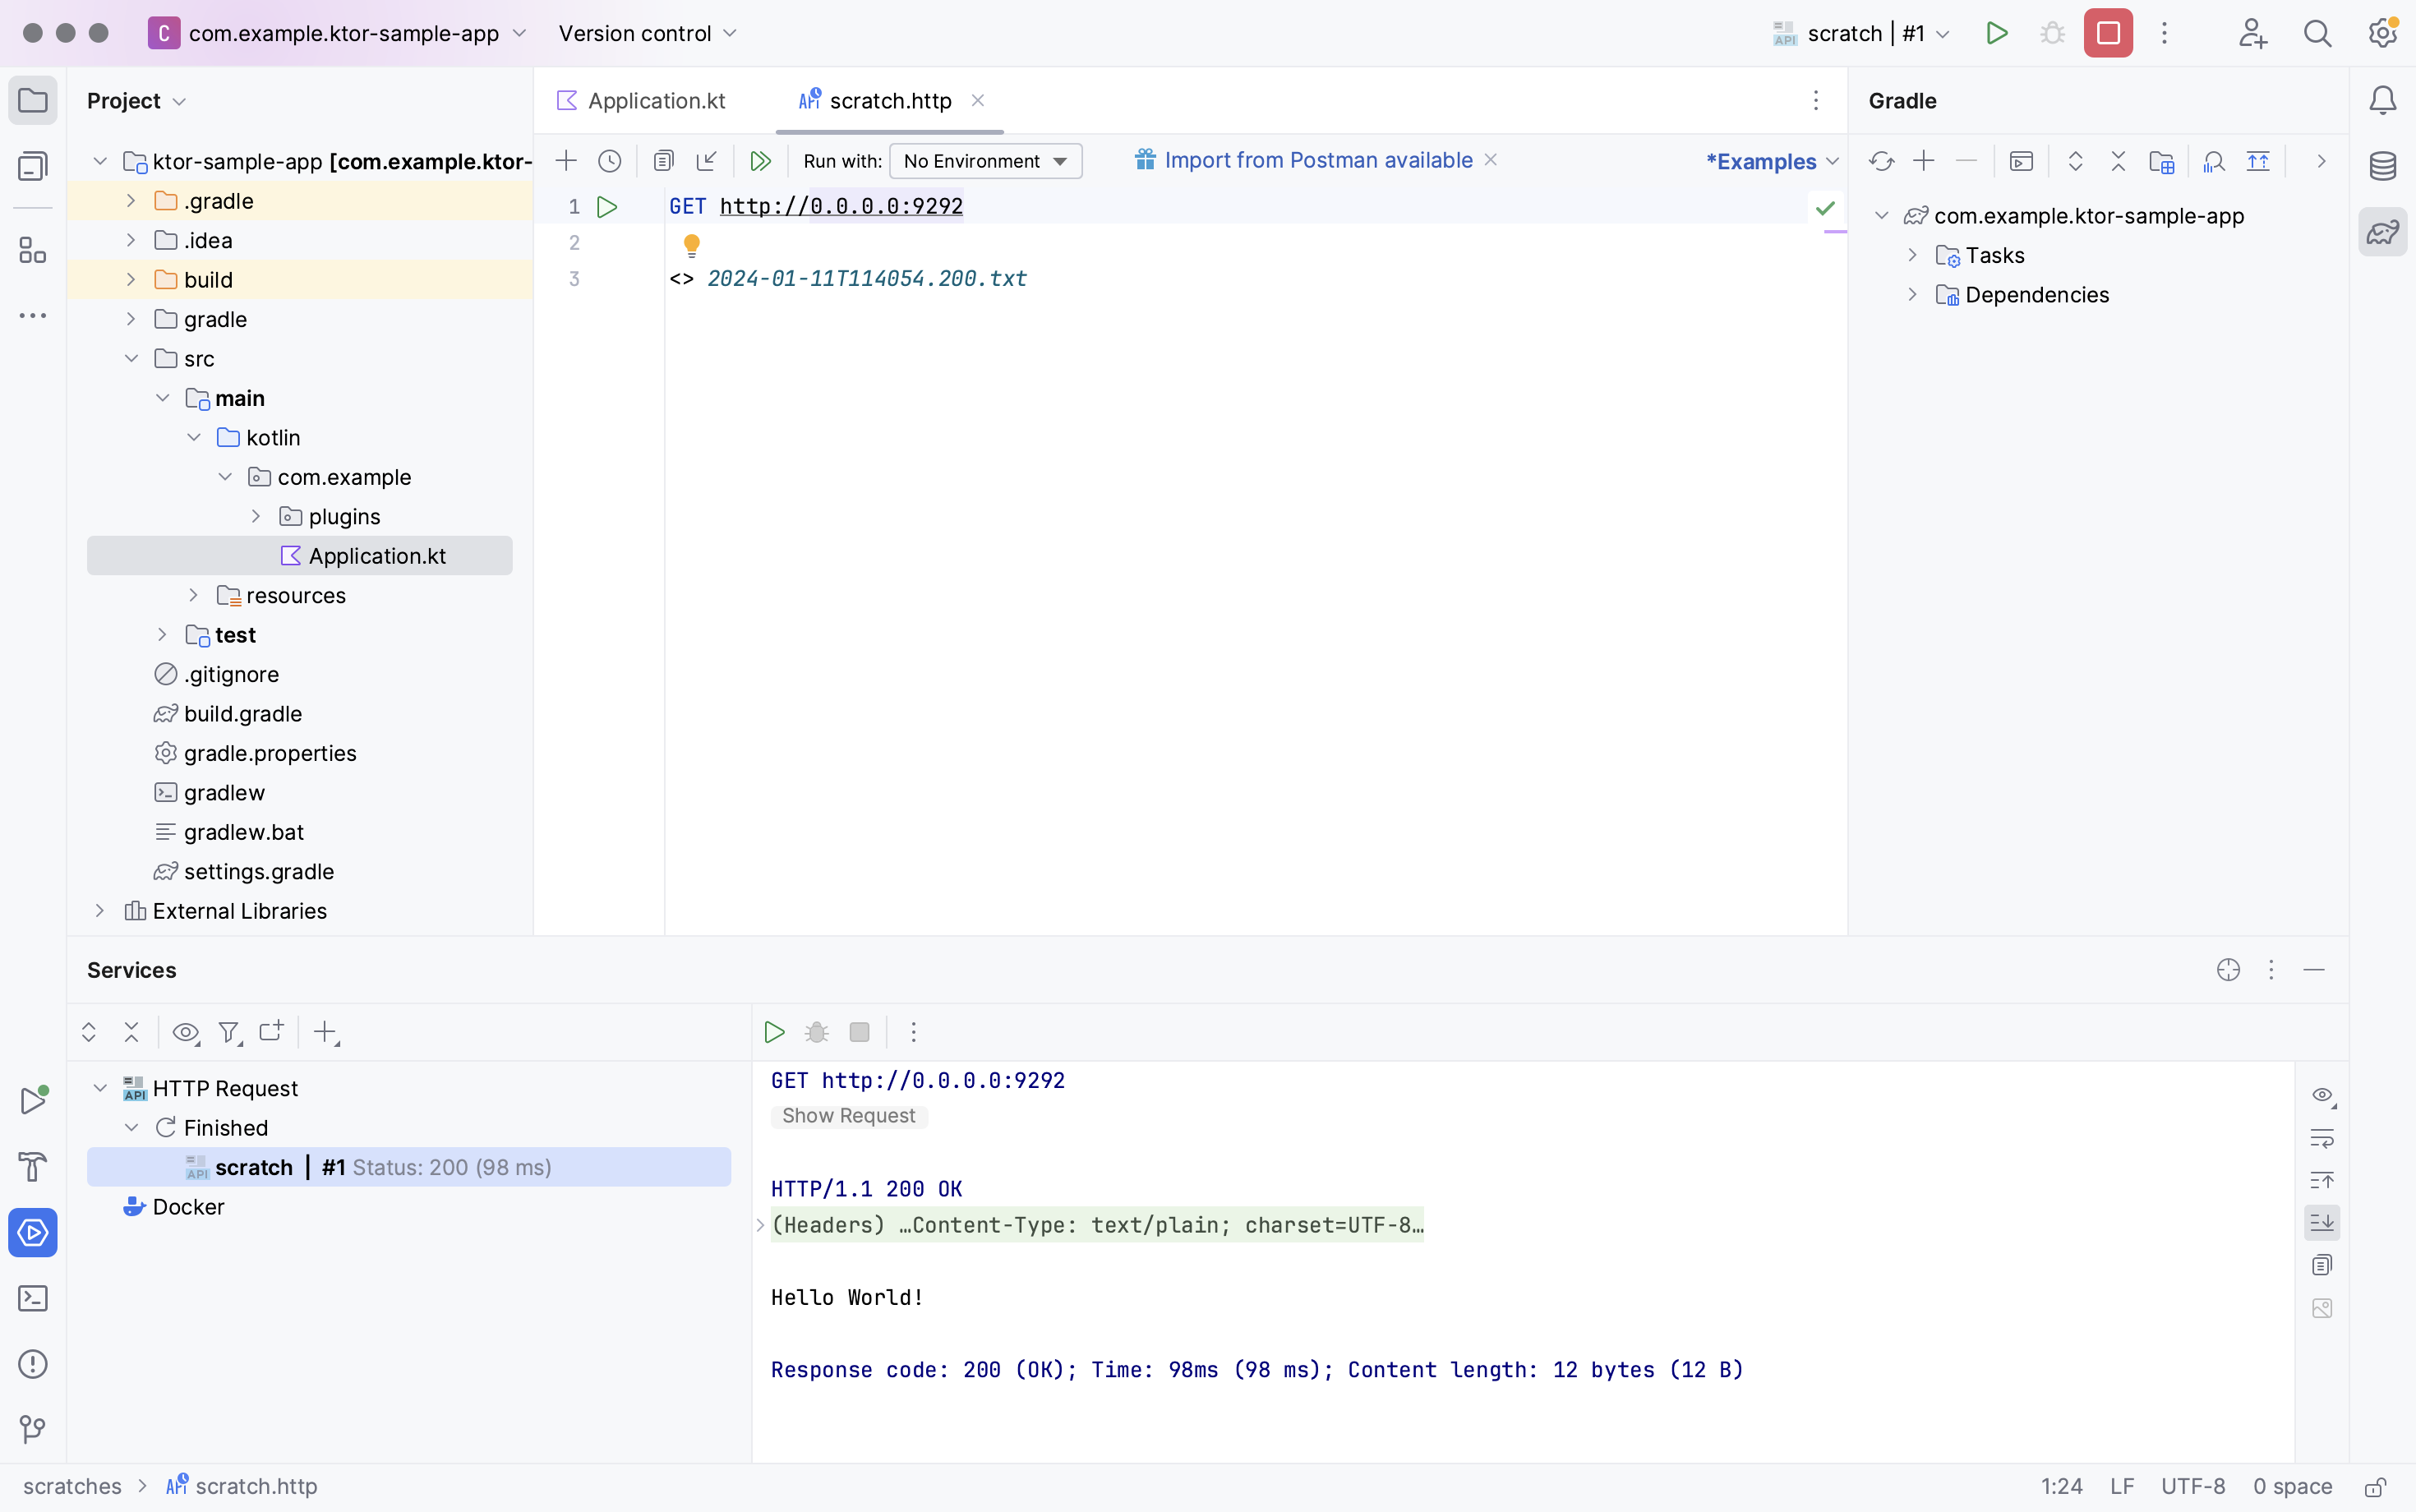
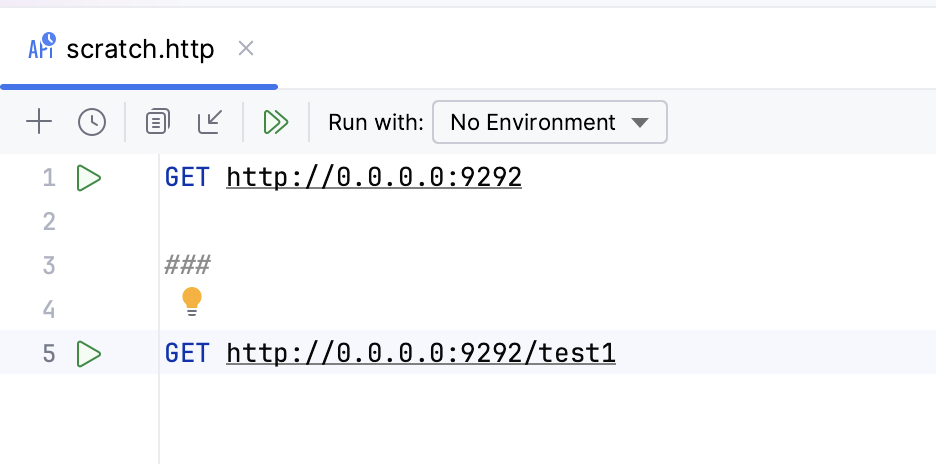
To verify that your application is running under the new port number, you can open your browser at the new URL (http://0.0.0.0:9292) or create a new HTTP Request file in IntelliJ IDEA:
Change the port in code
When creating a new Ktor project, you have the option to store configuration in code or externally, within a YAML or a HOCON file.
If you have chosen the option to store configuration in code, in the view navigate to the src/main/kotlin folder and follow the steps:
Open the Application.kt file. You should find code similar to the following:
fun main() { embeddedServer( Netty, port = 8080, // This is the port to which Ktor is listening host = "0.0.0.0", module = Application::module ).start(wait = true) } fun Application.module() { configureRouting() }In the
embeddedServer()function, change theportparameter to another number of your choosing, such as9292.fun main() { embeddedServer( Netty, port = 9292, host = "0.0.0.0", module = Application::module ).start(wait = true) }Click on the rerun button (
) to restart the application.
To verify that your application is running under the new port number, you can open your browser at the new URL (http://0.0.0.0:9292), or create a new HTTP Request file in IntelliJ IDEA:

Add a new HTTP endpoint
In the tool window, navigate to the src/main/kotlin folder and follow the steps:
Open the Application.kt file and find the
.configureRouting()function.In IntelliJ IDEA, hold Ctrl (Windows/Linux) or ⌘Cmd (macOS) and click
.configureRouting()to navigate to its definition.Alternatively, you can navigate to the function definition by opening the Routing.kt file.
This is the code you should see:
fun Application.configureRouting() { routing { get("/") { call.respondText("Hello World!") } } }To create a new endpoint, insert the additional route as shown below:
fun Application.configureRouting() { routing { // ... get("/test1") { val text = "<h1>Hello From Ktor</h1>" val type = ContentType.parse("text/html") call.respondText(text, type) } } }The IDE automatically adds the import for
ContentType:import io.ktor.http.ContentTypeClick on the rerun button (
) to restart the application.
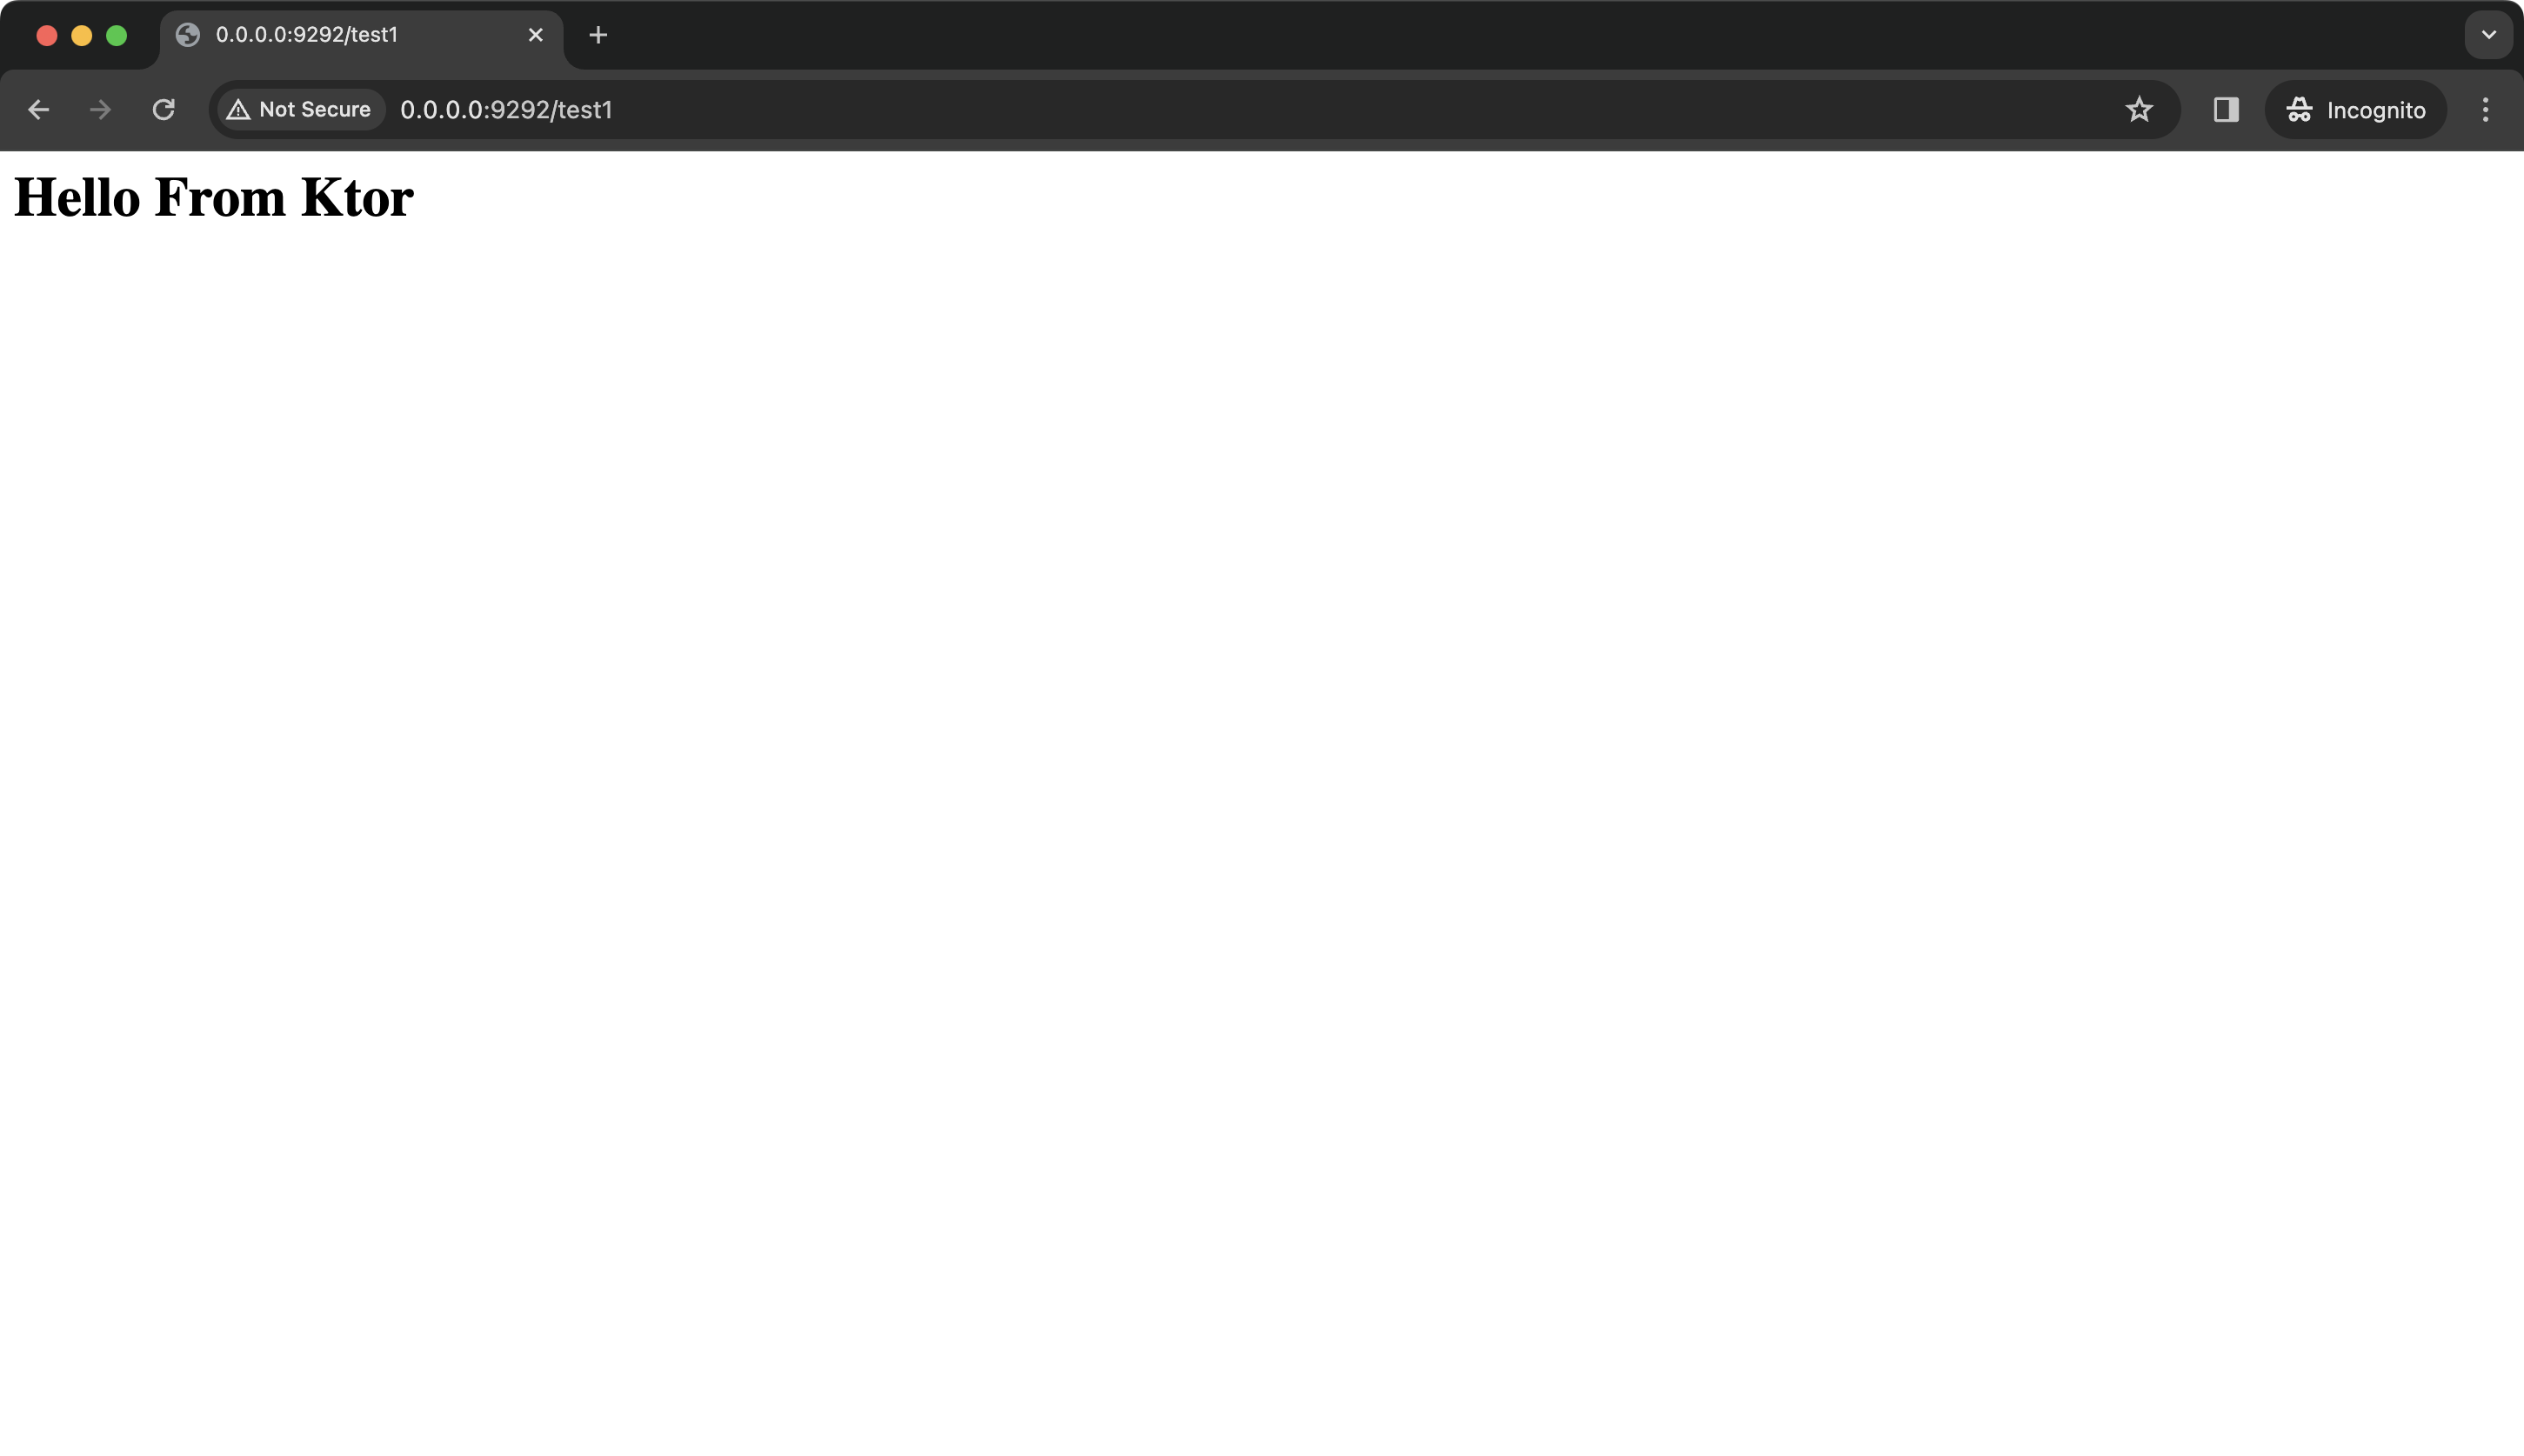
Request the new URL in the browser (http://0.0.0.0:9292/test1). The port number depends on whether you completed the Change the default port task. You should see the output displayed below:
If you have created an HTTP request file, you can also verify the new endpoint there:
Configure static content
In the tool window, navigate to the src/main/kotlin folder and follow the steps:
Open the Routing.kt file and add the following route to the routing section:
fun Application.configureRouting() { routing { staticResources("/content", "mycontent") // ... } }The meaning of this line is as follows:
Invoking
staticResources()enables your application to provide standard website content, such as HTML and JavaScript files. Although this content can be executed within the browser, it is considered static from the server's point of view.The URL
/contentspecifies the path used to fetch this content.The path
mycontentis the name of the folder within which the static content will live. Ktor will look for this folder within theresourcesdirectory.
Add the following import if the IDE doesn’t add it automatically.
import io.ktor.server.http.content.staticResourcesIn the Project tool window, right-click the src/main/resources folder and select New | Directory.
Alternatively, select the src/main/resources folder, press ⌘Cmd+N (macOS) or Ctrl+N (Windows/Linux) and click Directory.
Name the new directory
mycontentand press ↩Enter.Right-click on the newly created folder and click New | File.
Name the new file sample.html and press ↩Enter.
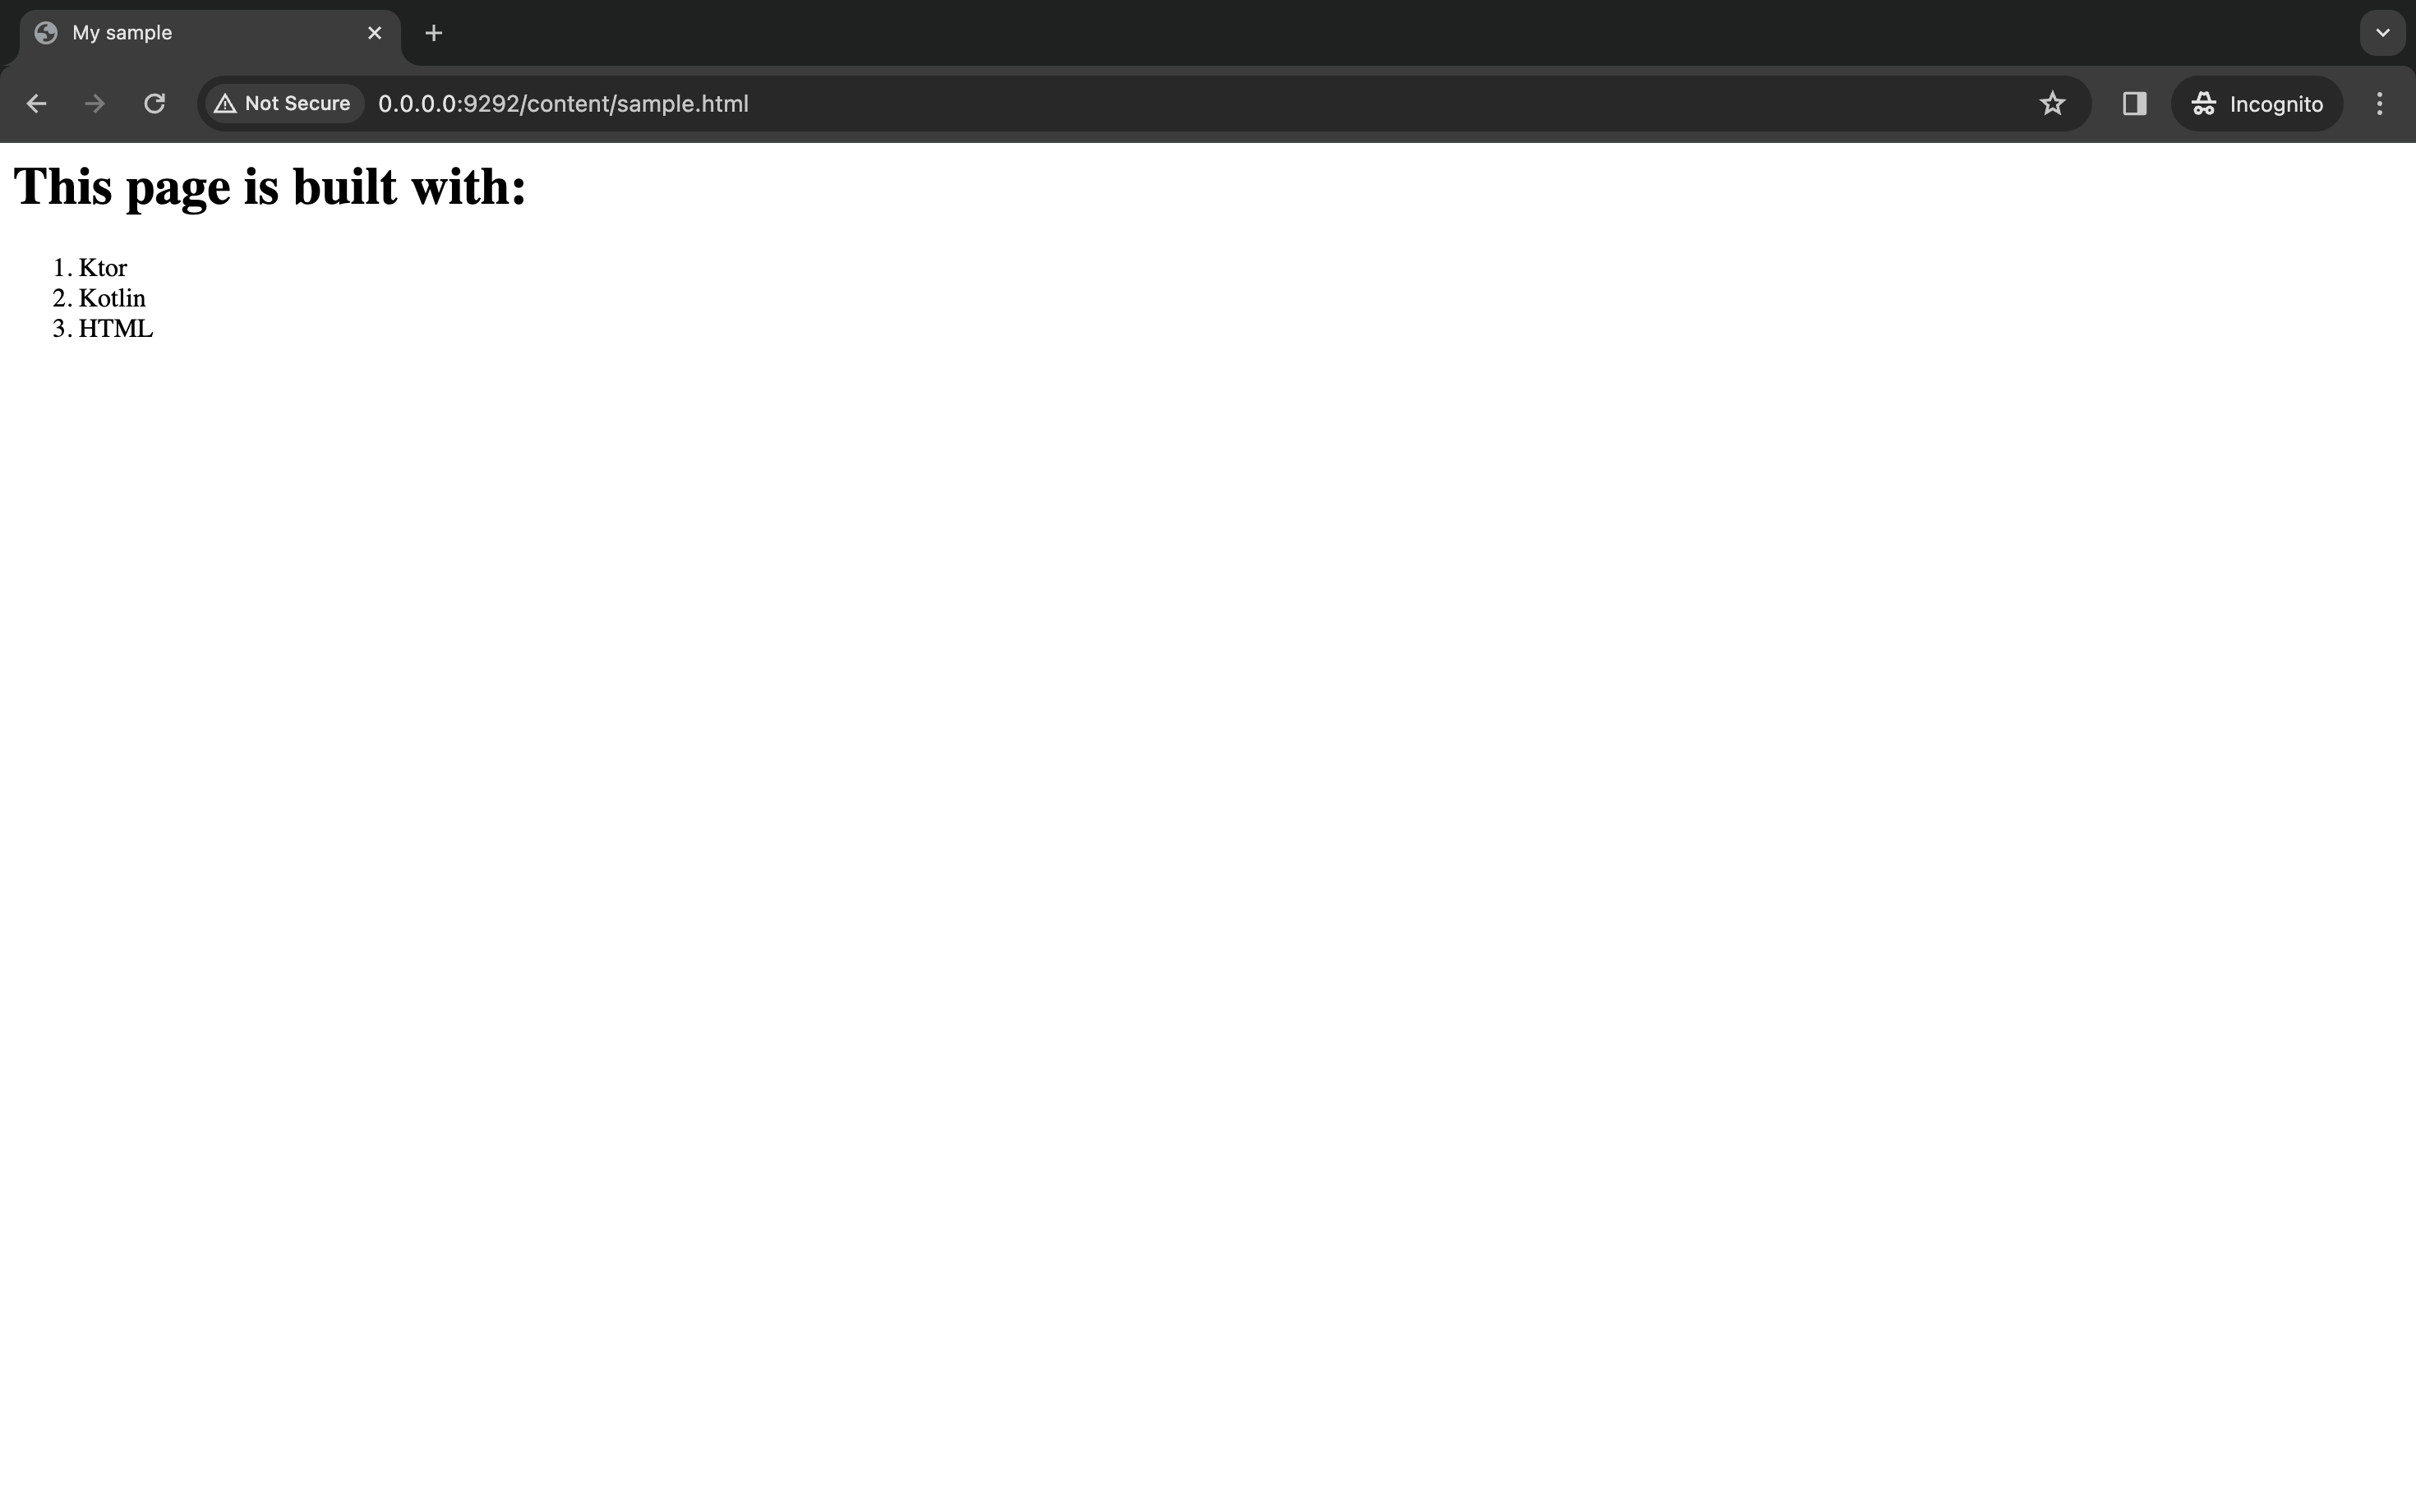
Populate the newly created file page with valid HTML, for example:
<html lang="en"> <head> <meta charset="UTF-8" /> <title>My sample</title> </head> <body> <h1>This page is built with:</h1> <ol> <li>Ktor</li> <li>Kotlin</li> <li>HTML</li> </ol> </body> </html>Click on the rerun button (
) to restart the application.
When you open your browser at http://0.0.0.0:9292/content/sample.html the content of your sample page should be displayed:
Write an integration test
Ktor provides support for creating integration tests, and your generated project comes bundled with this functionality.
To make use of this, follow the steps below:
Create a new subdirectory under src called test/kotlin.
Within src/test/kotlin create a new ApplicationTest.kt file.
Open the ApplicationTest.kt file and add the code below:
class ApplicationTest { @Test fun testRoot() = testApplication { application { module() } val response = client.get("/") assertEquals(HttpStatusCode.OK, response.status) assertEquals("Hello World!", response.bodyAsText()) } }The
testApplication()method creates a new instance of Ktor. This instance is running inside a test environment, as opposed to a server such as Netty.You can then use the
application()method to invoke the same setup that is called fromembeddedServer().Finally, you can use the built-in
clientobject and JUnit assertions to send a sample request and check the response.Add the following required imports:
import io.ktor.client.request.get import io.ktor.client.statement.bodyAsText import io.ktor.http.HttpStatusCode import io.ktor.server.testing.testApplication import kotlin.test.Test import kotlin.test.assertEquals
You can run the test in any of the standard ways for executing tests in IntelliJ IDEA. Note that, because you are running a new instance of Ktor, the success or failure of the test does not depend on whether your application is running at 0.0.0.0
If you have successfully completed adding a new HTTP endpoint, add this additional test:
Add the following additional imports:
Register error handlers
You can handle errors in your Ktor application using the StatusPages plugin.
In the next steps you will learn how to add and configure the plugin manually. There are four steps to achieving this:
Add a new dependency
In the Project tool window, navigate to the project root folder and follow the steps:
Open the gradle/libs.versions.toml file and add the following new library:
[libraries] #... ktor-server-status-pages = { module = "io.ktor:ktor-server-status-pages", version.ref = "ktor" }Open the build.gradle.kts file and add the new dependency as shown below:
dependencies { // Added new dependency implementation(libs.ktor.server.status.pages) // Existing dependencies implementation(libs.ktor.server.core) implementation(libs.ktor.server.netty) implementation(libs.logback.classic) implementation(libs.ktor.server.config.yaml) testImplementation(libs.ktor.server.test.host) testImplementation(libs.kotlin.test.junit) }Reload the project by pressing Shift+⌘Cmd+I (macOS) or Ctrl+Shift+O (Windows/Linux).
Install the plugin and specify an exception handler
Navigate to the
.configureRouting()method in Routing.kt and add the following lines of code:fun Application.configureRouting() { install(StatusPages) { exception<IllegalStateException> { call, cause -> call.respondText("App in illegal state as ${cause.message}") } } routing { // ... } }These lines install the
StatusPagesplugin and specify what actions to take when an exception of typeIllegalStateExceptionis thrown.Add the following import:
import io.ktor.server.plugins.statuspages.StatusPages
Note that an HTTP error code would usually be set in the response, but for the purpose of this task, the output is displayed directly in the browser.
Write sample code to trigger the handler
Staying within the
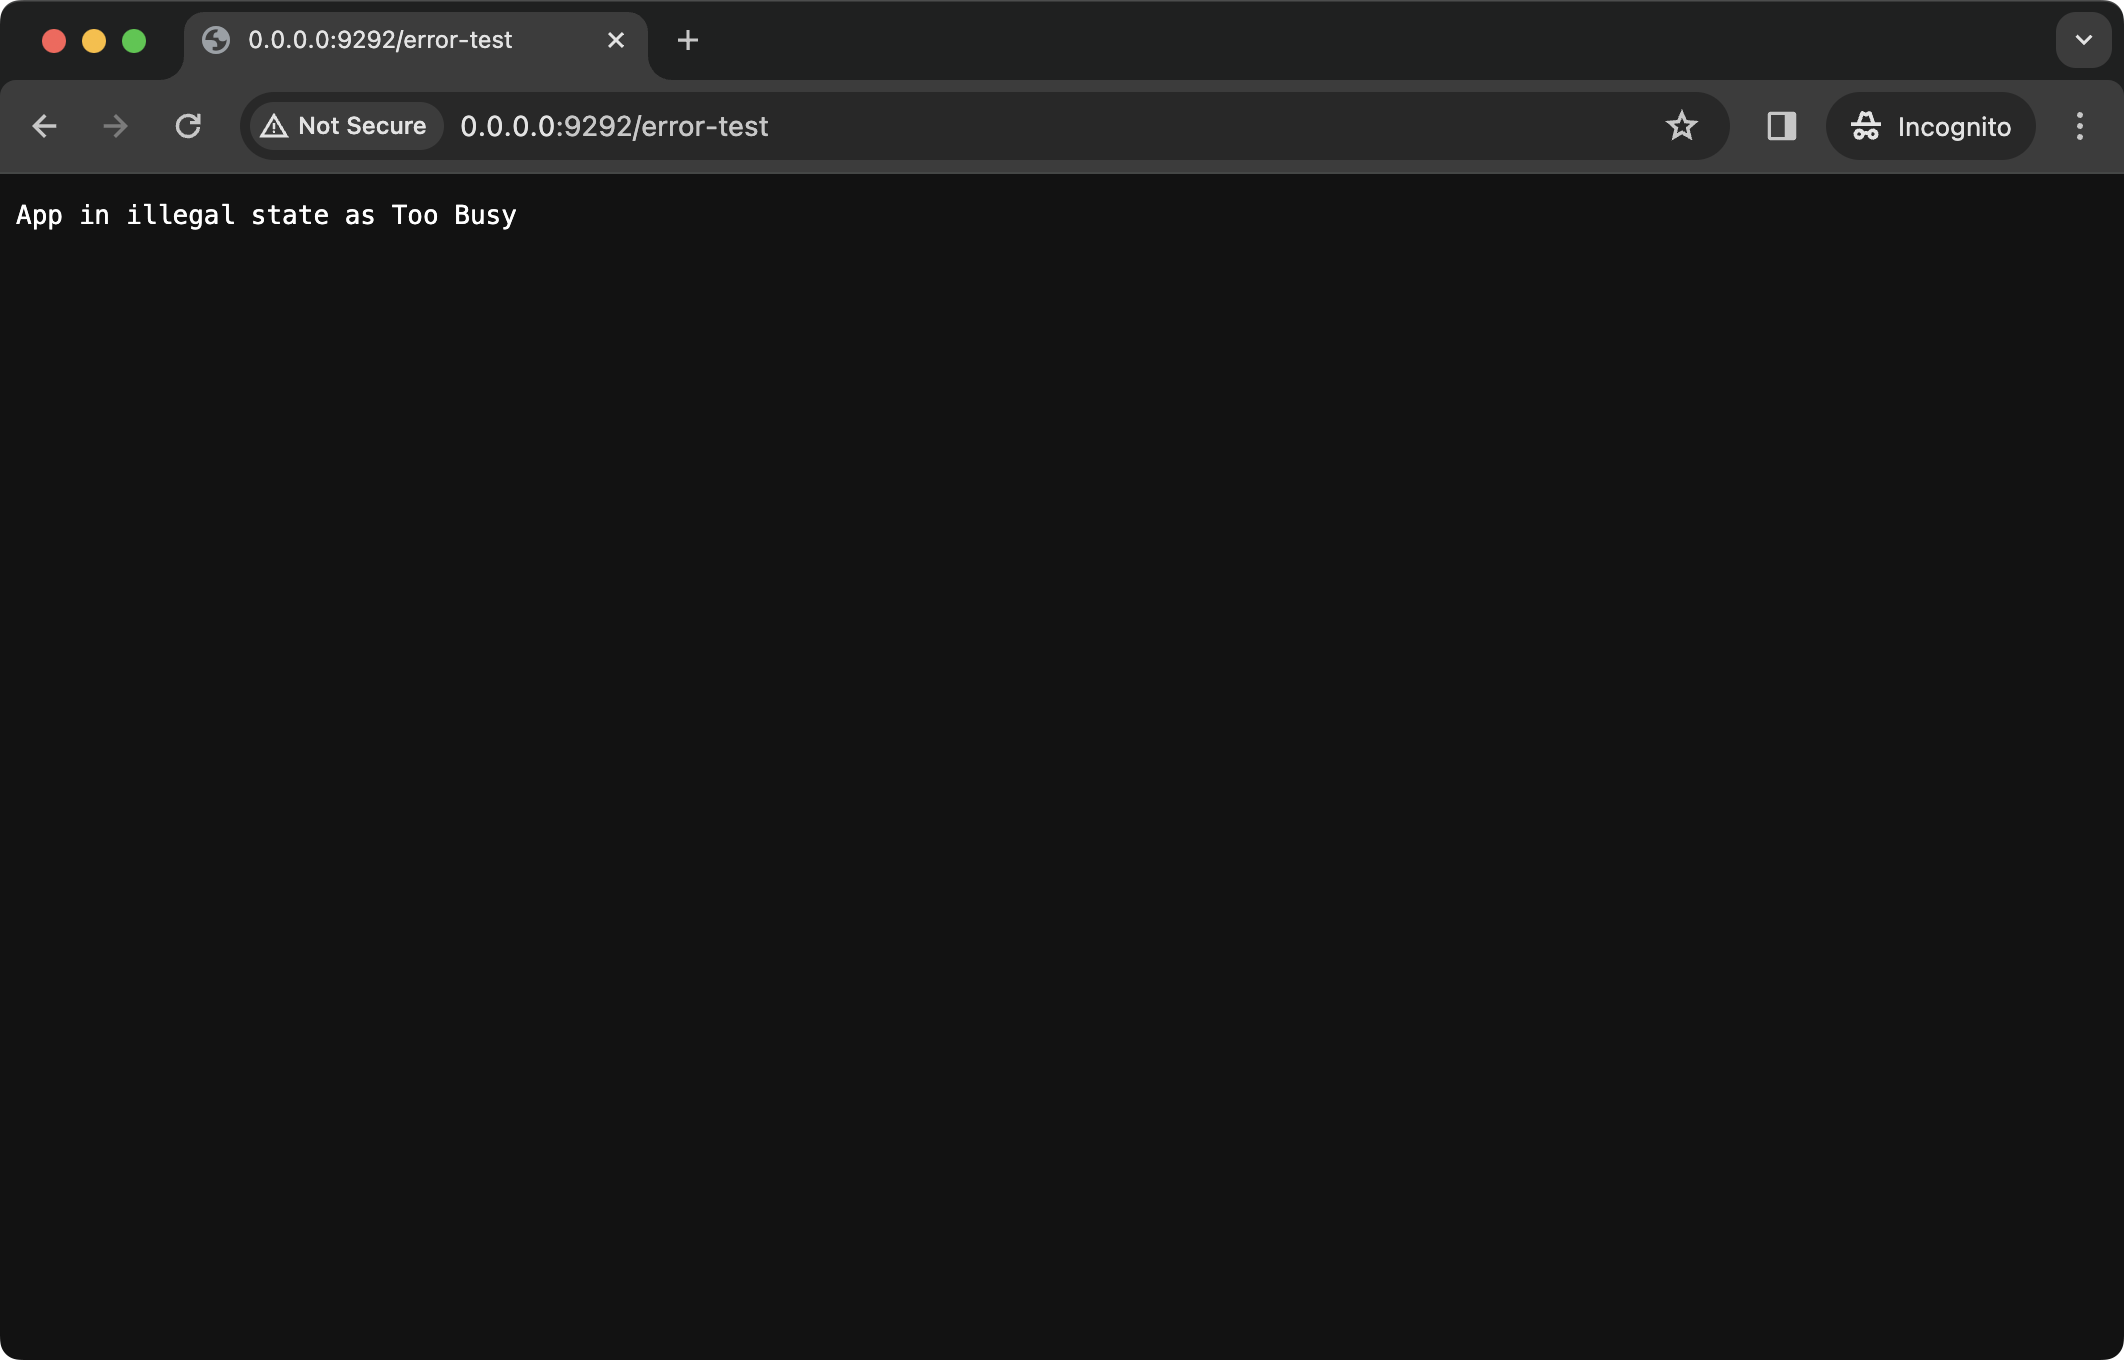
configureRouting()method, add the additional route as shown below:fun Application.configureRouting() { install(StatusPages) { exception<IllegalStateException> { call, cause -> call.respondText("App in illegal state as ${cause.message}") } } routing { // ... get("/error-test") { throw IllegalStateException("Too Busy") } } }You have now added an endpoint with the URL
/error-test. When this endpoint is triggered, an exception is thrown with the type used in the handler.
Restart and invoke the sample code
Click on the rerun button (
) to restart the application.
In your browser, navigate to the URL http://0.0.0.0:9292/error-test. You should see the error message displayed as shown below:
Next steps
If you've made it to the end of the additional tasks, you now have a grasp of configuring the Ktor server, integrating a Ktor plugin, and implementing a new route. However, this is just the beginning. To delve deeper into the foundational concepts of Ktor, continue to the next tutorial in this guide.
Next up, you will learn how to handle requests and generate responses by creating a Task Manager application.